Add Organization
As an administrator, you can easily add and delete an organization in Wyn Enterprise. There is no limit to the number of organizations and sub-organizations you can add. Each level of organization has its own set of permissions. You can further assign specific roles and users to the newly added organizations and sub-organizations.
Create an Organization
Wyn Enterprise offers you an in-built Global organization. You can also create a new organization(s) from the Admin Portal by following the below steps.
On the Admin Portal, navigate to Account > Organizations.
Click + next to Global to add a new organization.
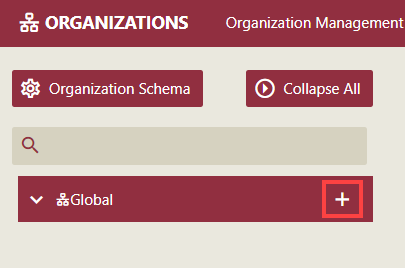
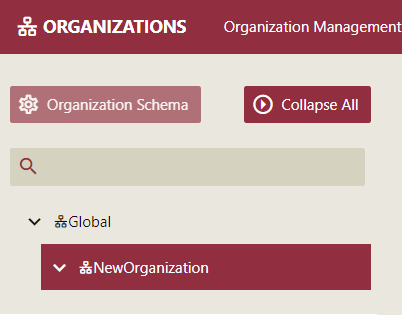
NewOrganization is added to the organization list.
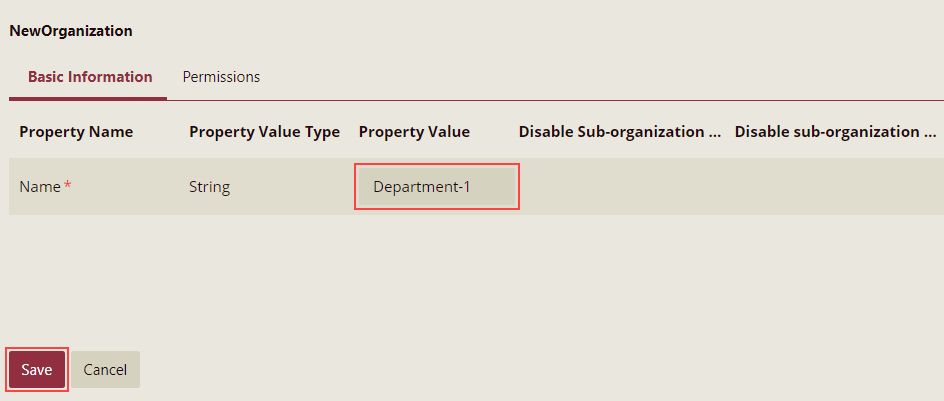
In the Basic Information tab, enter the name of the new organization and then click the Save button.
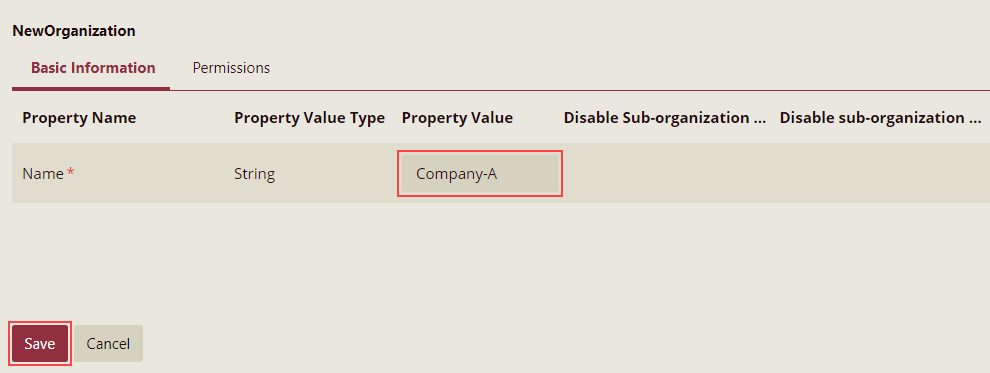
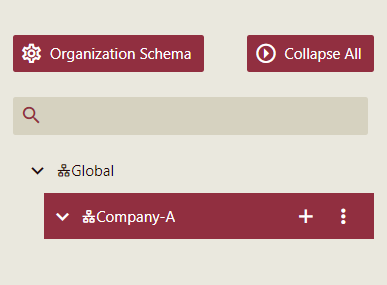
The name of the new organization is now updated.
To specify permissions for the newly added organization, switch to the Permissions tab and select the desired permissions like create data source, dataset, dashboard, report, and more. You can configure the scope of the permissions for an organization or sub-organization by enabling strict permission management using the Wyn.conf file. See the Enable Strict Permission Management article for more information.
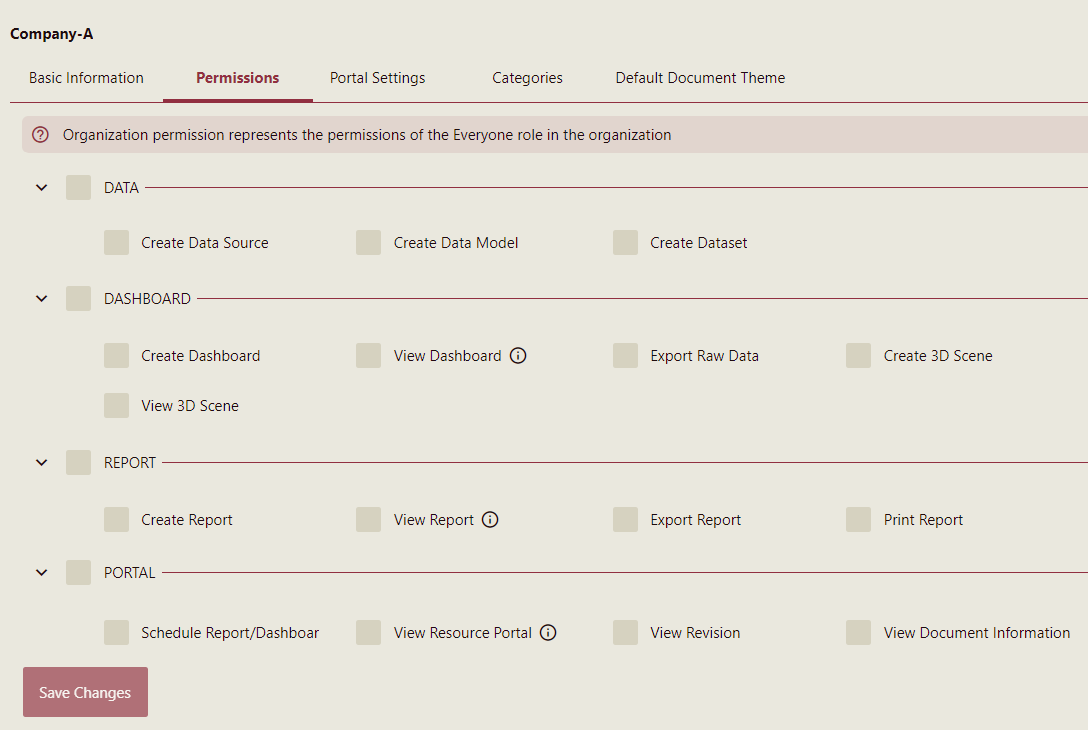
Finally, click the Save button.
Add a Sub-Organization
The following section describes the steps to add a sub-organization in Wyn Enterprise.
On the Admin Portal, navigate to Account > Organizations.
Click + next to the parent organization (for example, 'Company-A').
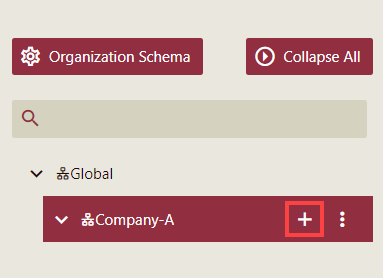
In the Basic Information tab, enter the name for the new sub-organization and then click the Save button.
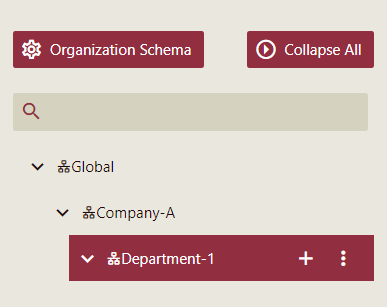
The newly created sub-organization is now displayed under the parent organization.
You can similarly define permissions for the sub-organization as explained in the previous section for an organization. Below are a few points
Delete Organization or Sub-Organization
The following section describes the steps to delete an organization in Wyn Enterprise. When you delete an organization, it will delete its sub-organizations as well.
On the Admin Portal, navigate to Account > Organizations.
Select the organization or sub-organization you want to delete. For example, select Company-A.
Click the Actions button next to the organization, and select Delete Organization option.
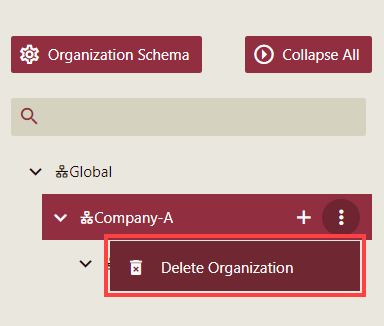
In the Delete Organization popup, click Yes to confirm.

The organization is now deleted along with its sub-organizations. Note that once an organization is deleted, it is gone forever.
Managing UI Settings
The Global administrator can manage the following UI settings for a particular organization and their Sub-organizations: Portal Settings, Categories, and Default Document Theme.
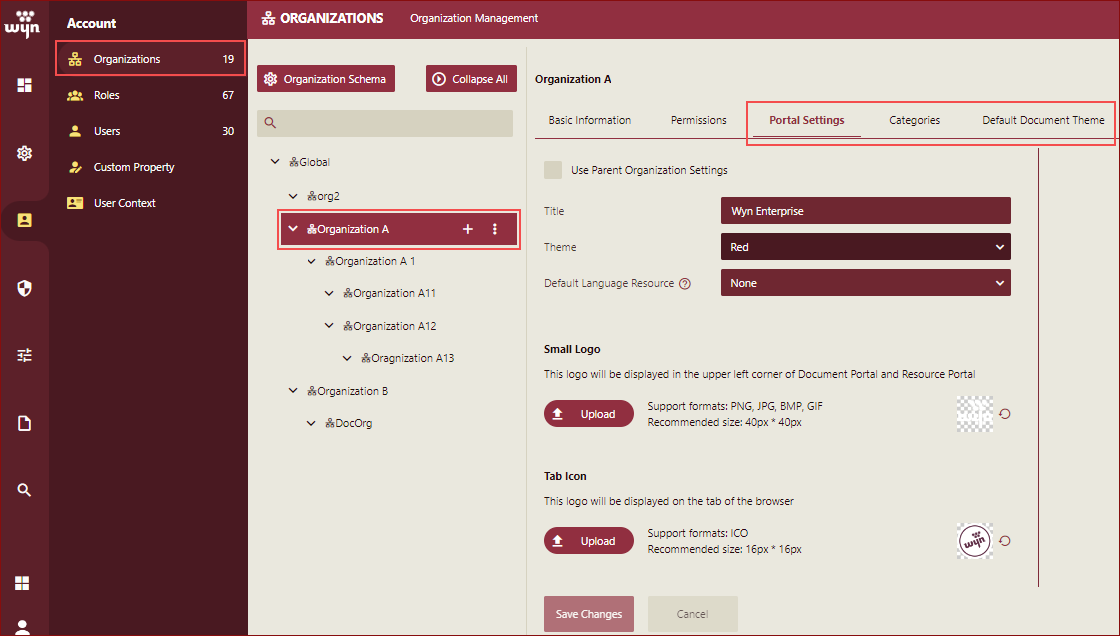
Note: Organization Admins can change these settings according to their requirements.
The following section describes the steps to manage these settings.
On the Admin Portal, navigate to Account-> Organizations.
Select the organization or sub-organization for which you want to manage the settings. In this example, we have selected Organization A.
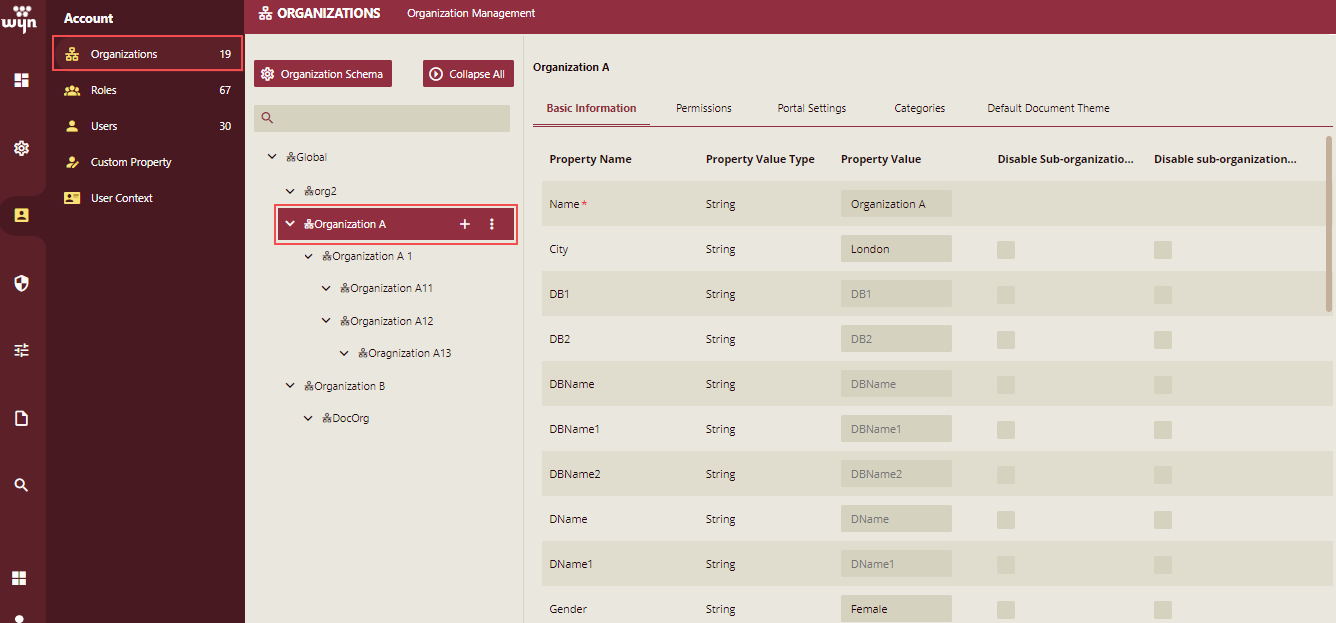
Portal Settings: To manage the Portal Settings, click the Portal Settings tab and enter the following details:
Title: To give a title to your Wyn Enterprise application.
Theme: To set a theme color for the Wyn Enterprise application for organization A.
Default Language Resource: To manage Category name translation to the native language of an organization's users, select a language resource from the dropdown.
Note: Default Language Resource only works on category. The language resource selected here should have a minimum of Read permission for the selected organization users.
Small Logo: To upload an image as a logo that is displayed in the upper left corner of the Document and Resource Portal for the selected organization (Organization A in this example). The supported image formats are PNG, JPG, BMP, and GIF, and the recommended size is 40px X 40px.
Tab Icon: To upload an image as a logo that is displayed on the tab of your browser for the selected organization (Organization A in this example). The supported image format is ICO, and the recommended size is 16px X 16px.
Click the Save Changes button.
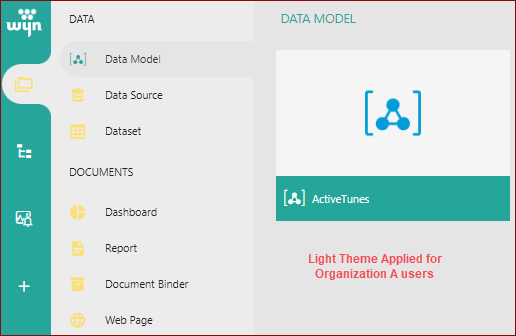
In this example, we have selected the Light theme as shown below.
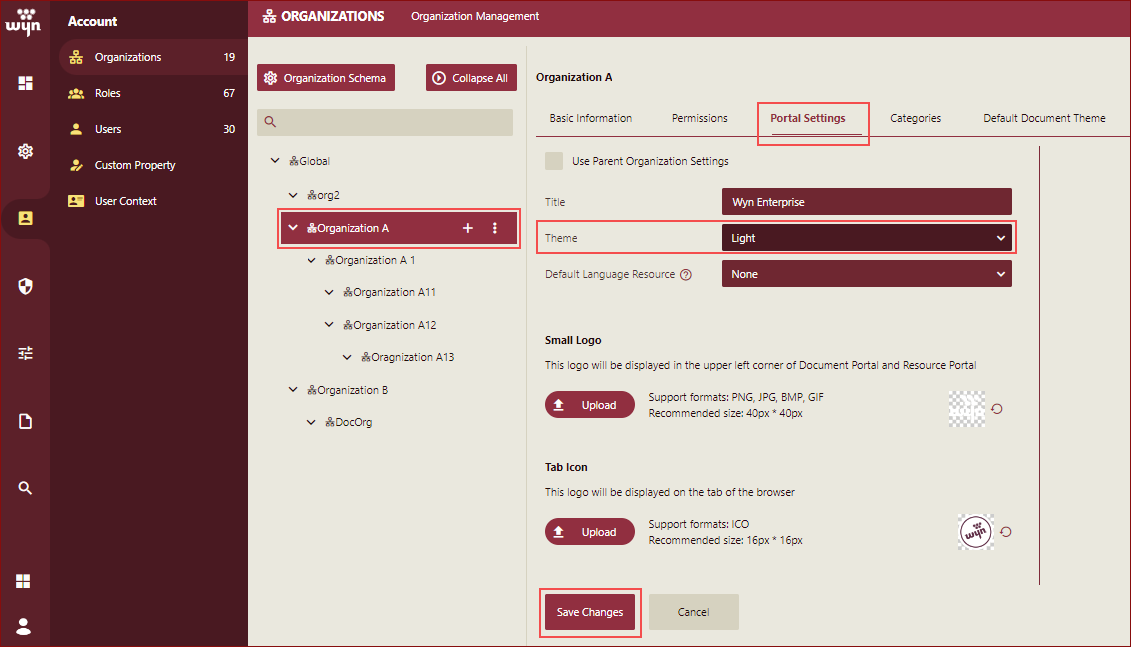
So the Light theme will be applied for Organization A as shown below.
Note: If you want to keep the settings the same as the parent organization, then select the checkbox Use Parent Organization Settings.
Categories: To manage the Categories, click the Categories tab. You can add, edit, or delete the categories.
In this example, we will add a category. Select the organization or sub-organization to which you want to add the categories. In this example, we have selected Organization A.
Click the Add Category button.

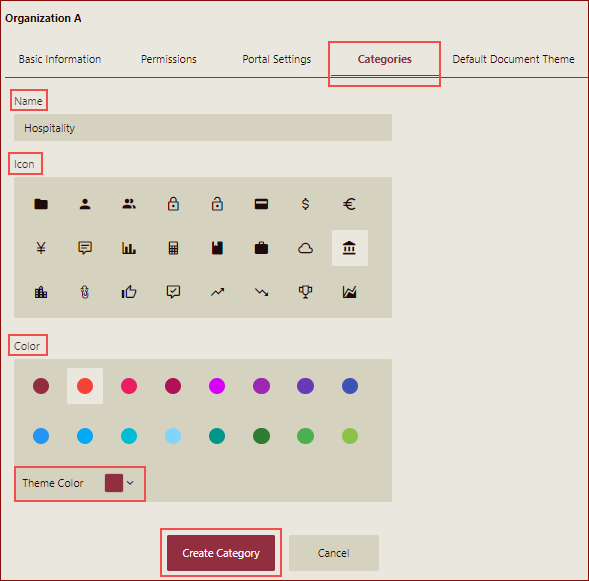
Specify the Name, Icon, and Color for your category. You can also use hexadecimal or RGBA values to represent the category color by using the Theme Color option. Click the Create Category button.
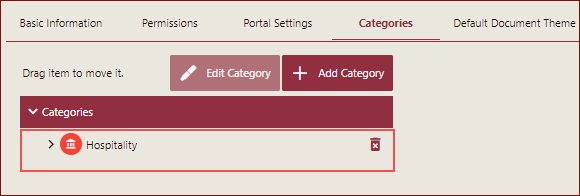
In this example, we have added the Category named Hospitality and selected an Icon and Color as shown below in the image.
The category will be added.
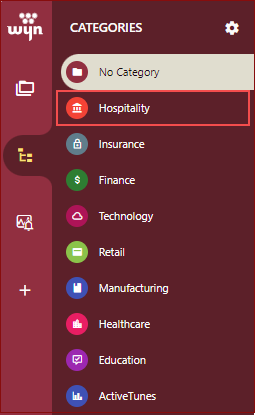
This category will be displayed to the users of the organization A.
Default Document Theme: To manage the default document theme for an organization, click the Default Document Theme tab. Select the organization or sub-organization for which you want to manage the default document theme. In this example, we have selected Organization A and selected the Cheerful theme.
Click the Save Changes button.
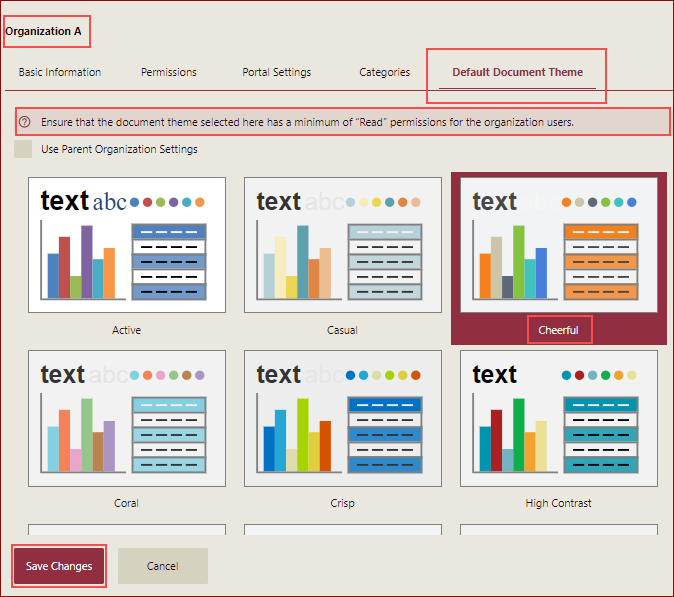
The document theme will be applied to the users of Organization A.
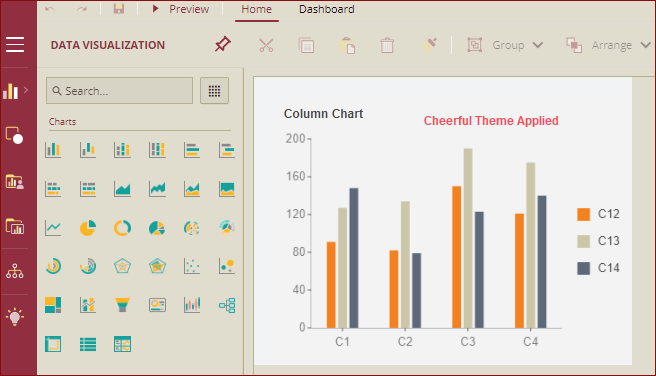
The document theme selected here should have a minimum of Read permissions for that organization.
Note: If you want to keep the same theme as the parent organization, then select the checkbox Use Parent Organization Settings.


