- Getting Started
- Administration Guide
-
User Guide
- An Introduction to Wyn Enterprise
- Document Portal for End Users
- Data Governance and Modeling
- Working with Resources
- Working with Reports
- Working with Dashboards
- View and Manage Documents
- Understanding Wyn Analytical Expressions
- Section 508 Compliance
- Subscribe to RSS Feed for Wyn Builds Site
- Developer Guide
Formatted Text
The Formatted Text control can perform mail merge operations, and it displays richly formatted text in HTML. You can format the Formatted Text report control by entering HTML code into the Html property. You can freely expand the content of the report through HTML coding.
Using Formatted Text Control in Report Designer
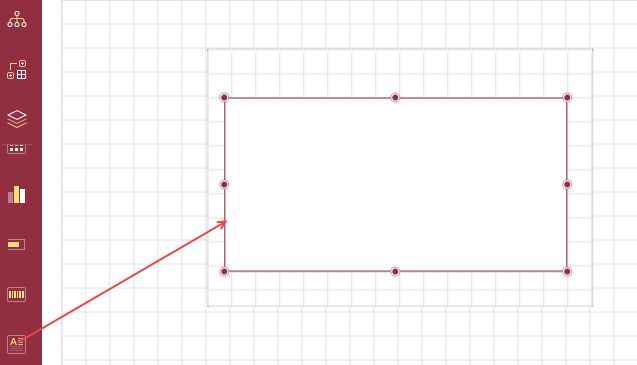
Follow the steps below to add a Formatted Text control:
From the Report Toolbox on the left, drag and drop the Formatted Text control onto the design area or left-click the control.
You can also add it to the List control.
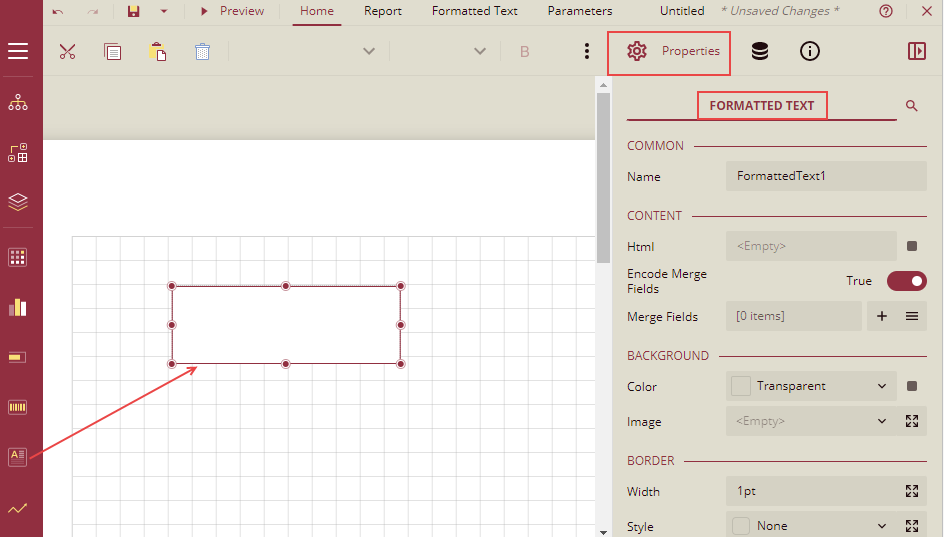
Select the control, then click the Properties tab to display a list of related properties.

Properties Tab
You can customize the appearance and behavior of the Formatted Text control using the Properties tab.
Property Section | Property Description |
|---|---|
Common | - Name: Sets the name of the control. |
Content | - Html: Enter HTML code. All content must be enclosed in - Encode Merge Fields: Set to - Merge Fields: Add mail merge fields with the + button and delete with X. Each field includes: • Field Name: Used inside • Value: Expression to pull data (use Pick Data to select).
|
Background | - Color: Choose background color. - Image: Choose from Shared, Embedded, or Database sources. Click the Expand icon to configure: • Source • Value • MIME Type • Repeat, NoRepeat, RepeatX, or RepeatY
|
Border | - Width, Style, and Color of all sides can be set individually via the Expand icon. |
Dimensions | - Left, Top, Width, Height |
Layout | - Style: Theme - Layer Name: Report layer - Z-Index: Layer stacking order |
Visibility | - Hidden: - Toggle Item: Another control can toggle visibility |
Data | - Element Name: For XML output - Element Output: |
Misc Options | - Tooltip: Mouse hover text - Label: Used in Table of Contents - Bookmark: Identifier for jump navigation |

Using Mail Merge in Formatted Text Control
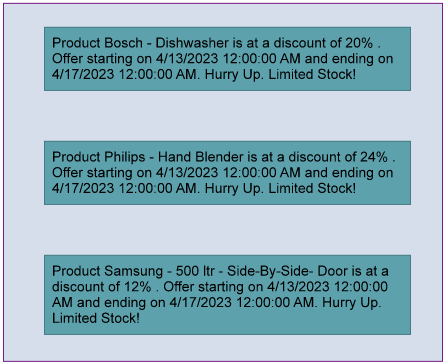
The following example shows how to create a mail merge report using the Formatted Text control to display product data.
Goal: Show Product, Discount, Start Date, and End Date for each unique product.
Steps:
Drag and drop a List control onto the design area and bind it to a dataset.
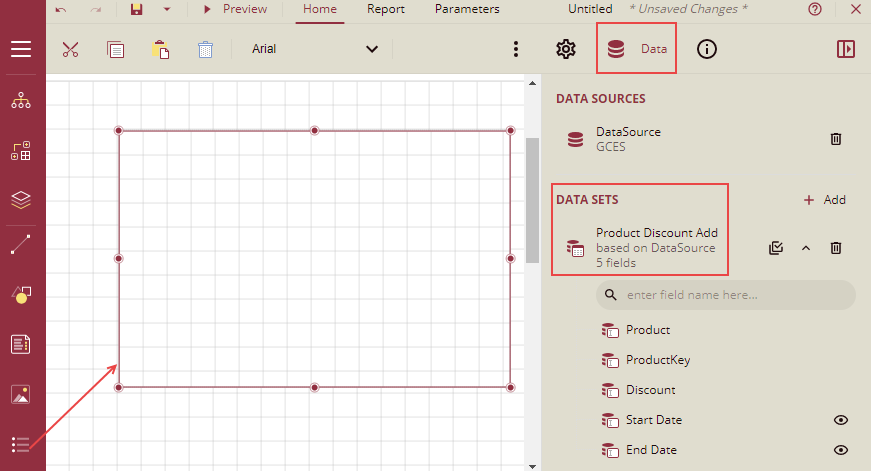
Go to the Properties tab and set the Data Set Name under the Data section.
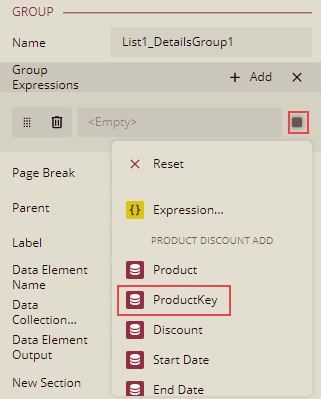
Under the Group section, click the + icon to add Group Expressions.
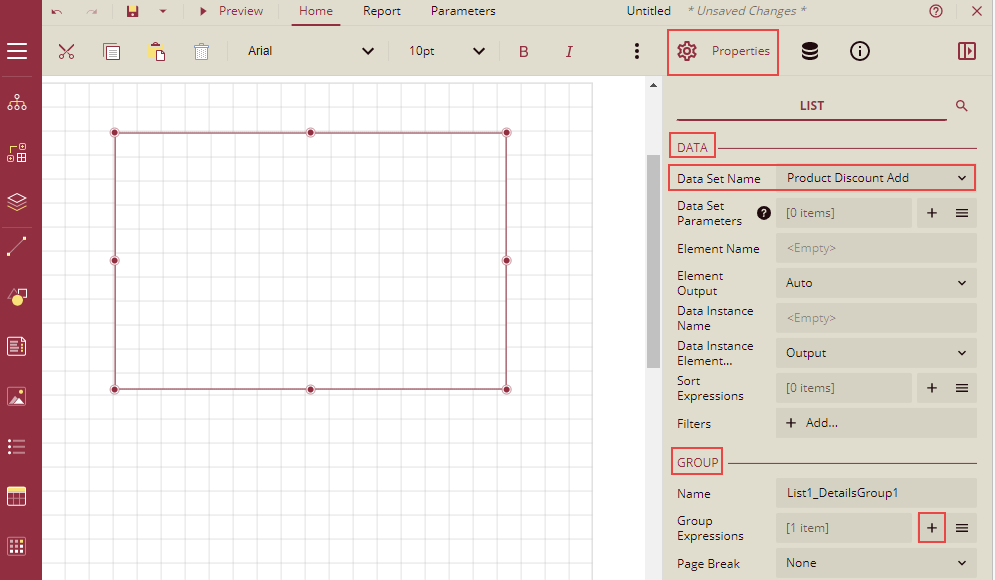
Click Data Binding and select the ProductKey field.
Drag and drop the Formatted Text control into the List data region.
Set Encode Merge Fields to
True.Add the following Merge Fields using the Add Item icon:
Field Name
Value
Field1
= ProductField2
= DiscountField3
= Start DateField4
= End Date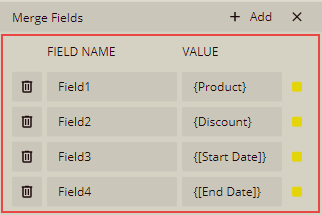
Set the Html property by clicking Data Binding → Expression.
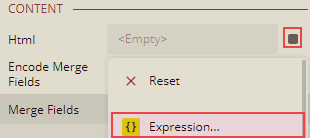
In the Expression Editor, enter this HTML:
<body>
  Product <%Field1 /%> is at a discount of <% Field2 /%>%.
  Offer starting on <% Field3 /%> and ending on <% Field4 /%>.
  Hurry Up. Limited Stock!
</body>
Format the appearance of the report control and preview it.