


Users
A user is an entity whose role(s) is assigned by the admin. Based on the assigned role(s), the user gets permission to perform specific actions.
The admin account is also a user account that has the highest permissions and cannot be deleted. An admin can view and edit the account information of all the users such as email, mobile number, status; add, import, delete users, and modify existing users' credentials, passwords, and roles. An organization administrator can also perform these operations in his organization(s) or sub-organizations(s) only if he has the Manage User permission.
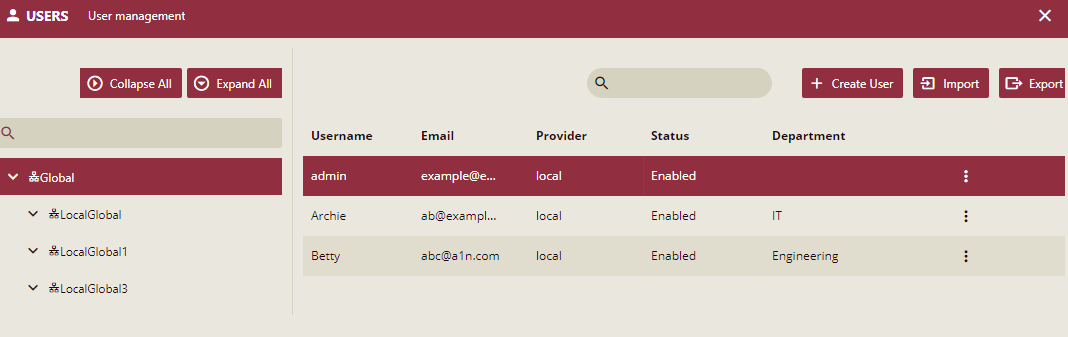
All of this can be managed from the User page in the Account section.
Add a User
Navigate to Account > Users.
Select the organization from the left panel for which you want to add users, and click the Create User button.
In the Create User pane on the right, enter the user details and fill in all the compulsory fields - Username, Email, and Password.
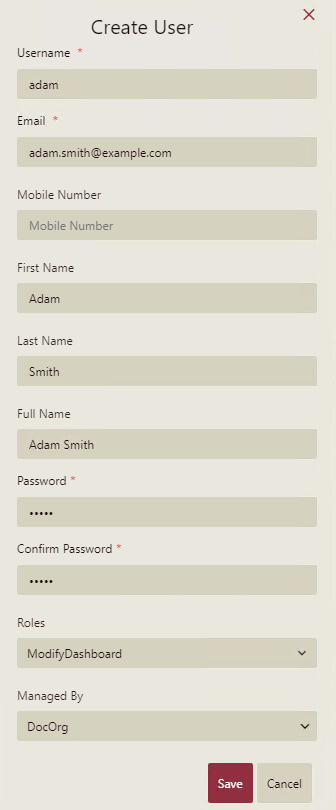
Re-enter the password to confirm it. Select the appropriate Roles and Department for the user from the drop-down lists.
Click Save to save the new user.
Add Multiple Users
To add multiple users, the following information of each user needs to be entered in an excel file, which later needs to be imported into the Wyn Enterprise portal.
Data Fields | Remarks |
|---|---|
Id | the unique identification for user can be empty if the provider is 'local' |
UserName | the unique user name, cannot be empty |
FirstName | the first name of user |
LastName | the last name of user |
FullName | the full name of user |
the unique email address of the user, cannot be empty | |
Mobile | the unique mobile number of users |
Password | the password of the user, must contain both letter and number, the length should be between 8 and 32, cannot be empty if the provider is 'local' |
Provider | the provider of the user, the default value is 'local', can be empty |
Roles | the roles of user, the roles must be defined before, can be separated by comma ',' |
Enabled | the enable state of the user, can be true or false, the default value is true |
Follow these steps to import the user(s) information:
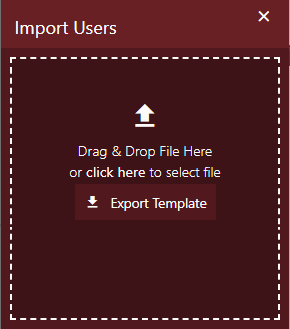
Click the Import button.
Note that you can import users only for the Global organization.
In the Import Users pane on the left, drag and drop or select the excel file that contains users' information.
A message of successful or unsuccessful import appears. In case of successful import, you will be able to see the added users on the User page. In case of failure, it might be possible that:
A required user data field (User name, Email, or Password) is not specified.
The email data field is not in a valid email format.
The user is already registered with the same name or email address.
The Export Template button lets you download the users' information in an excel file.
Modify a User
Navigate to Account > Users.
Select the user from the right panel and from the vertical ellipses
 next to the user you want to modify, click Edit, Enable or Disable a user, or Delete the user from the database.
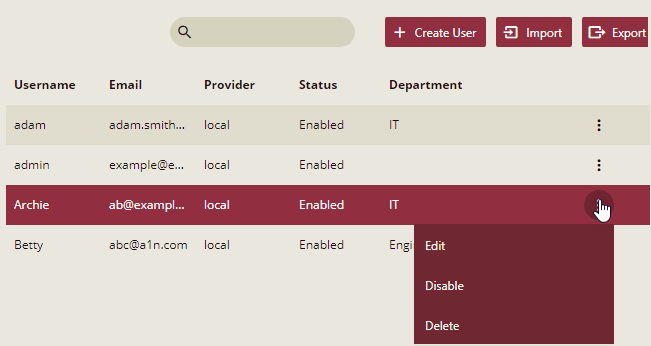
Select Edit to edit the user details.
Click Save.