


- Getting Started
- Administration Guide
- User Guide
- Developer Guide
Preview Report
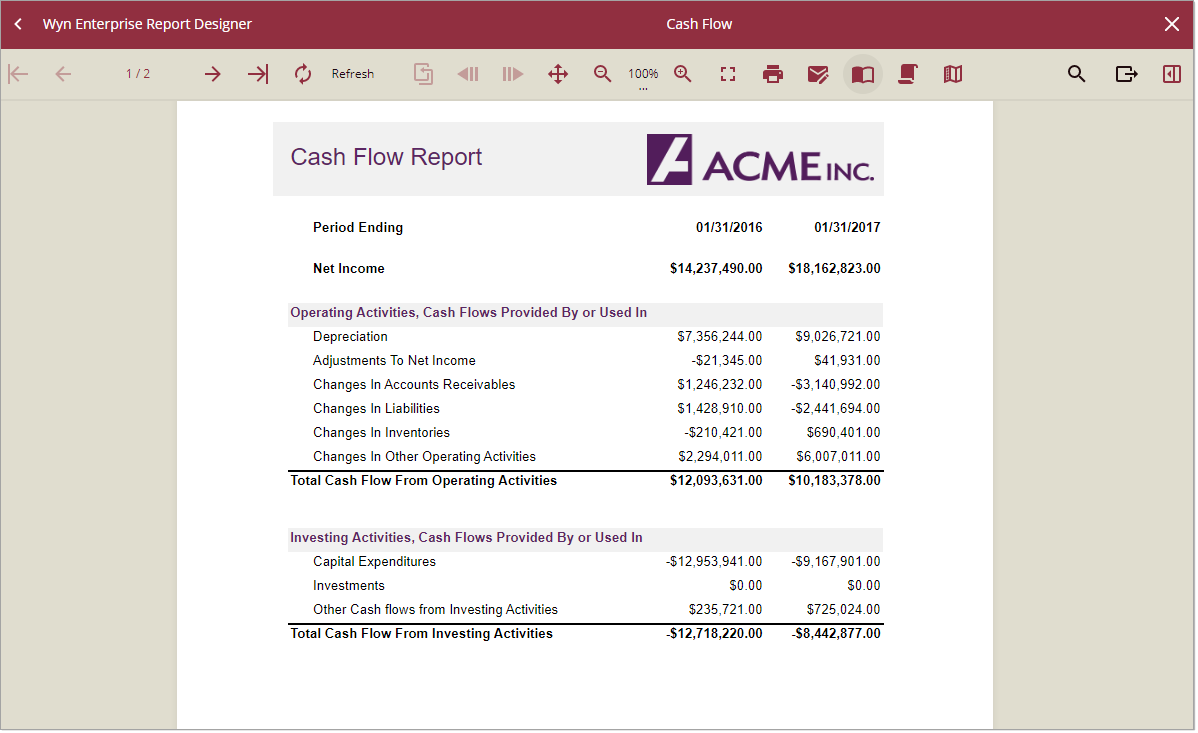
When you create a report in Wyn Enterprise, you must preview it in the Report Viewer to verify the final output of your report. The Report Viewer has numerous built-in features that enable you to print or export a report, zoom in or out of a report, search for any text or numbers in a report, navigate between the report pages, ability to save filters for reports which define the value of parameters, and more. All these features are useful when previewing a report in the Viewer and are briefly explained later in this topic.
To Preview a Report
Following are the different ways to view your report output in Wyn Enterprise.
Method 1
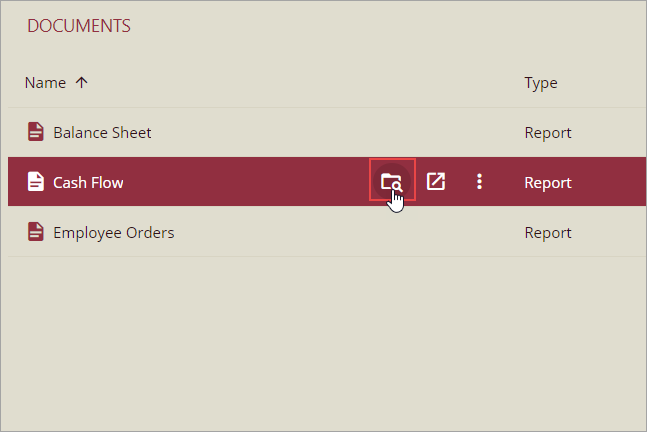
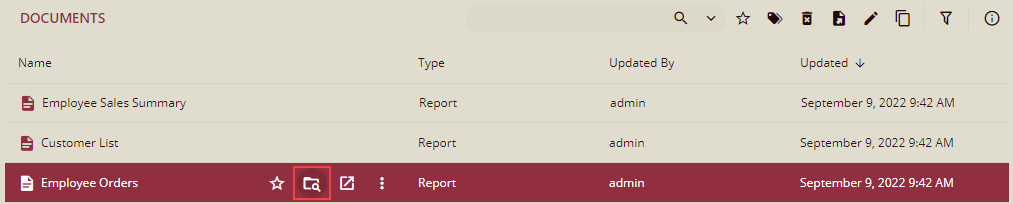
Under the Documents section on the portal, click the Preview button against the report whose output you want to see in the Report Viewer.
If you want to reload the report or preview the report in a new window, use the Reload or Preview Report in New Window button, respectively.
Method 2
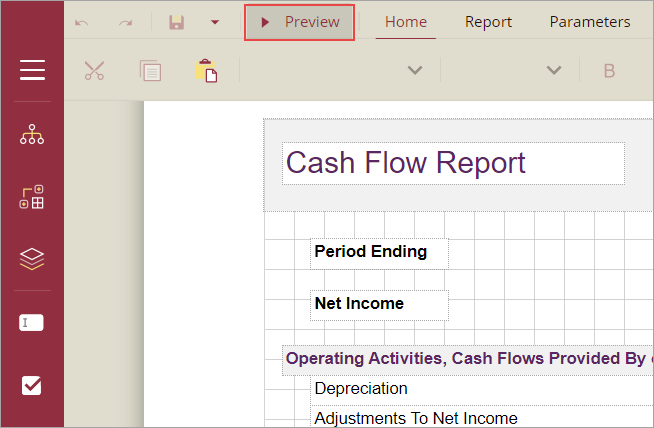
In the Report Designer, click the Preview button to generate the report output in the Viewer.
Saving the Filters
You can save the filters for reports which define the value of the parameters. These filters can be used as quick settings for the parameters when previewing the reports. Instead of defining the parameters every time, you can use these preset filters to match the filters that were used in the preview.
Steps to save/manage the filters
Under the Documents section on the portal, click the Preview button against the report whose output you want to see in the Report Viewer.
Report preview is displayed.
If the report has the parameters, then select the parameters and click Preview.
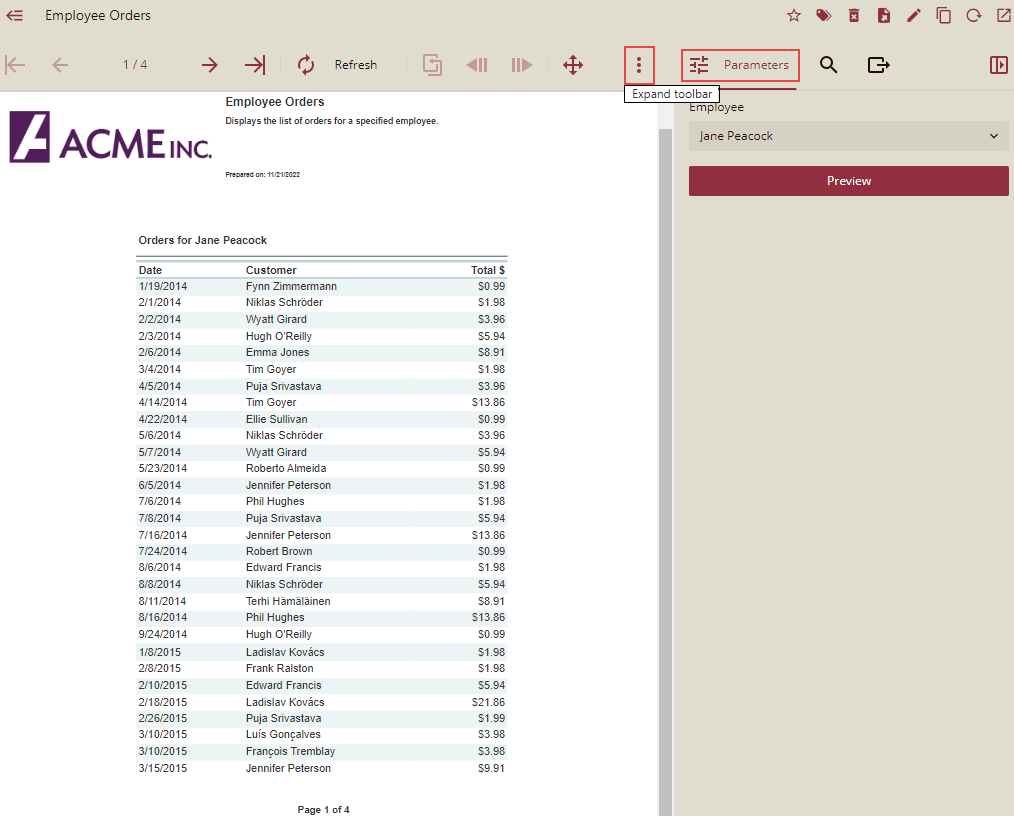
Click the Expand toolbar, and then click Filters option.
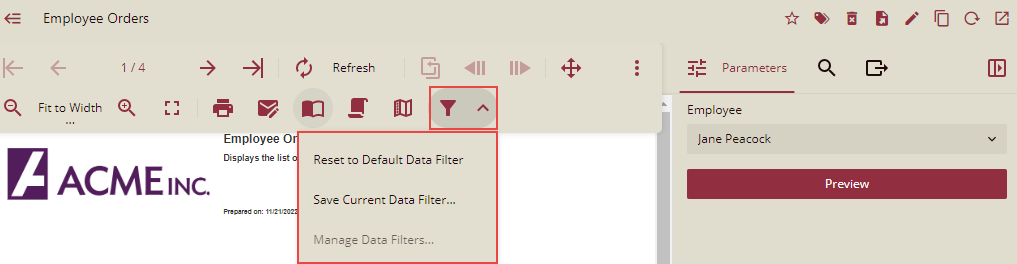
Select the Save Current Data Filter.. option.
Save New Data Filter dialog pop-up is displayed.
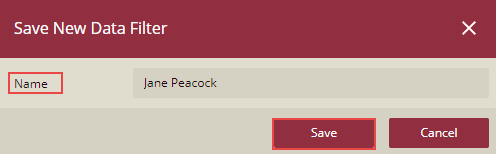
Enter the details and click Save, to save the filters.
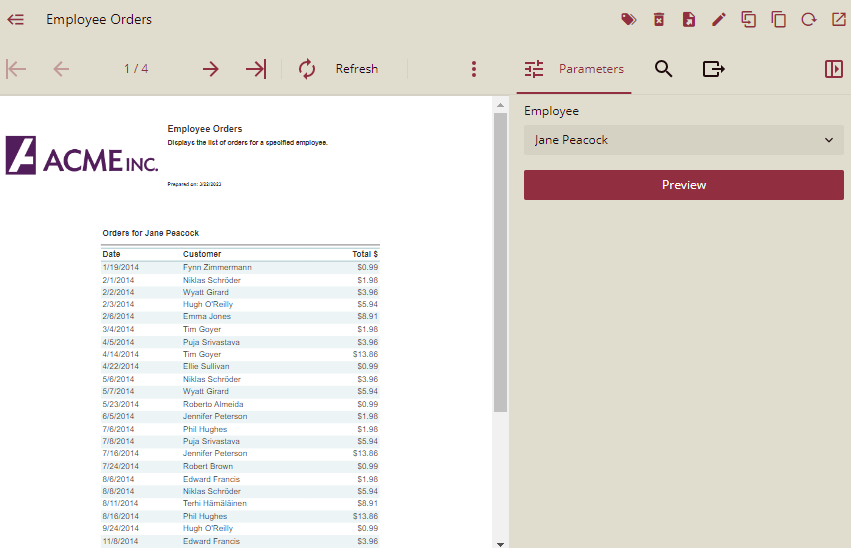
The saved filter is now listed in the list.

You can then use these filters as quick settings for the parameters when previewing the reports.
Viewer Toolbar
The following table lists the actions you can perform through the Viewer toolbar.
| Toolbar Element | Name | Description |
|---|---|---|
 |
First Page | Navigates to the first page of the report. |
 |
Previous Page | Navigates to the previous pages in the report. |
 |
Next Page | Navigates to the following pages in the report. |
 |
Last Page | Navigates to the last page of the report. |
 |
Refresh | Refreshes the report to check for any new modifications or updates. |
 |
Cancel | Cancels the report rendering. |
 |
Back to Parent | Returns to the parent report in a drill-through page report. |
 |
Go Back | Takes Viewer to the previous view in the Viewer history. |
 |
Go Forward | Takes the Viewer one step forward in the Viewer history. |
 |
Move Tool | Allows to move a selection or an entire page by moving the mouse. |
 |
Zoom Out | Decreases the magnification of the report. |
 |
100% | Displays the current zoom percentage. Allows you to select from the available zoom options - Zoom In, Zoom Out, 100%, Fit to Page and Fit to Width. |
 |
Zoom In | Increases the magnification of the report. |
 |
Expand toolbar | To view more options on the toolbar. |
 |
Toggle Fullscreen | Displays the report in fullscreen mode, hiding the entire UI. |
 |
Displays the Print dialog to specify printing options. | |
| Emails the report to the designated email address(es) in the specified export format. | ||
 |
Single Page View | Shows one page at a time in the Viewer. |
 |
Continuous View | Shows all preview pages one below the other. |
 |
Galley | Displays report in a single scrollable page. |
 |
Filters | Gives the ability to save filters for reports which define the value of the parameters. |
 |
Search | Allows you to search for text with match-case and whole-word search options. |
 |
Export | Allows you to export to PDF, Excel, Word (docx), CSV, HTML, PNG, TXT, and JSON formats. |
 |
Expand or Collapse | Expands or collapses the sidebar panel for Search and Export options. |
Email Report From the Preview Page
You can send the previewed report to email by using the Email option of the viewer.
Steps to Email a report:
Preview the desired report in the viewer.
Report preview is displayed.
On the Preview page, click the Email icon
 on the viewer toolbar.
ORYou can, click the Export icon
on the viewer toolbar and select Delivery Type as Email.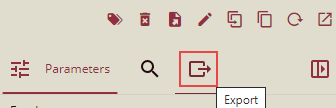 .
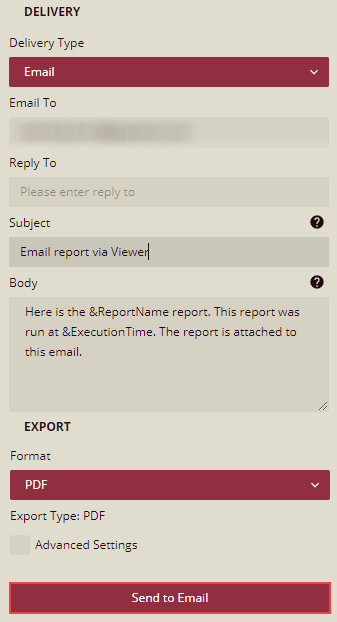
.Delivery and Export sections are displayed.
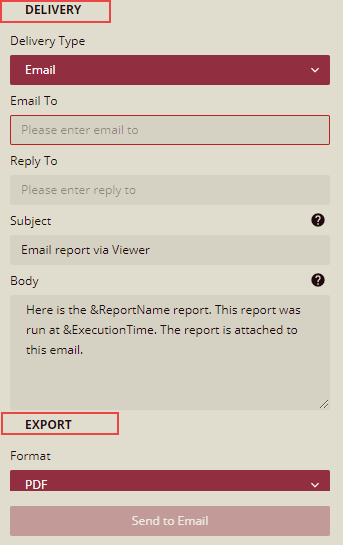 .
.Enter the relevant information (Email To, Reply To, Subject, Body, Export Format), and then click Send to Email to send the mail.
 .
.
Note: Under the Export section, the Advanced Settings check box is not checked by default. You can check this checkbox to view and add the advanced settings.