- Getting Started
- Administration Guide
-
User Guide
- An Introduction to Wyn Enterprise
- Document Portal for End Users
- Data Governance and Modeling
- View and Manage Documents
- Working with Resources
- Working with Reports
- Working with Dashboards
- Working with Notebooks
- Wyn Analytical Expressions
- Section 508 Compliance
- Subscribe to RSS Feed for Wyn Builds Site
- Developer Guide
Create a Cached Model
The procedure for creating a cached model for a dashboard is composed of four steps: choose the data source/dataset, select and edit tables, select and edit columns, and load the data.
In a cached model, you use data from the existing data sources/datasets available on the server. The data from these data sources can be added one by one to the data model. Also, note that only one user can edit a cached model at a time.
To Create a Cached Model
Follow the steps below to create a cached model for a dashboard:
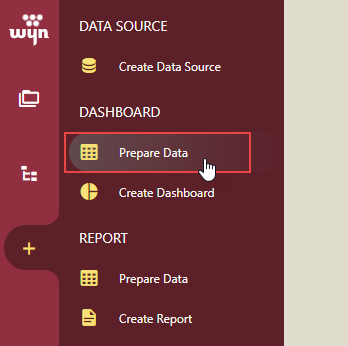
On the Resource Portal, navigate to the Create tab and then select Prepare Data under the Dashboard section.
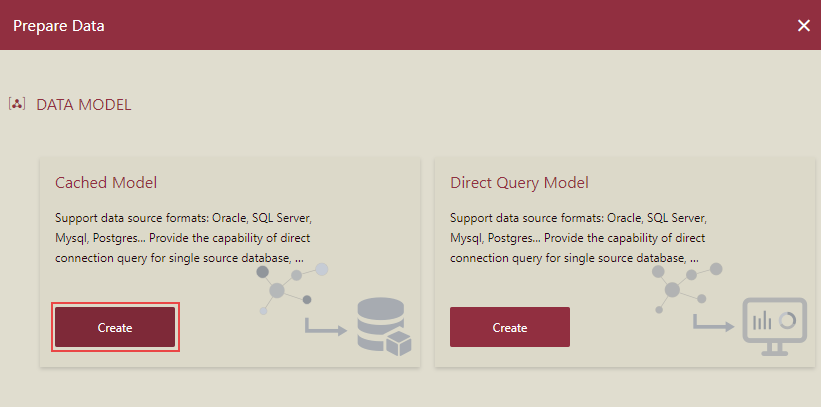
To create a new cached model, click the Create button.
Enter the name for the cached model in the Input Cached Model Name dialog box, and click OK.
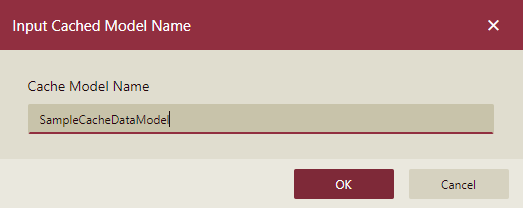
Note: The model is created and saved as soon as you click OK after providing the model name.
A Data Model Designer appears. Currently, there is no data added to the data model.
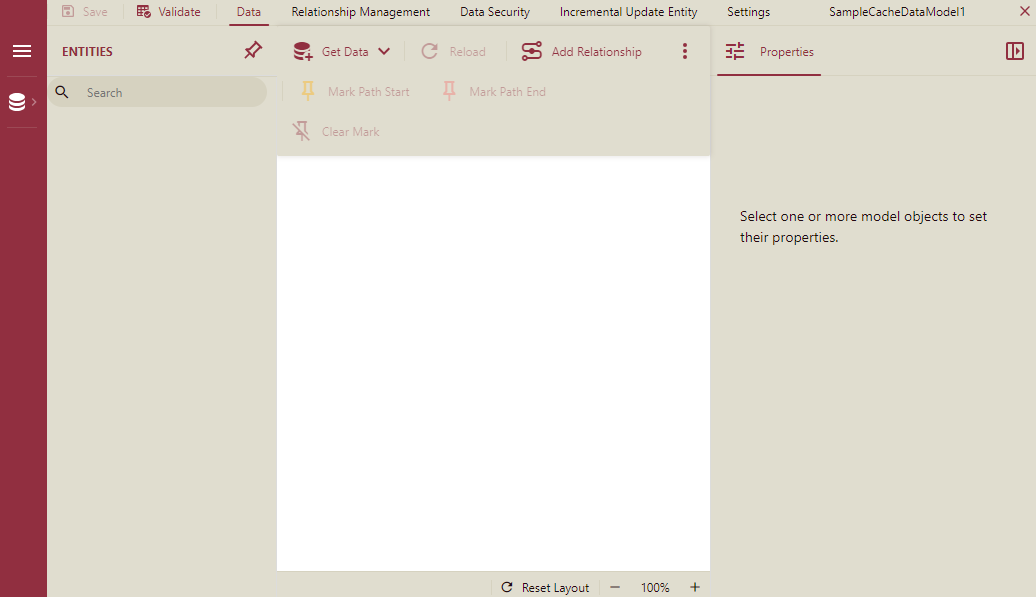
You can add the data from a data source or a dataset. Click the Get Data dropdown list at the top of the designer, and it will display two options as shown below. You can also add data from multiple data sources, one after another, using the following steps.
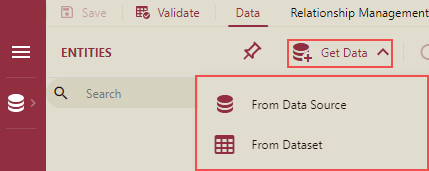
When a DataSource is selected, follow the steps below:
Here we have selected DataSource. So, in the Get Data window that appears, choose a data source from the list.
The list shows the available data sources on the server.

You can click the sort icon
 to sort the datasets or data sources by Created Date, Updated Date, or Name. You can sort in ascending or descending order.
Click the Next button to proceed further.
Select the tables, views, and materialized views you want to include in the cached model. You can choose to display tables or views (including materialized views) in the list by clicking the Tables or Views button, respectively.
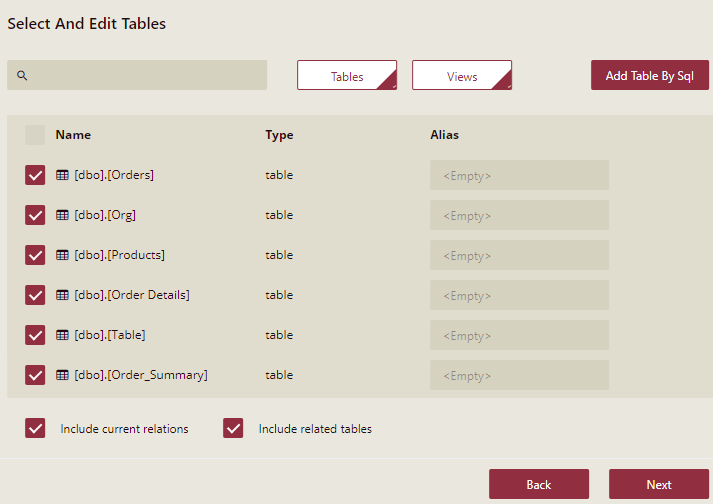
Note: You can view and select materialized views in the Select Tables and Views section when using a PostgreSQL data provider.
You can also create custom tables using SQL expressions if the existing tables do not meet your requirements. Click the Add Table by SQL button and enter the SQL expression.
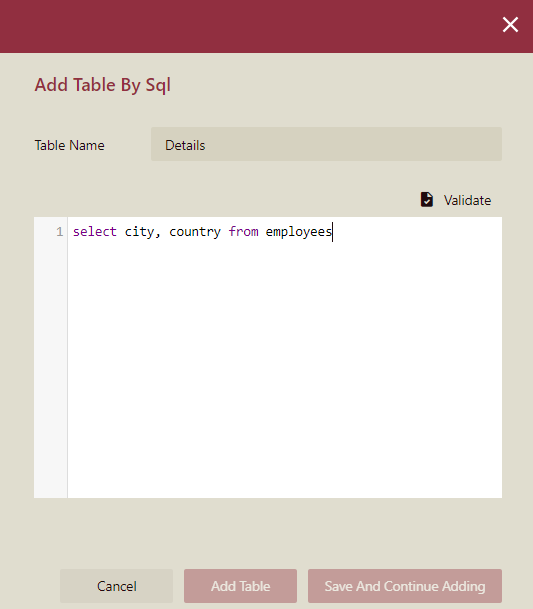
Click the Validate button to verify the SQL expression. Once validated, click the Add Table button to return to the Get Data wizard. If you want to add more tables using SQL expressions, click the Save and Continue Adding button.
Please note that you can use the Edit button in the Select and Edit Tables window to reconfigure the custom table.

If the selected data source uses table/column mapping, you can see the mapped table names in the Alias column. You can add aliases or modify the existing aliases for the table names. You can also generate the Alias based on data source mapping or database description by clicking this button
 . It is supported for SQL Server, Oracle, MySQL, TiDB, and Doris databases.
Uncheck the Include current relations option to exclude the existing relations in the selected tables and views. You can uncheck the Include related tables option to exclude the related tables in the selected tables and views.
Click the Next button to proceed further.
Select the columns that you want to include in the cached model, and change the data types for the columns.
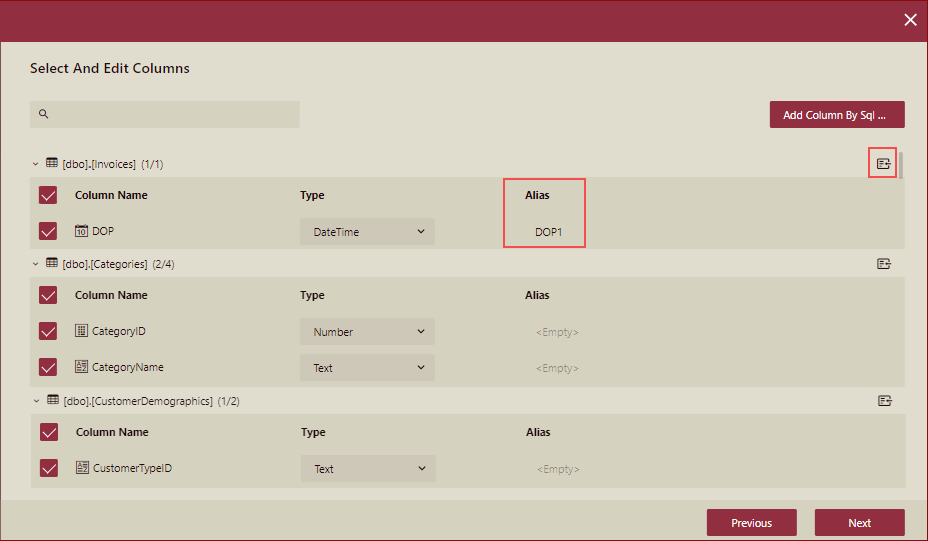
You can also create custom columns using SQL expressions if the existing columns do not meet your requirements. Click the Add Column By SQL Expression button and enter the following details:
* Table Name - The name of the table where you want to add the column.
* Column Name - The name of the column.
* Type - The data type of the column. It can be set to Number, Text, Boolean, Date, and DateTime. If you do not specify the type, the data type is automatically determined based on the SQL expression.
* SQL Expression - A valid SQL expression for the column.
Note: You cannot add a new column to a custom table.
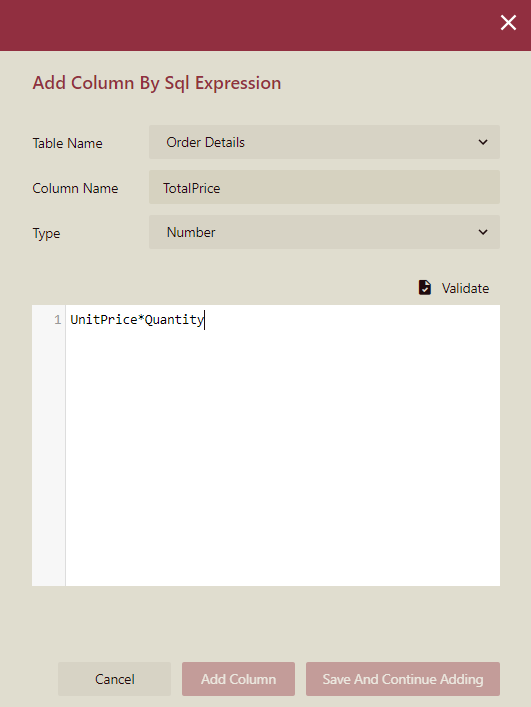
Click the Validate button to verify the SQL expression. Once validated, click the Add Column button to return to the Get Data wizard. If you want to add more columns using SQL expressions, click the Save and Continue Adding button.
Note: Use the Edit button in the Select and Edit Columns window to reconfigure the custom table column.
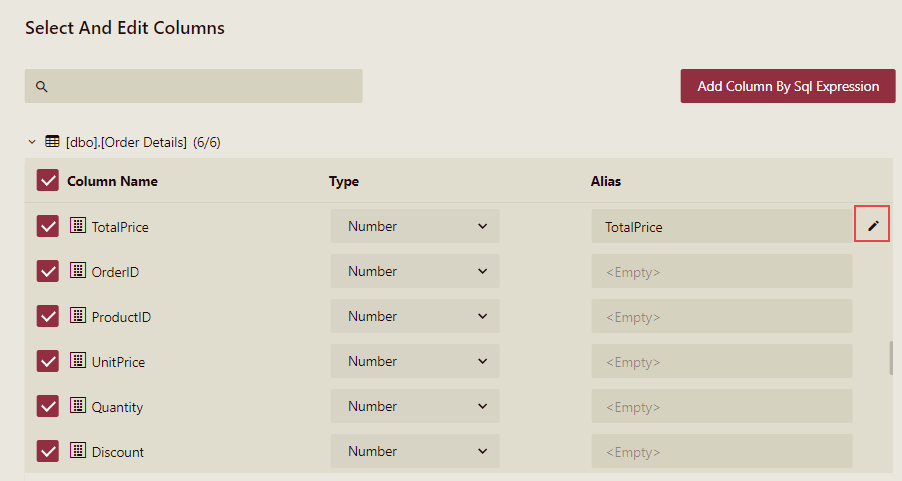
If the selected data source uses table/column mapping, you can see the mapped table names in the Alias column. You can add aliases or modify the existing aliases for the column names.
Click the OK button to proceed further.
Now, the data from the data source will begin to load. You can see the loading progress for each table under the Progress header.
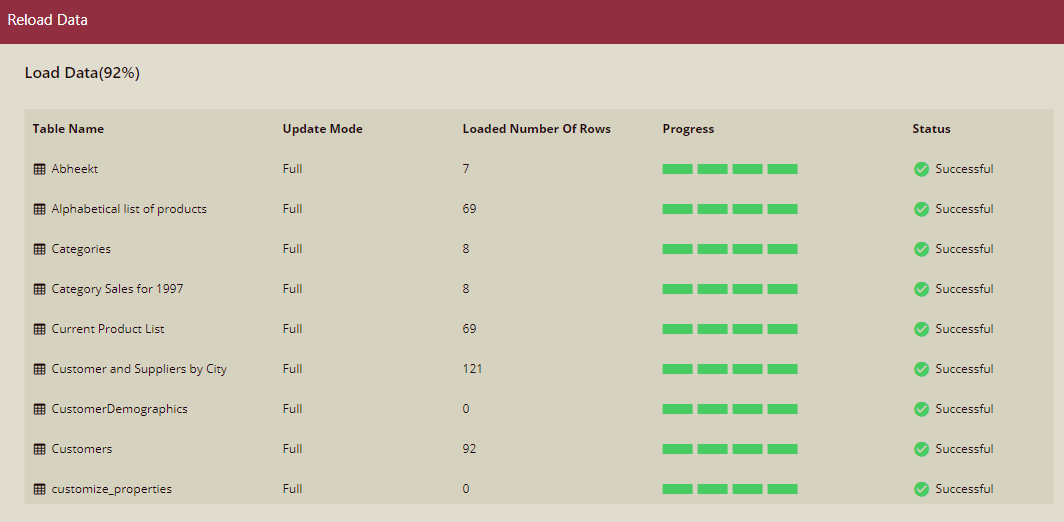
Once the data is completely loaded, you will see the load status for each table under the Status header, and the number of rows loaded in each table under the Loaded Number of Rows header.
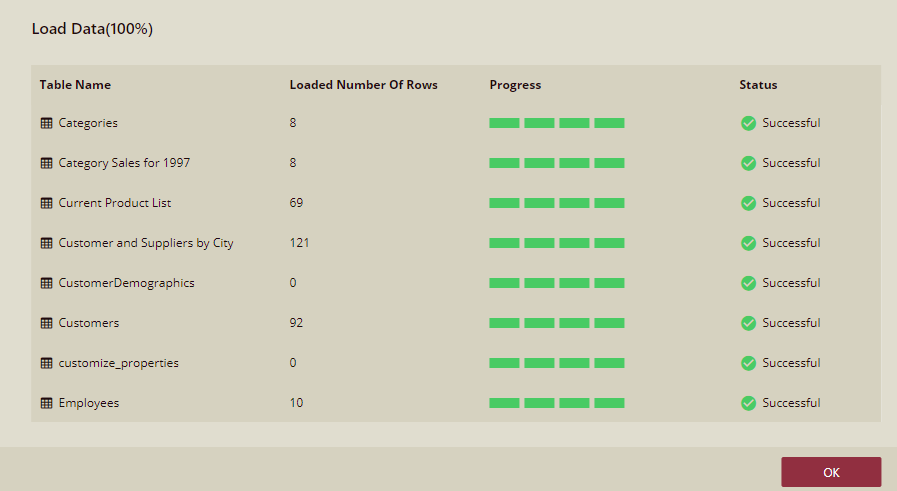
If you face a failure during the loading of data, you can click the Reload button to load the data again for the failed entities until they get successfully loaded. The Status column header icon will show a hint message to check the details of the message in the admin portal.
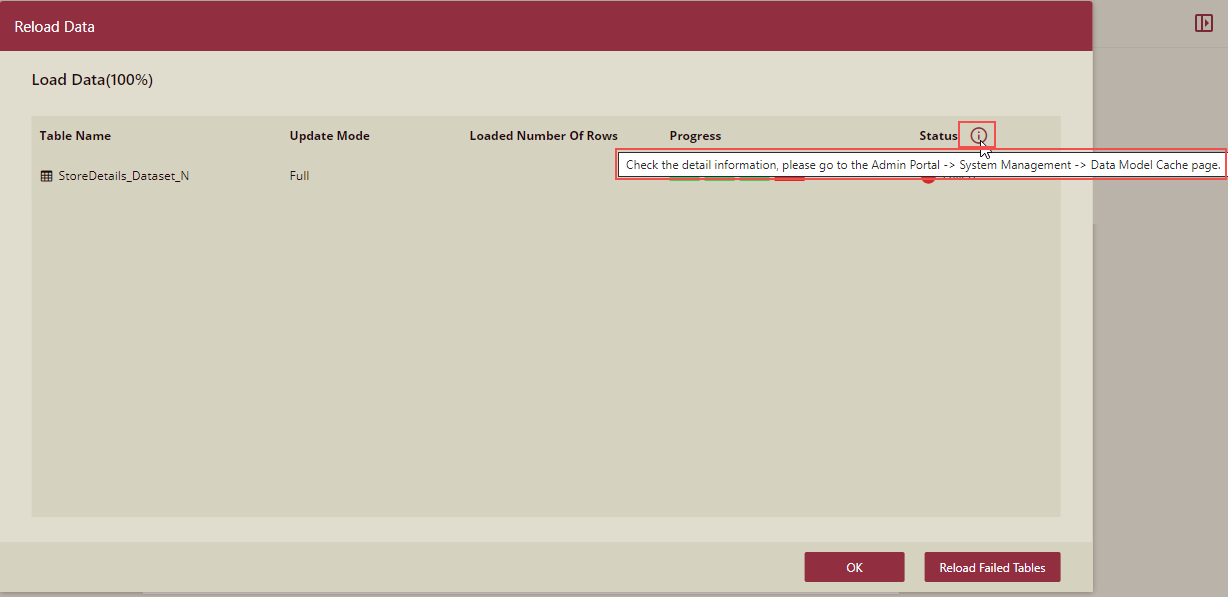
Now, click the OK button.
Based on the defined settings, a cached model is created as shown below.
The Data Model Designer displays the aliases for the entities and attribute names defined while editing tables and columns in the Get Data dialog box.
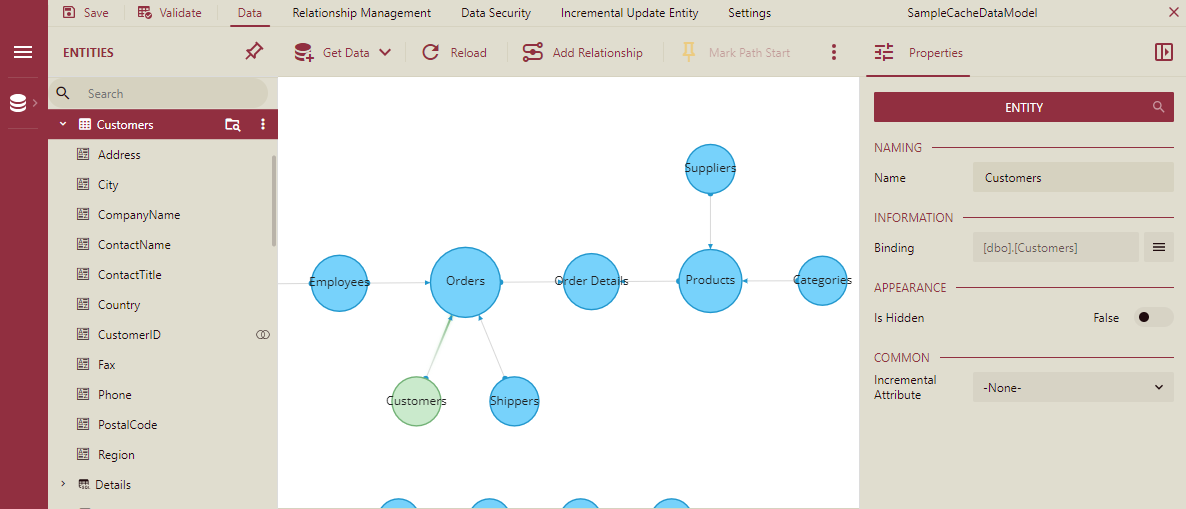
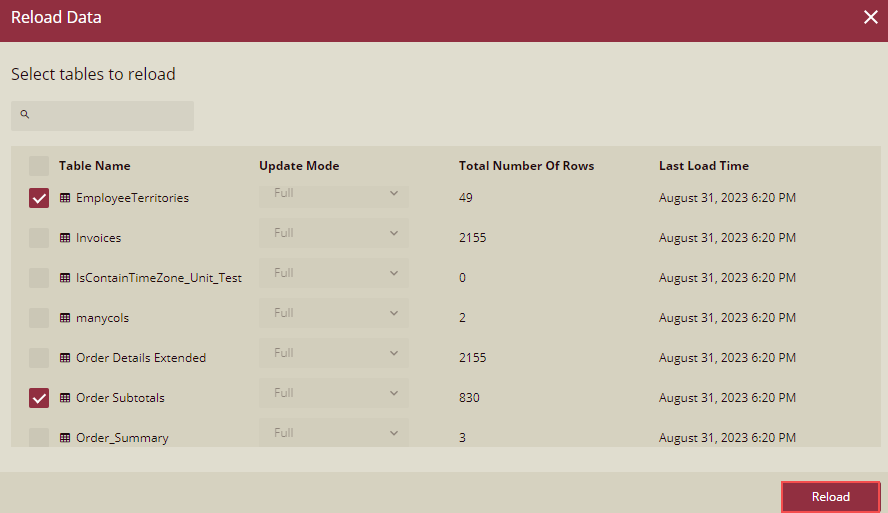
Use the Reload button in the designer to manually refresh the cached data for the selected entities in the model.
When a DataSet is selected, follow the steps below:
Here we are selecting a DataSet. So, in the Get Data window that appears, choose a data set from the list.
The list shows only the available Cached dataset and Direct dataset.
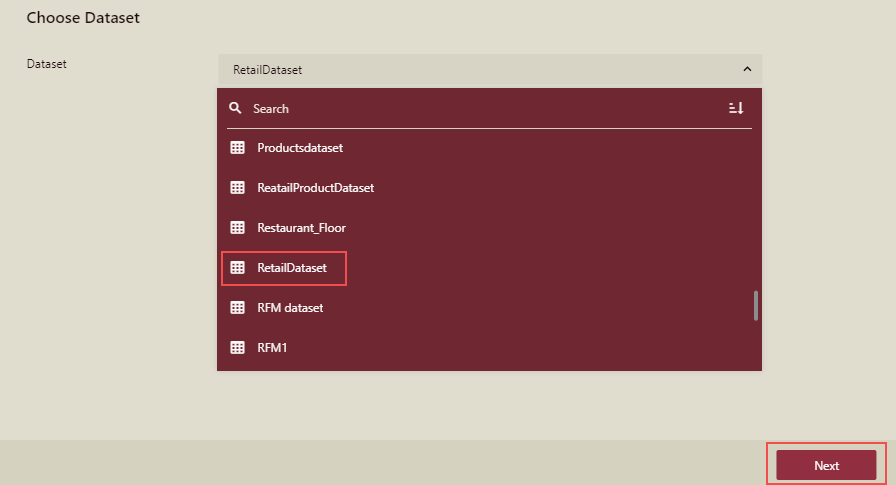
Note: You can only select the Dataset for which you have read permission.
If you select a dataset, it will check whether the dataset is referenced, and the referenced dataset needs to meet the following requirements:
The referenced dataset cannot contain "User Input", "User Context", and "Organization Context" type parameters, or else it will give an error message.
The data source of the referenced dataset cannot contain "User Context" and "Organization Context" type parameters, or else it will give an error message.
Click the Next button to proceed further to the Select and edit columns page.
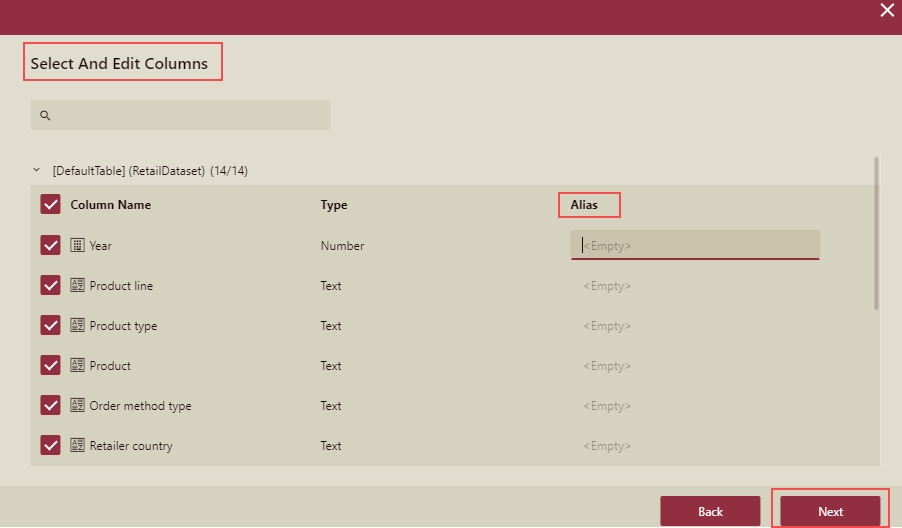
Now click the OK button.
Based on the defined settings, a cached model is created as shown below.
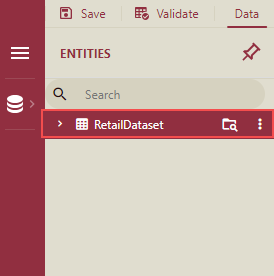
Referenced DataSet
Listed below are a few important points related to the referenced dataset.
The selected referenced dataset cannot contain "User Input", "User Context", and "Organization Context" type parameters. So, when a referenced dataset is selected has these parameters, then an error message is displayed.


