-
Interactive DashboardsCreate interactive BI dashboards with dynamic visuals.
-
End-User BI ReportsCreate and deploy enterprise BI reports for use in any vertical.
-
Wyn AlertsSet up always-on threshold notifications and alerts.
-
Localization SupportChange titles, labels, text explanations, and more.
-
Wyn ArchitectureA lightweight server offers flexible deployment.
-
 Wyn Enterprise 7.1 is ReleasedThis release emphasizes Wyn document embedding and enhanced analytical express...
 -
 Choosing an Embedded BI Solution for SaaS ProvidersAdding BI features to your applications will improve your products, better serve your customers, and more. But where to start? In this guide, we discuss the many options.
-
Visual GalleryInteractive sample dashboards and reports.
-
BlogExplore Wyn, BI trends, and more.
-
WebinarsDiscover live and on-demand webinars.
-
Customer SuccessVisualize operational efficiency and streamline manufacturing processes.
-
Knowledge BaseGet quick answers with articles and guides.
-
VideosVideo tutorials, trends and best practices.
-
WhitepapersDetailed reports on the latest trends in BI.
-
 Choosing an Embedded BI Solution for SaaS ProvidersAdding BI features to your applications will impr...
 -

- Getting Started
-
Administration Guide
- Installing Wyn Enterprise
- Configuration Settings
- Account Management
- Security Management
- System Management
- Document Management
- How To and Troubleshooting
- User Guide
- Developer Guide
Categories
The Categories tab of UI Settings page provides you with the ability to add or edit categories to help organize your reports and dashboards. An admin has the right to add, edit, delete, and localize the name of a category and a sub-category. The Role determines whether a category is visible to an end-user or not.
Wyn Enterprise supports two types of categories. The first are general categories, which all users can contribute to and have permissions to all resources placed under them.
The second category is shared categories, which allow you to document permissions based on the category they are assigned to.
If a document is in a Shared Category, you may control the document permissions of the users in the shared category settings. Users are given one of the following document permissions; Execute, Read, Read/Write, or Full Control.
Create Category
To create categories in Wyn, navigate to the Categories menu. Click on the gear icon to open the Configuration Menu. Navigate to UI Settings on the left-side pane. In UI Settings, you will find the Categories menu on the top ribbon.
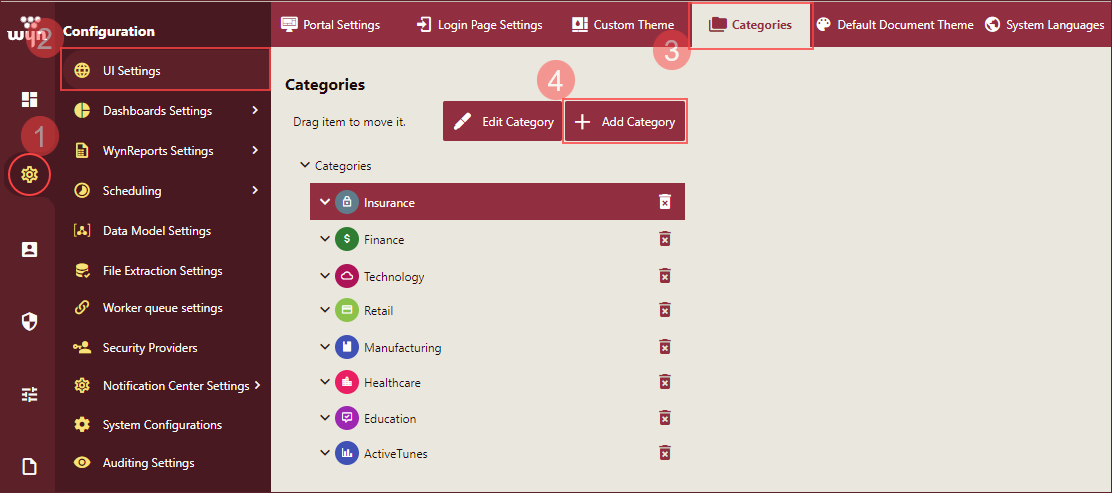
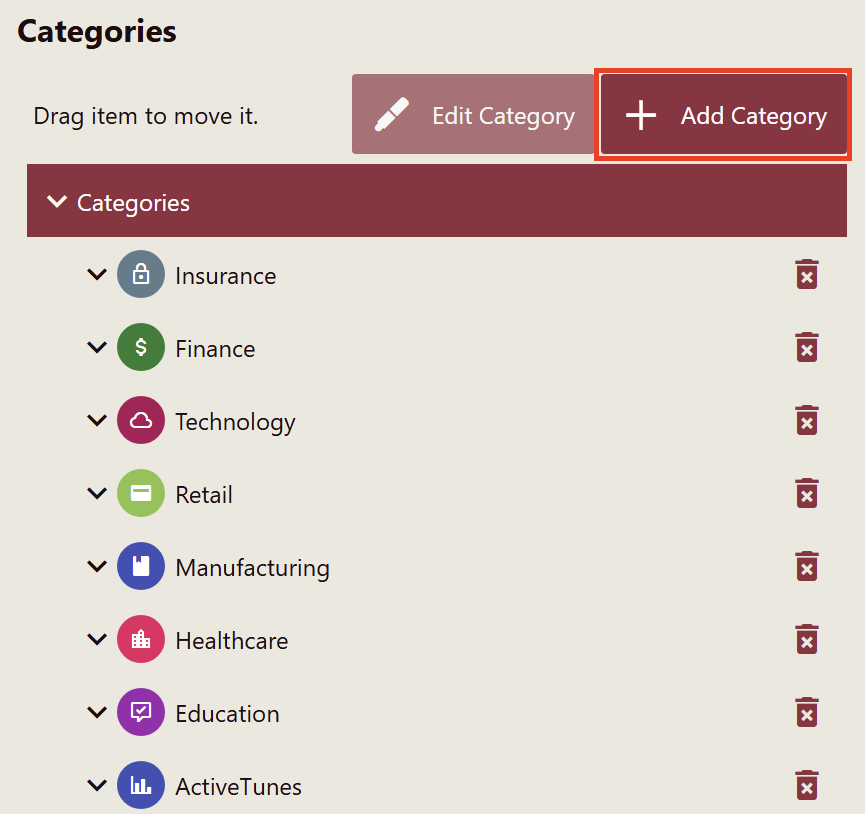
To create a general category, click Add Category.
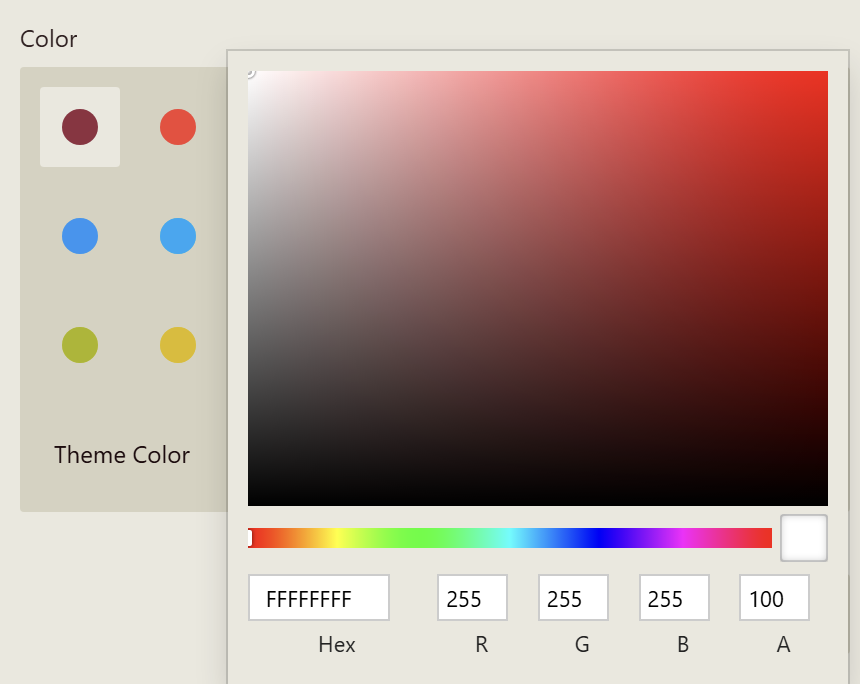
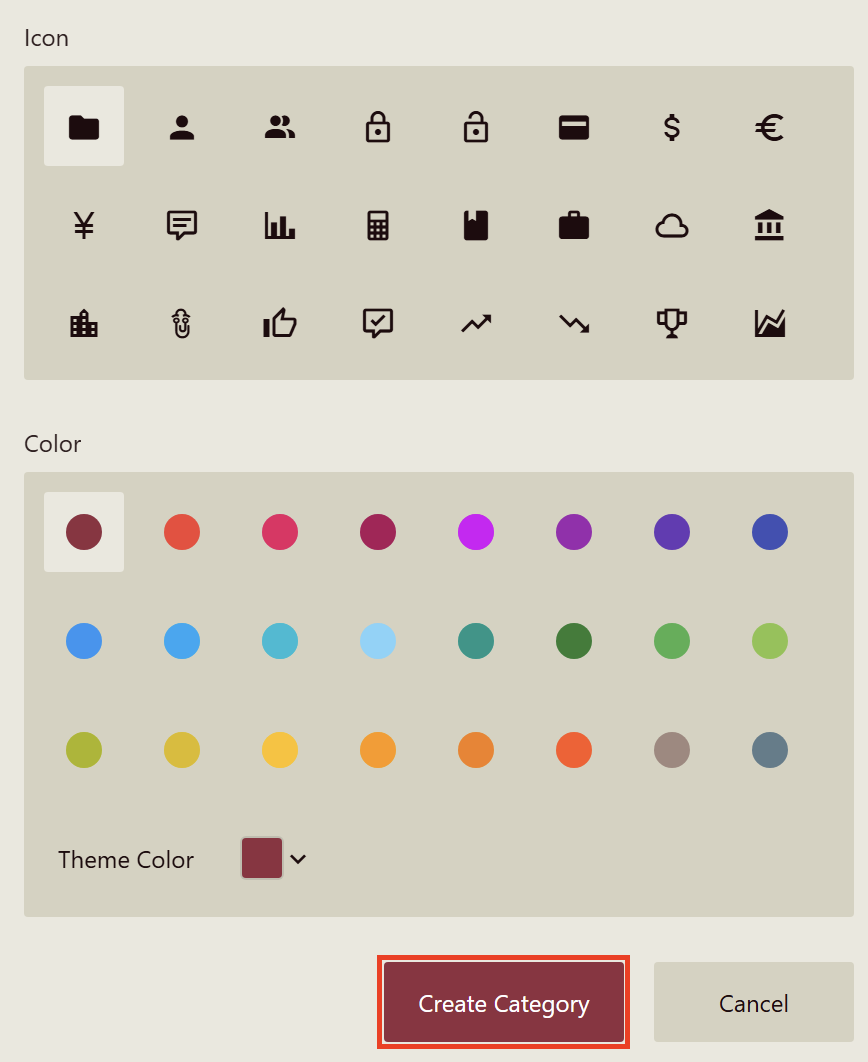
Specify the name, type, icon, and color for your category. Based on whether you want to create a General Category or Shared Category, select one or the other. You can also use a hexadecimal or RGBA value to represent the category color. Just click on the color binding slot next to the Theme Color property to open the color picker.
Click the Create Category button to create the category. To create a sub-category, select an existing category, and click the Add Category button.
Note: Shared Categories do not support sub-categories.
Set Shared Category Permissions
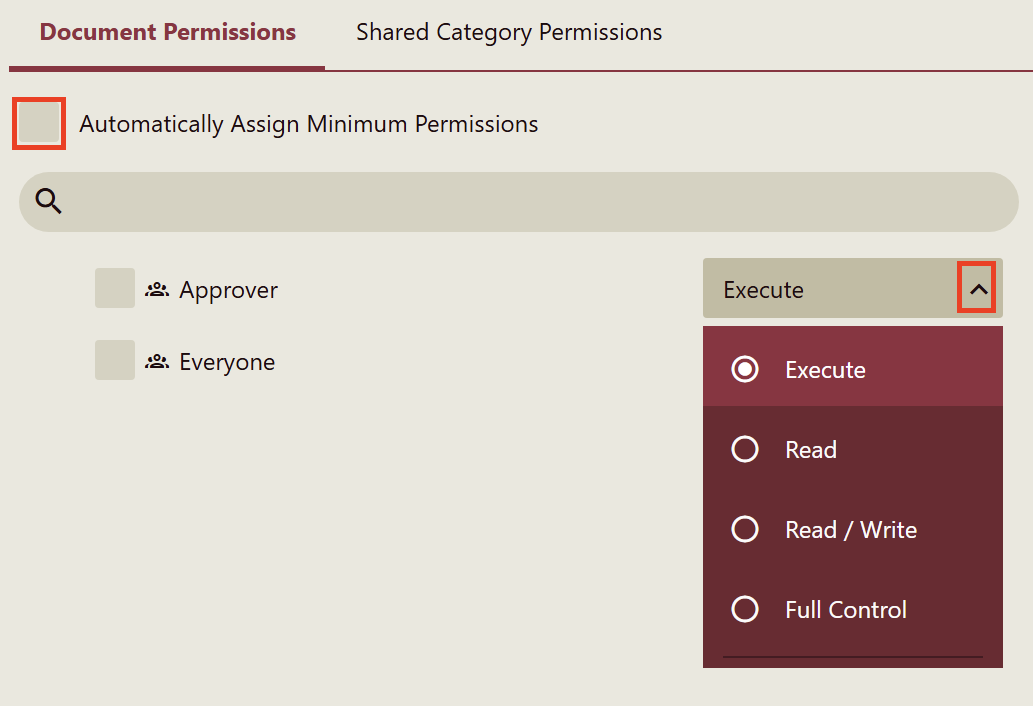
If you created a Shared Category, you fill find the Document Permissions on the right-side pane. There are four permission types:
Execute: Users with this permission can schedule reports and dashboards.
Read: Users with this permission can only read reports and dashboards.
Read/Write: Users with this permission can read and edit reports and dashboards.
Full Control: Users with this permission can do all of the above.
Automatically, Wyn Enterprise assigns the minimum permissions to all users. Unselect Automatically Assign Minimum Permissions and set the permission type you wish to add to the users with access to this category.
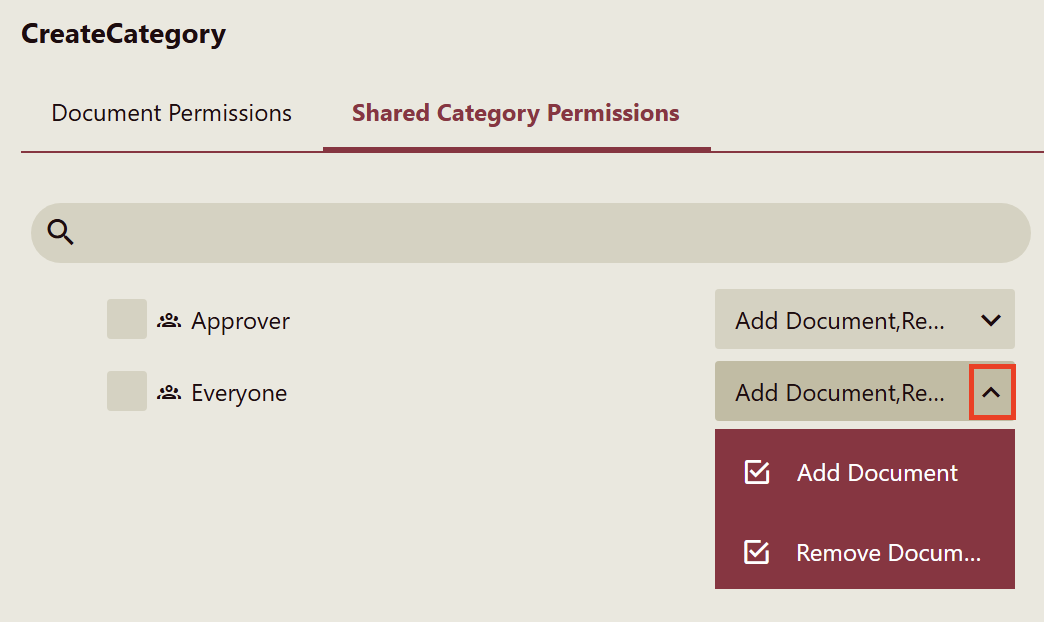
In the second tab, Shared Category Permissions, choose which users you would like to give the ability to add or remove documents. Simply click on the arrow to open the dropdown.
Once you are done, click Save.
To Edit a Category
Navigate to Configuration >> UI Settings >> Categories, select a Category, and click the Edit Category button.
Update the category by modifying its name, icon, or color. In the example below, we changed the category color.
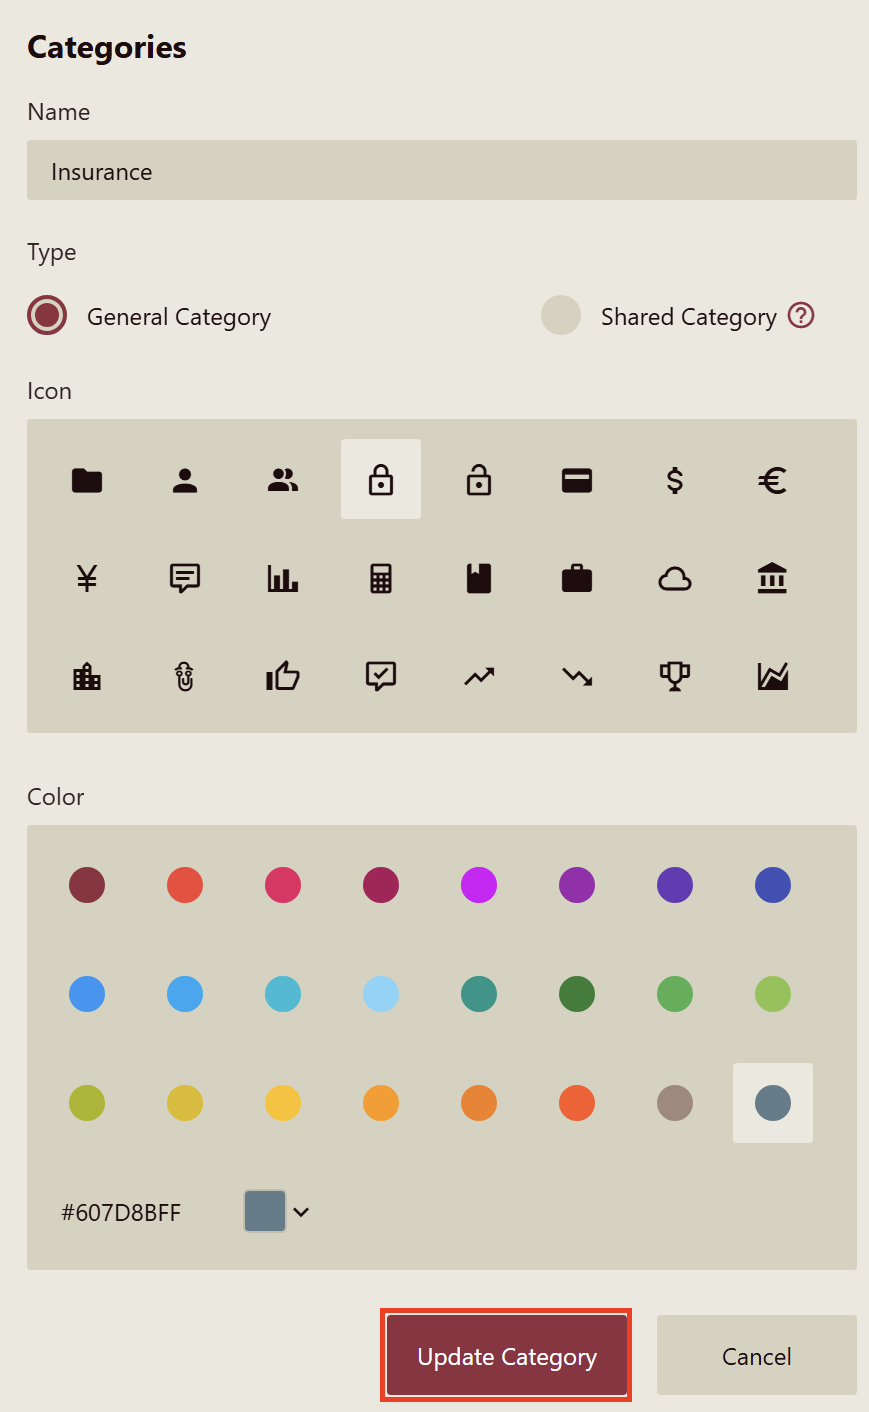
Click the Update Category button to update the settings.
To Delete a Category
Navigate to Configuration > Categories.
Click the delete icon adjacent to the category name. A Delete Category message box appears.

Click OK to confirm the deletion of a category. Deleting a category does not delete the documents in that category. The documents in a deleted category are displayed under No Category in the Document and Resource Portal. Note that the category is deleted permanently.
To move a category up or down in the list, simply drag the category to the desired position.
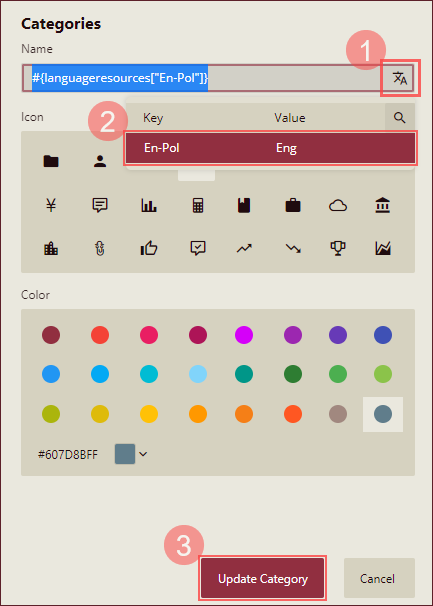
To Localize Category Name
You can translate the Category name for your users in their native language. To allow users to see the Category name is their native language, you need to do the following,
Set Permissions on Default Language Resource
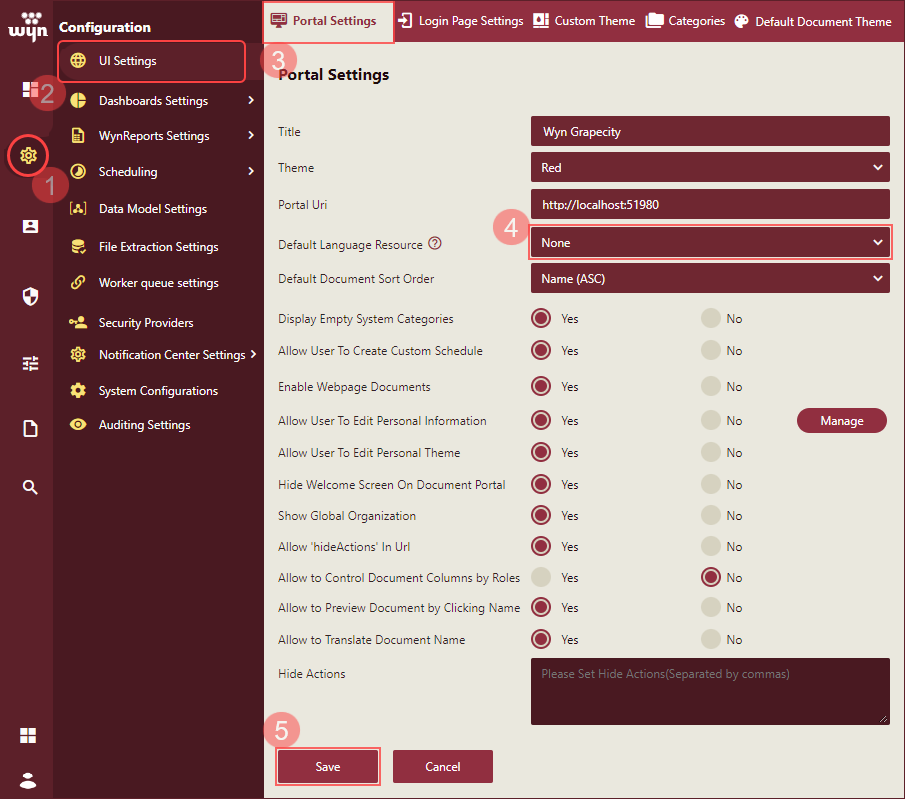
On the Admin Portal, navigate to Configuration >> UI Settings >> Portal Settings tab.
From the Default Language Resource drop-down, select a language resource to translate the Category name to and click the Save button. See the Add Language Resource article for information on adding language resources in the Wyn Enterprise application.
Note: Default Language Resource on the Portal Settings tab is added from the Resource Portal >> + (Create) >> Add Language Resource option.
Set Category Localization
Add or edit a Category from the Categories tab.
Select a key of the Default Language Resource using the Language Resource icon. The Category name will be added as an expression which will translate the name to the user's native language as per the selected Default Language Resource on the Portal Settings tab.
Click Save or Update button to apply localization.
Scenarios Where Category Localization Will Not Work
When a Category is created or edited, a ComboBox is provided to select a key of the currently set Default Language Resource. If a key is selected from the ComboBox, the Category name is recorded as an Expression. There are two possible scenarios where localization of the Category name will not work, as described below,
If the user does not have read permission for the Language Resource, the key of the expression (Category name) will be displayed directly.
If the expression's Key is not found in the Default Language Resource, it will not be translated, and the key will be displayed directly.