-
Interactive DashboardsCreate interactive BI dashboards with dynamic visuals.
-
End-User BI ReportsCreate and deploy enterprise BI reports for use in any vertical.
-
Wyn AlertsSet up always-on threshold notifications and alerts.
-
Localization SupportChange titles, labels, text explanations, and more.
-
Wyn ArchitectureA lightweight server offers flexible deployment.
-
 Wyn Enterprise 7.1 is ReleasedThis release emphasizes Wyn document embedding and enhanced analytical express...
 -
 Choosing an Embedded BI Solution for SaaS ProvidersAdding BI features to your applications will improve your products, better serve your customers, and more. But where to start? In this guide, we discuss the many options.
-
Visual GalleryInteractive sample dashboards and reports.
-
BlogExplore Wyn, BI trends, and more.
-
WebinarsDiscover live and on-demand webinars.
-
Customer SuccessVisualize operational efficiency and streamline manufacturing processes.
-
Knowledge BaseGet quick answers with articles and guides.
-
VideosVideo tutorials, trends and best practices.
-
WhitepapersDetailed reports on the latest trends in BI.
-
 Choosing an Embedded BI Solution for SaaS ProvidersAdding BI features to your applications will impr...
 -

- Getting Started
- Administration Guide
-
User Guide
- An Introduction to Wyn Enterprise
- Document Portal for End Users
- Data Governance and Modeling
- View and Manage Documents
- Working with Resources
- Working with Reports
- Working with Dashboards
- Working with Notebooks
- Wyn Analytical Expressions
- Section 508 Compliance
- Subscribe to RSS Feed for Wyn Builds Site
- Developer Guide
Use Parameters in Data Models
Parameters can be added directly to the data model (semantic layer) and then connected to parameters inside the Dashboard Designer. This approach allows dashboards to dynamically filter data while keeping the filtering logic centralized and efficient.
When a parameter is defined in the data model and used in a query, the filter is applied before data is returned from the database. In Direct Query scenarios, this means the database only returns the rows needed for the current parameter value. The dashboard then passes the selected value to the model parameter, allowing users to interactively change the results without modifying the underlying query.
This approach improves performance, governance, and reusability, making it ideal for enterprise dashboards that need to scale across many users.
Creating a Parameter in the Data Model
To begin, open the Resource Portal and create a new data model.
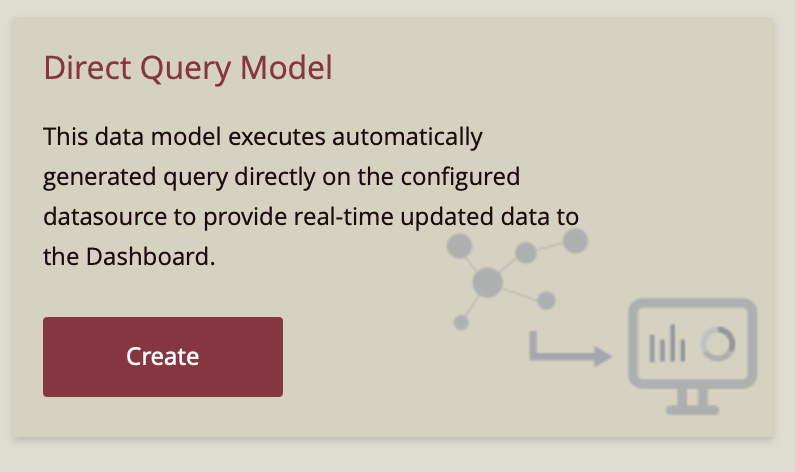
Click the “+” (Create) button in the left navigation pane. Under the Dashboard category, select Prepare Data. In the options that appear, choose Direct Query Model.
In the Configure Data Source step:
Set Data Source Type to Shared Data Source
Select the shared data source Adventure Works SS

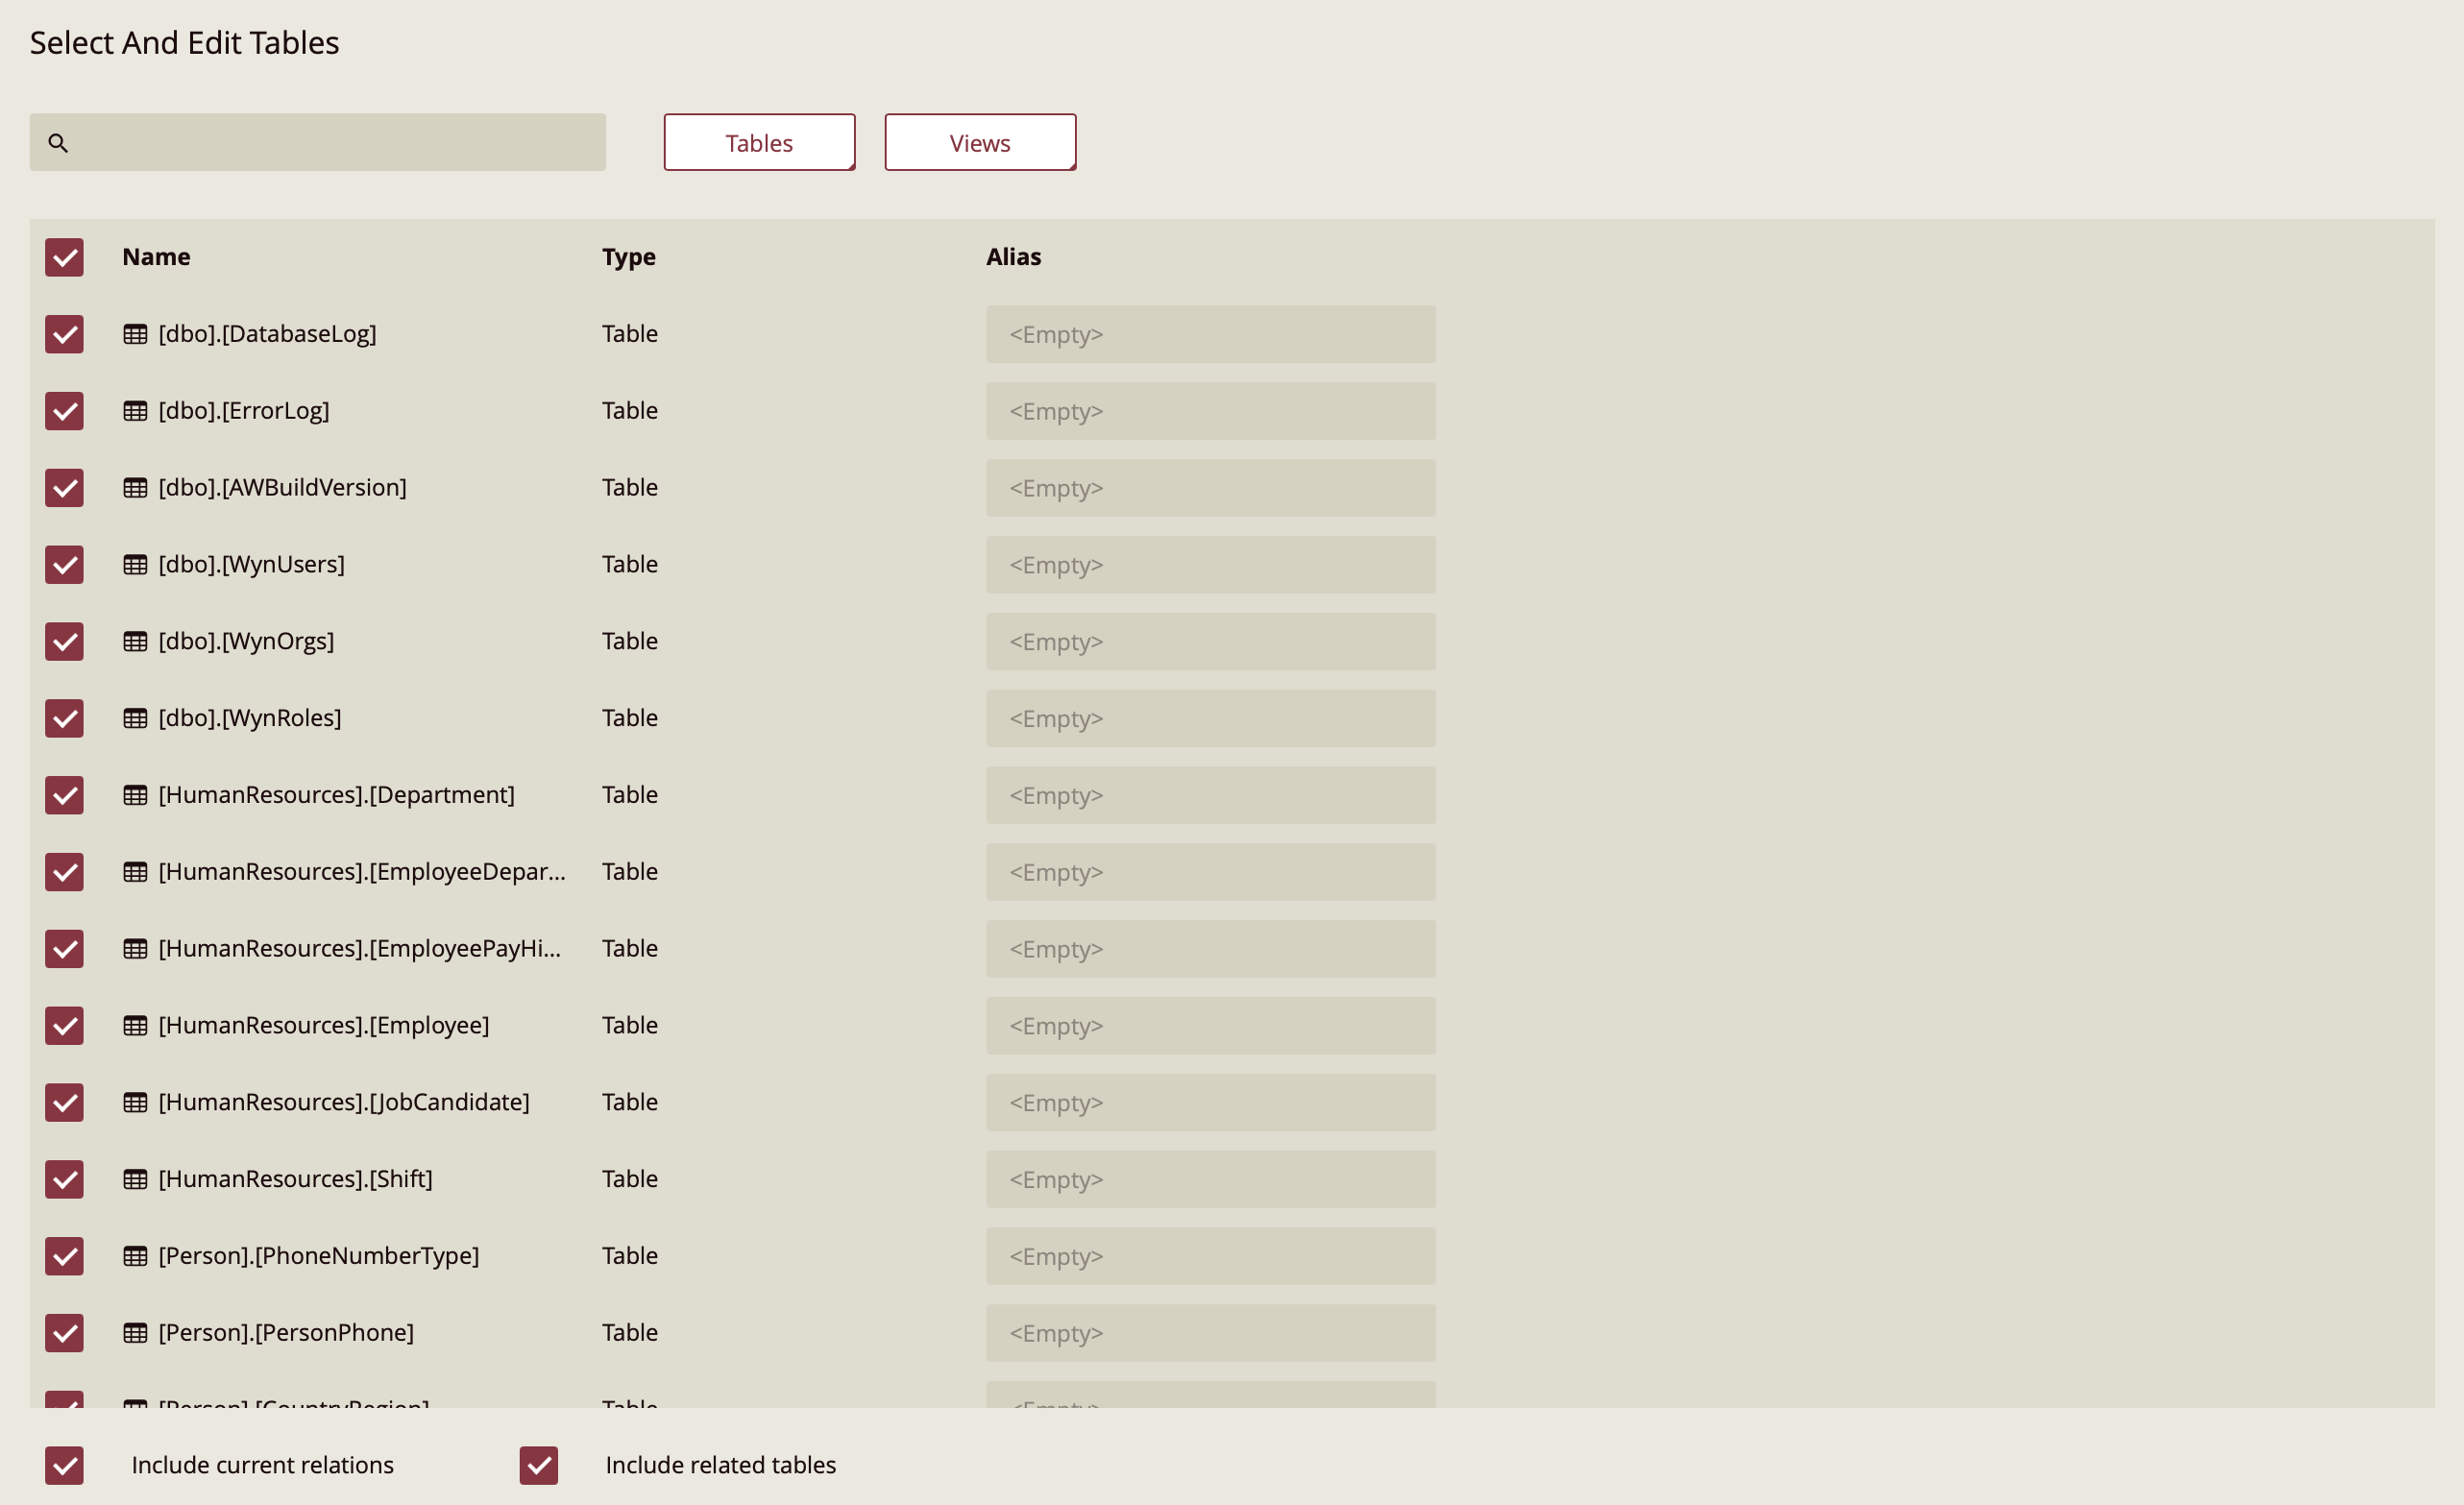
This example uses the AdventureWorks dataset. Select the tables you want to include in your model, or select all tables if you plan to build multiple entities.
Click Next.
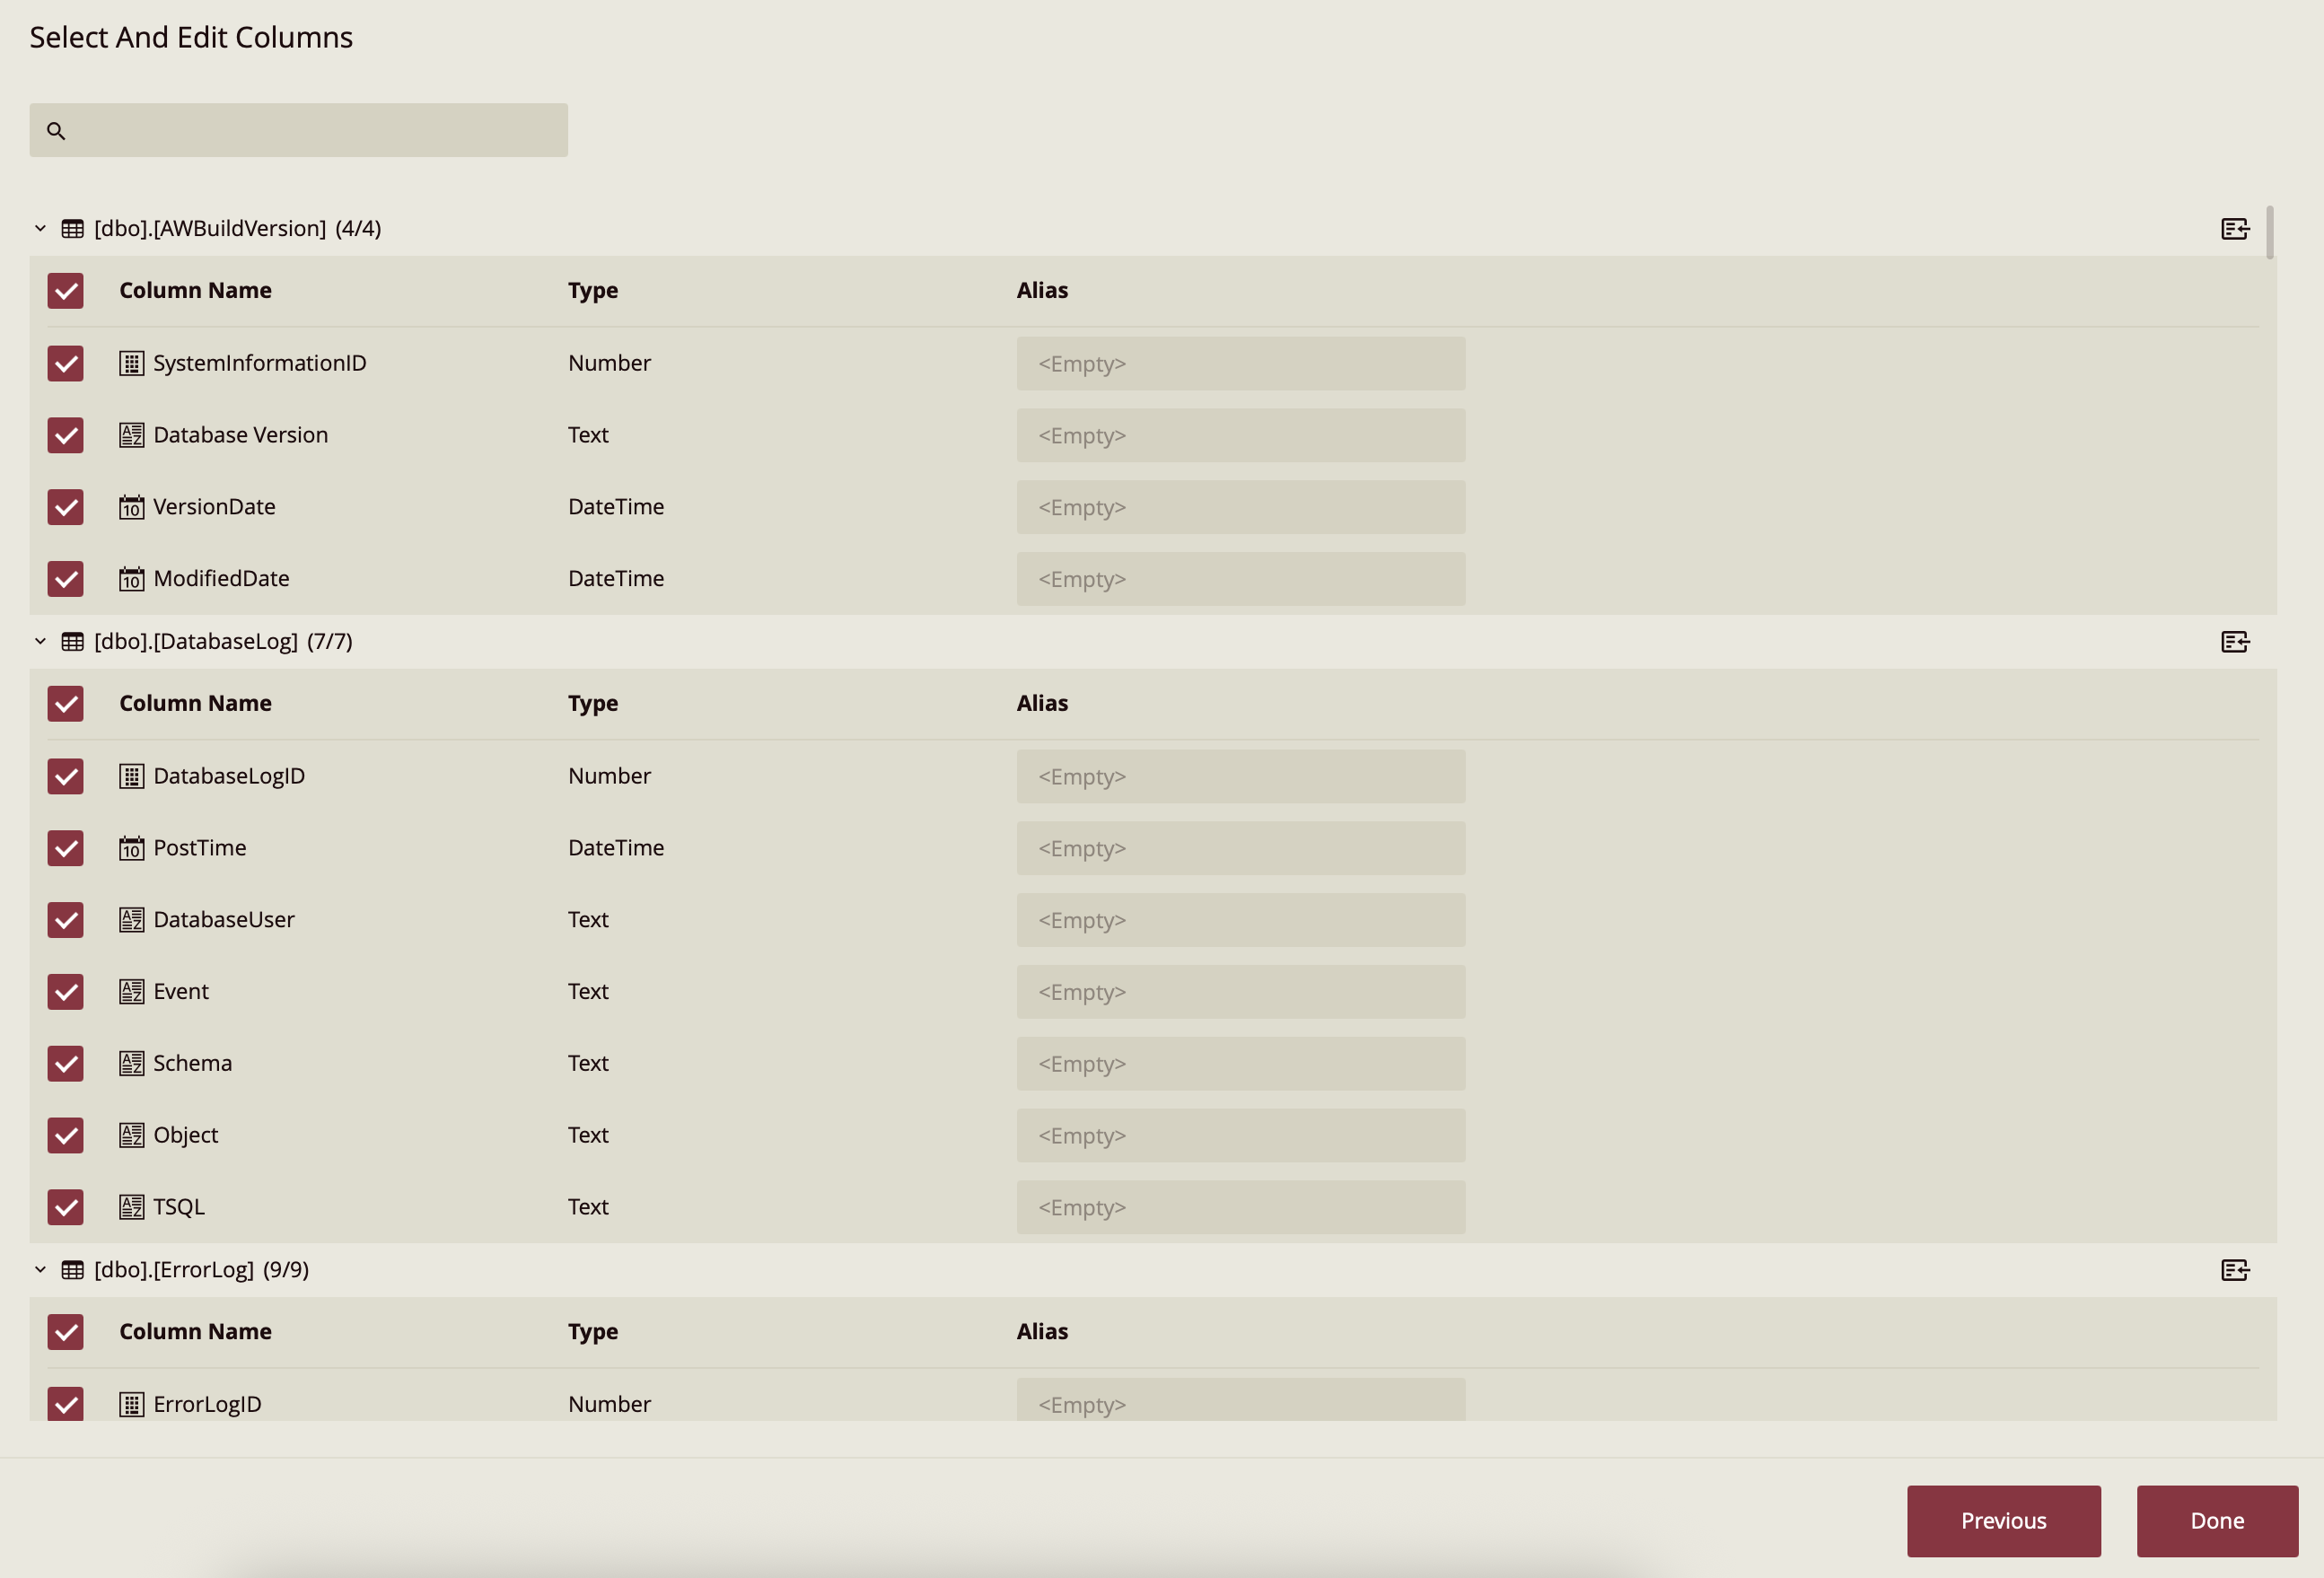
The next screen is titled Select and Edit Columns. For this example, no column modifications are required, so simply proceed without making changes.
Click Done to open the data model editor.
Creating an Entity with a Parameterized Query
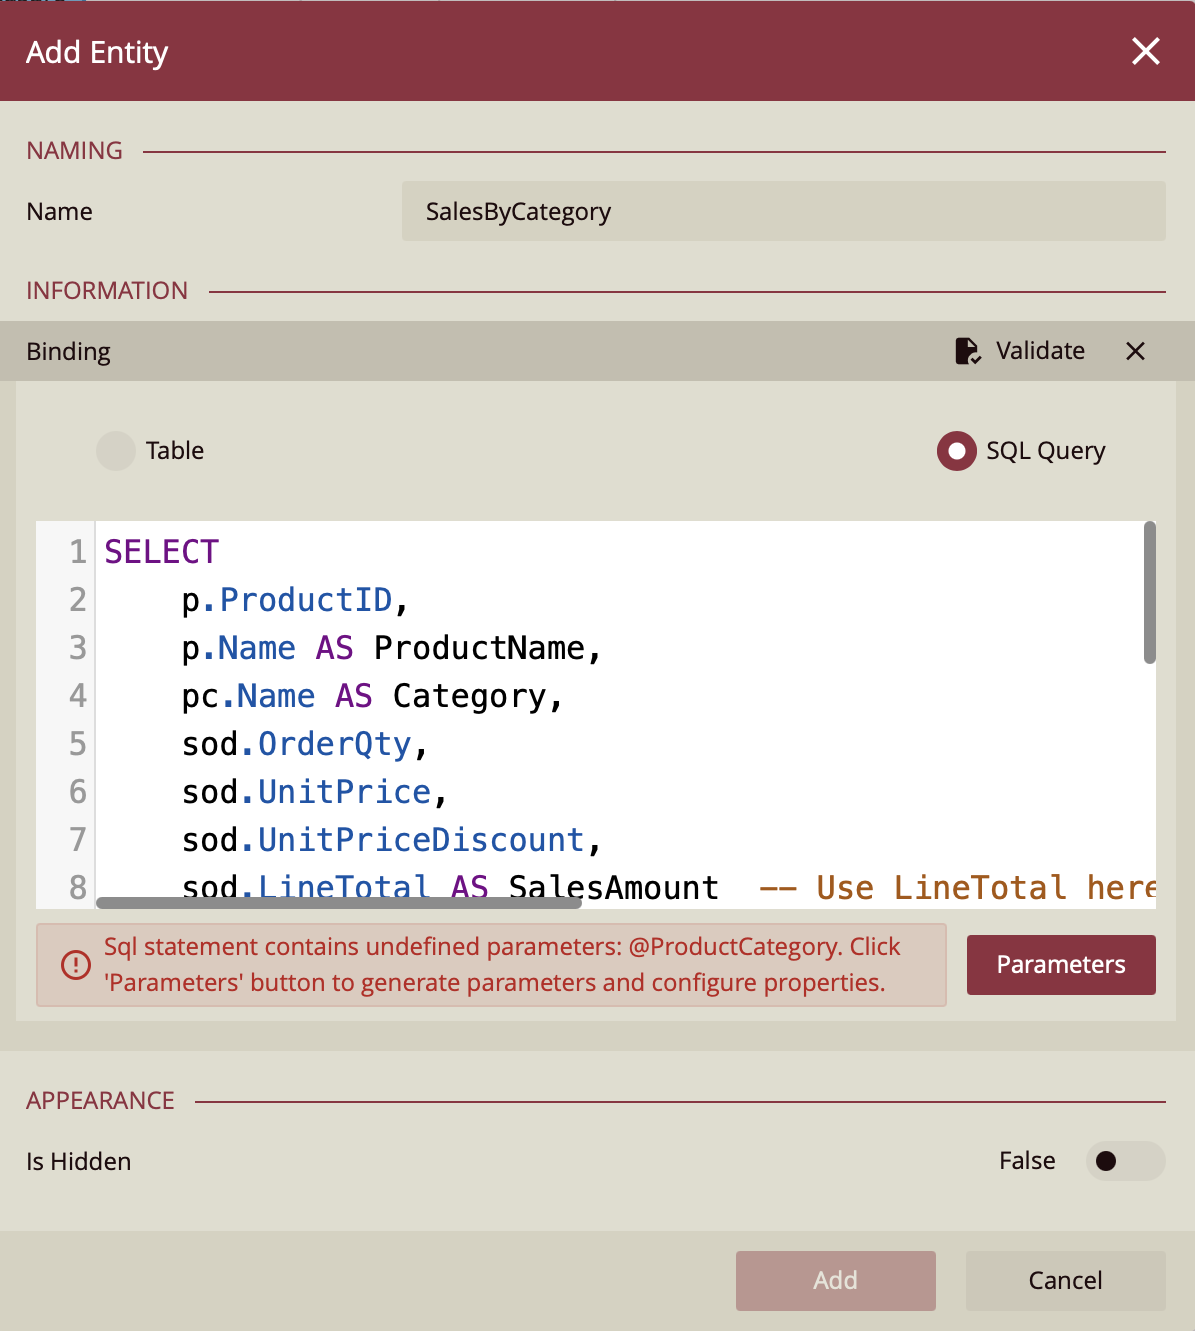
To create an entity that uses a parameter, select Add Entity from the top ribbon. This opens the Add Entity window.

Provide an entity name such as:
SalesByCategory
Under Information, select SQL Query as the entity type.
Why Use a SQL Query?
Using a SQL query allows you to control exactly how data is retrieved from the source database. This is particularly useful when working with parameters because they can be injected directly into the WHERE clause of the query. When the query executes, the database returns only the rows that match the parameter value, which improves performance and reduces unnecessary data transfer.
Enter the following SQL query:
SELECT
    p.ProductID,
    p.Name AS ProductName,
    pc.Name AS Category,
    sod.OrderQty,
    sod.UnitPrice,
    sod.UnitPriceDiscount,
    sod.LineTotal AS SalesAmount
FROM
    Production.Product p
INNER JOIN
    Production.ProductSubcategory psc
    ON p.ProductSubcategoryID = psc.ProductSubcategoryID
INNER JOIN
    Production.ProductCategory pc
    ON psc.ProductCategoryID = pc.ProductCategoryID
INNER JOIN
    Sales.SalesOrderDetail sod
    ON p.ProductID = sod.ProductID
WHERE
    pc.Name IN (@ProductCategory)
This query joins several AdventureWorks tables to retrieve product sales data. The key element is the @ProductCategory parameter in the WHERE clause. This allows the query to dynamically filter results based on the selected product category.
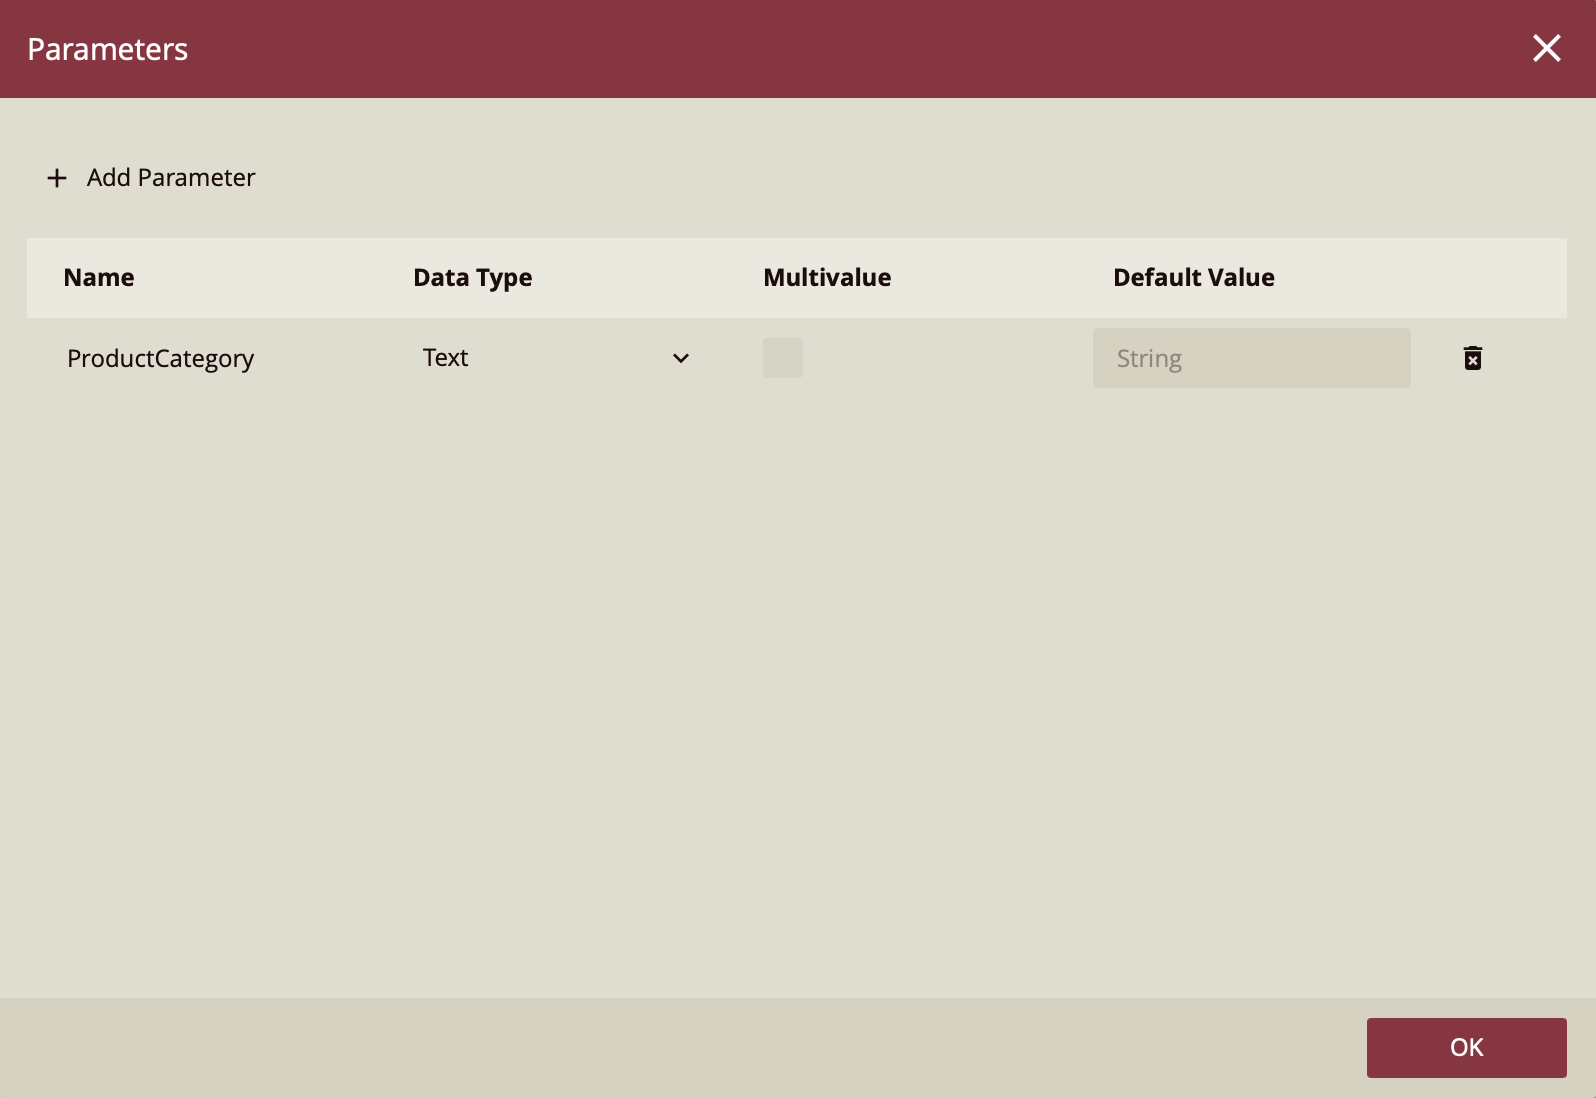
Adding the Parameter
After entering the query, click the Parameters button.
Add a parameter with the following settings:
Name: ProductCategory
Data Type: Text
Click OK to create the parameter.
Next, click Validate above the SQL query. Validation confirms that the query and parameter are configured correctly.
Once validation succeeds, click Add to create the entity.
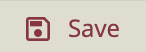
Finally, click Save on the top ribbon to save the data model.
At this point, you have successfully added a parameter to the data model.
Configuring the Parameter in a Dashboard
After creating the model parameter, the next step is to configure how the dashboard supplies values to that parameter.
Return to the Resource Portal.
Click the Create (+) button again and select Create Dashboard under the Dashboard category. Choose Blank Dashboard, then click Create.
Adding the Data Model
In the Data Binding panel, click + Add and select the data model you created earlier.
Once the model is added, you can configure how its parameters receive values.
Setting Model Parameter Values
In the upper-right corner of the Dashboard Designer, click the gear icon and select Set Parameter Values.
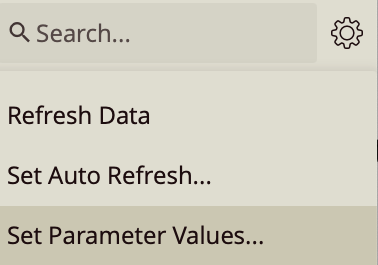
This opens the Model Parameter Settings window.
Click + Configure Model Parameter.
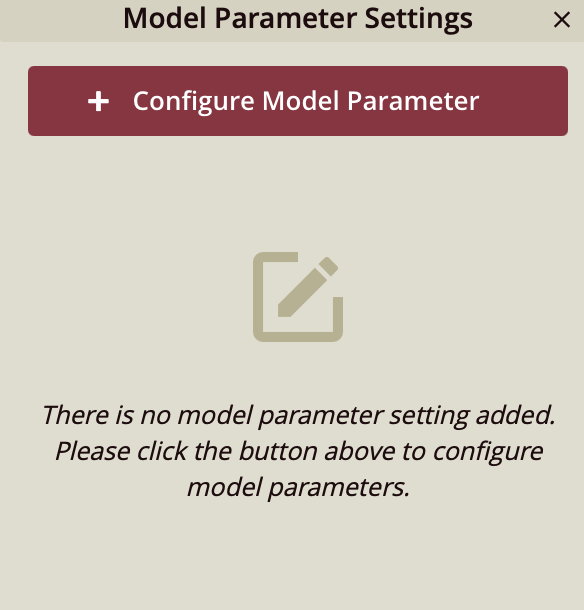
You will now see the ProductCategory parameter that was created in the data model.
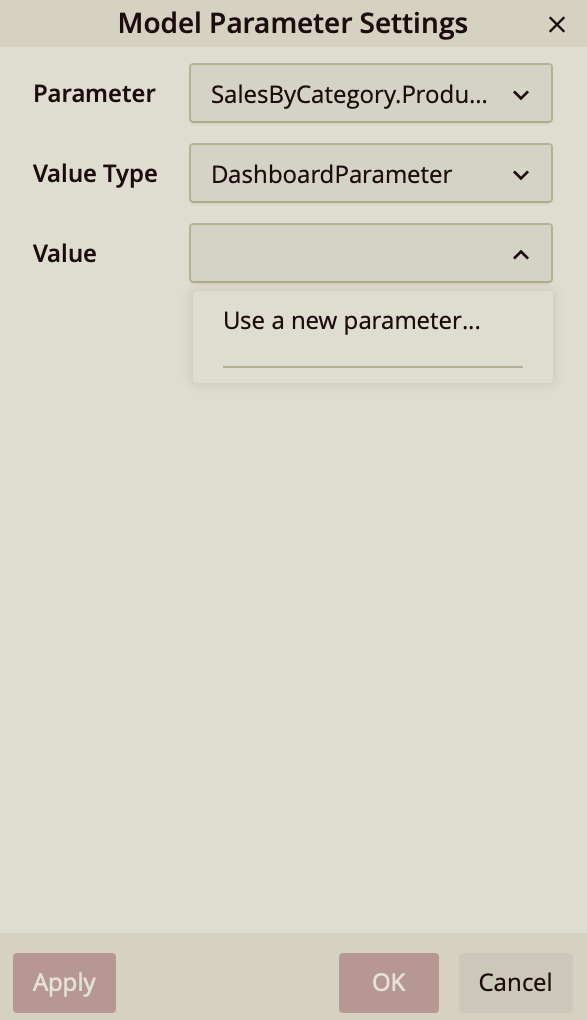
For Value Type, you can choose between two options:
Static Value
Selecting StaticValue allows you to manually enter a fixed value that will always be passed to the data model.
For example:
BikesWith this configuration, the query will always return only the Bikes category.
Dashboard Parameter
Selecting DashboardParameter allows the model parameter to be controlled by a dashboard parameter.
Choose DashboardParameter for the Value Type.
In the Value dropdown, select Use a new parameter…. This opens the Parameter Settings window.
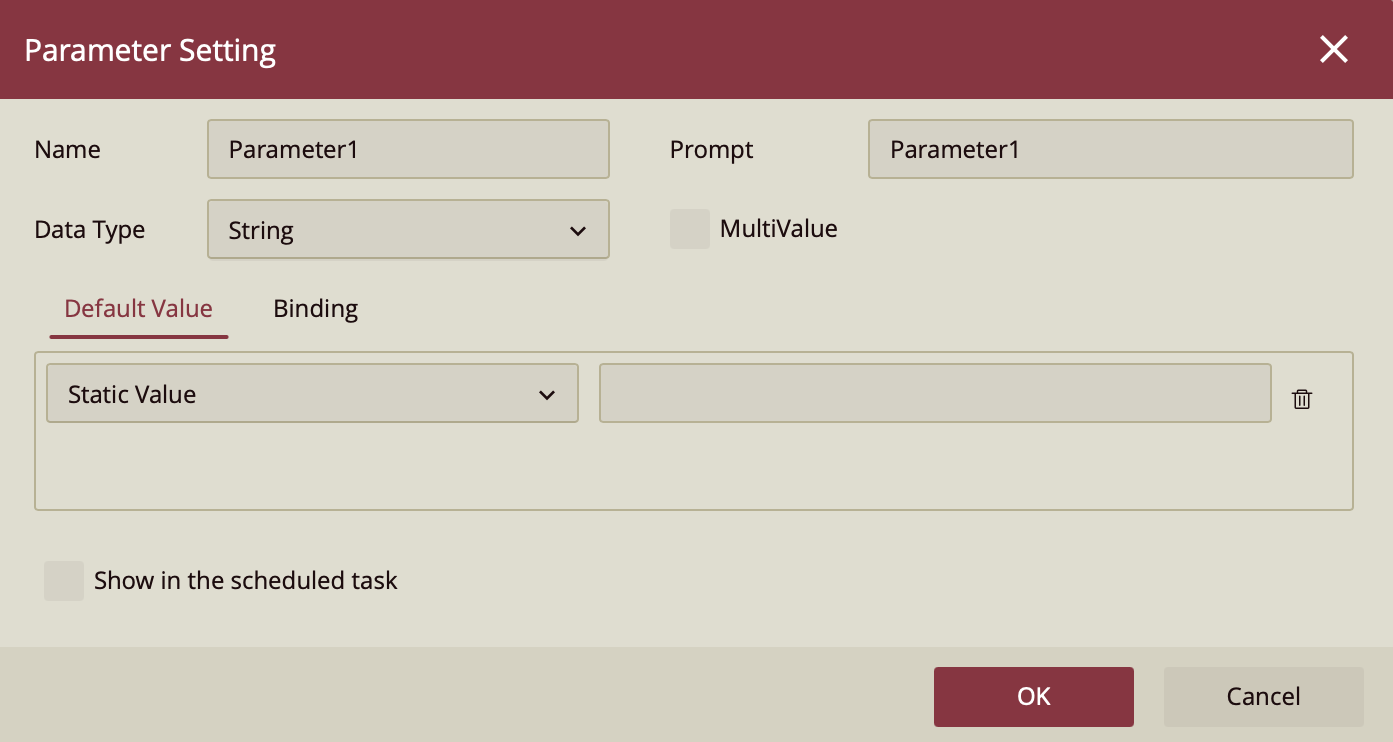
Here you can configure:
Name of the dashboard parameter
Data Type
Default Value
For example, you might set:
Name: ProductCategoryParameter
Data Type: String
Default Value: Bikes
After creating the parameter, you can further configure it in the Binding tab. In this tab, the parameter can be connected to a slicer or other interactive control so users can select different categories directly from the dashboard.
When the dashboard runs, the slicer or parameter selection sends a value to the dashboard parameter, which then passes the value to the ProductCategory parameter in the data model. The query executes with that value, returning only the relevant rows.
Why Use Data Model Parameters?
Using parameters at the data model level provides several important advantages.
Performance
Because the parameter is included in the SQL query, filtering occurs at the database level. Only the required rows are returned to the dashboard, which reduces query cost and improves performance—especially when working with large datasets.
Reusability
Model parameters are part of the semantic layer, meaning multiple dashboards and reports can reuse the same logic without redefining filters in each asset.
Security and Governance
Parameters can be used to enforce row-level filtering, ensuring users only see the data they are permitted to access.
Cleaner Dashboards
Dashboard parameters provide the user interface for filtering, while model parameters handle the underlying query logic. This separation keeps dashboards simpler and easier to maintain.
Example Scenario
In this example, a SalesByCategory entity was created with a ProductCategory parameter.
The dashboard defines a parameter with a default value of Bikes and passes that value to the model parameter.
When the dashboard loads, the query retrieves only sales records for the Bikes category. If the dashboard parameter is connected to a slicer, users can select another category, and the dashboard will automatically retrieve the corresponding data from the database.
When to Use This Approach
Adding parameters to the data model is especially useful when:
Dashboards work with large datasets
Multiple dashboards need the same filtering logic
Data access must follow security or governance rules
Queries must remain efficient and scalable
Starting with a simple parameter such as ProductCategory is a common way to test the workflow. From there, parameters can be expanded to support more advanced scenarios such as regional filtering, date ranges, or user-based data access.