- Getting Started
- Administration Guide
-
User Guide
- An Introduction to Wyn Enterprise
- Document Portal for End Users
- Data Governance and Modeling
- View and Manage Documents
- Working with Resources
- Working with Reports
- Working with Dashboards
- Working with Notebooks
- Wyn Analytical Expressions
- Section 508 Compliance
- Subscribe to RSS Feed for Wyn Builds Site
- Developer Guide
Create a Direct Query Model
The procedure for creating a Direct Query Model for a dashboard is typically composed of five steps:
Select the model type.
Specify the data source.
Configure data source connection details. And,
Select and edit tables and views.
Select and edit columns.
In Wyn Enterprise, you can create a Direct Query Model by manually filling in the configuration details in the designer or by reusing an existing data source available on the server.
Using Embedded Data Source
An embedded data source is defined in the Direct Query Model and used only by that model. Use the steps below to create a Direct Query Model with an embedded data source.
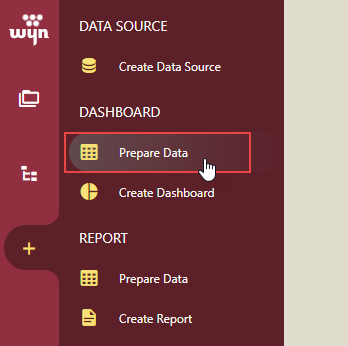
On the Resource Portal, navigate to the Create tab and select Prepare Data under the Dashboard section.
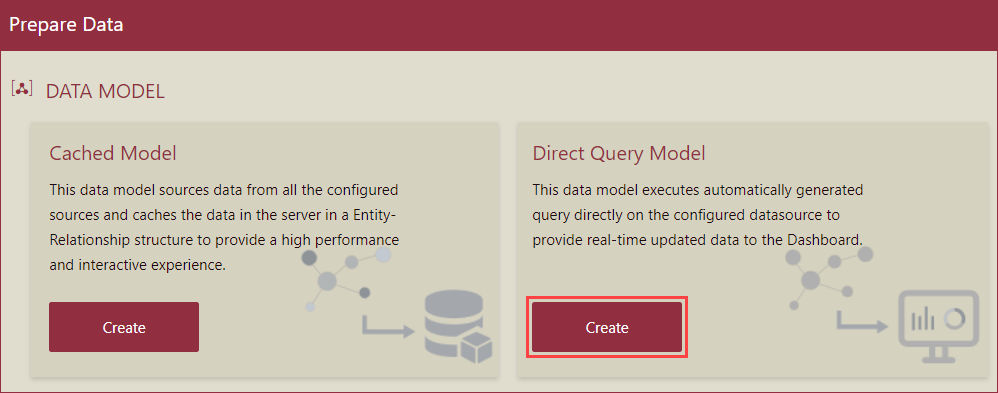
To create a new Direct Query Model, click the Create button.
In the Create Data Model window that appears, set the Data Source Type to Embedded Data Source.
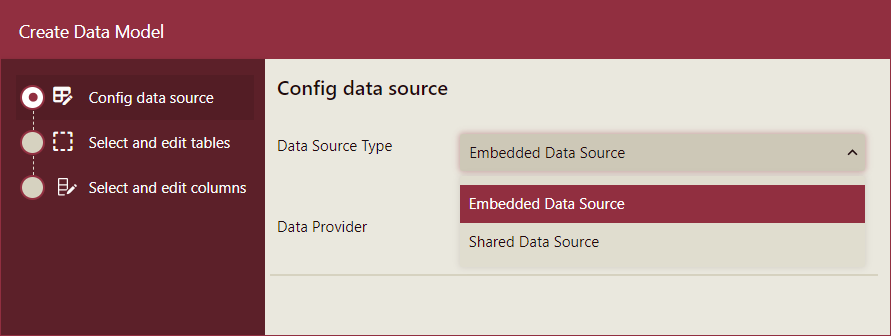
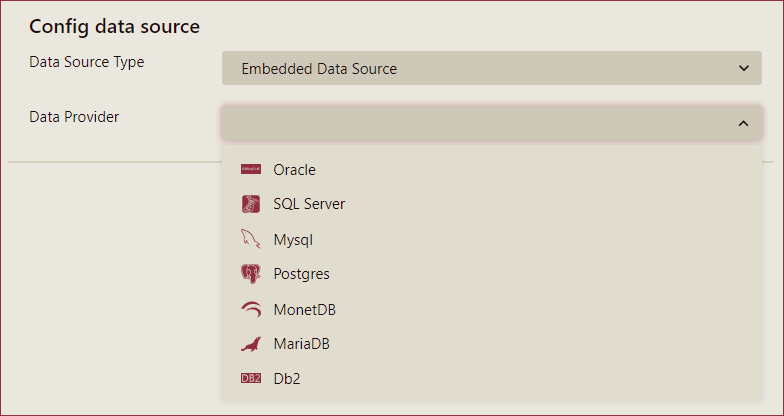
Select the Data Provider you want to use for the Direct Query Model. The supported data providers are Oracle, SQL Server, MySQL (version 8.0 or above), Postgres, MariaDB, IBM DB2, BigQuery, TiDB, and DM.
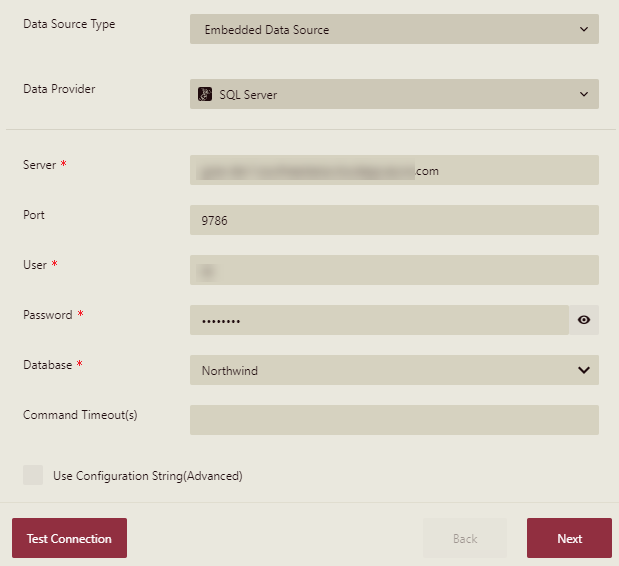
Based on the chosen data provider, the configuration details for the data source can vary. Let's say you chose the SQL Server provider as shown below.
You can connect to the data source by either entering the configuration details in the respective fields or directly through the connection string.
To verify the data source connection, use the Test Connection button, and then click the Next button to proceed further.
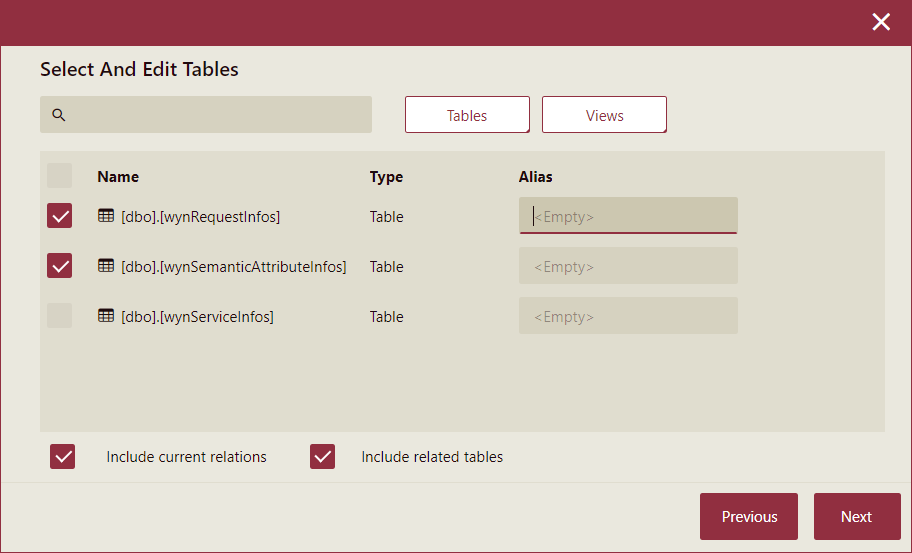
Select the tables, views, and materialized views from the list using the checkboxes. Filter out tables and views using the Tables and Views buttons. Use the Alias column to label the table or view names. Click Next to proceed. You can use the following options as well -
Include current relations - This option is used to include or exclude the existing relations in the selected tables and views.
Include related tables - This option is used to include or exclude the related tables in the selected tables and views. It is disabled in case you have not included current relations in the selected tables and views.
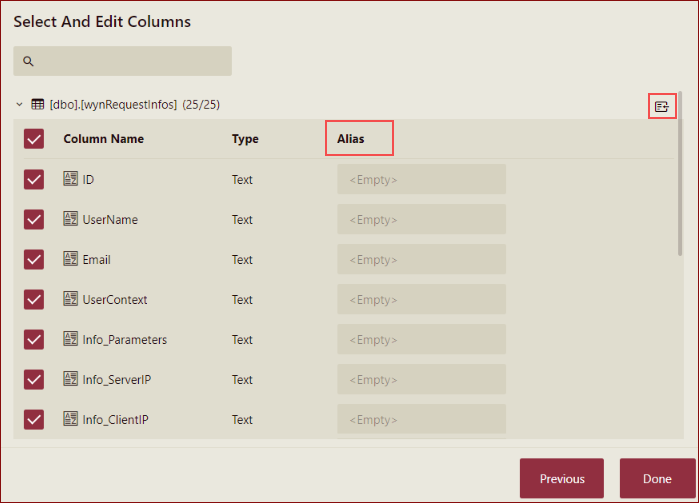
Select or unselect the columns for tables/views selected in the previous step using the checkboxes. You can also add aliases for the columns. You can generate the Alias based on data source mapping or database description by clicking this button
 . It is supported for SQL Server, Oracle, MySQL, TiDB, and Doris databases.
Click the Done button.
Note: You can view and select materialized views in the Select Tables and Views section when using a PostgreSQL data provider.
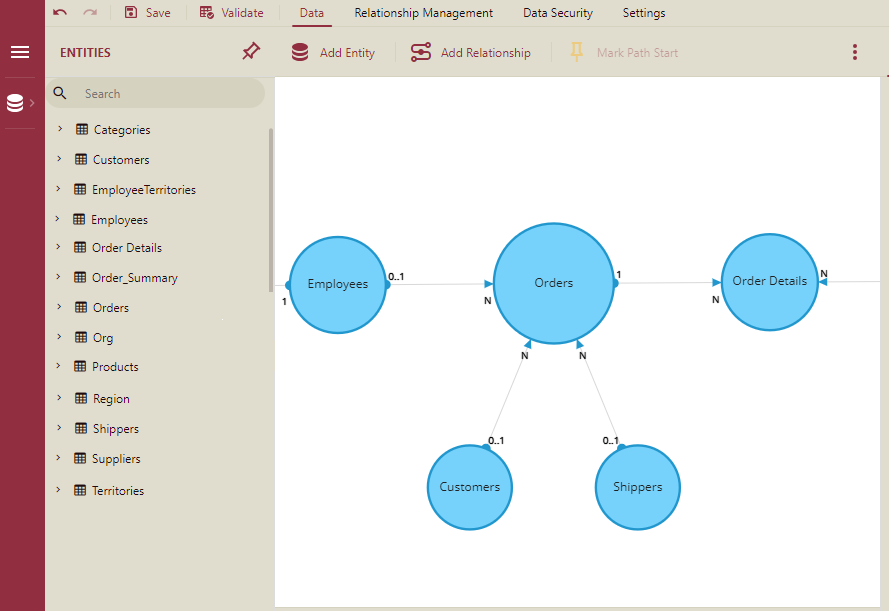
Based on the defined settings, a Direct Query Model is created as shown below.
Using Shared Data Source
A shared data source is one that already exists on the portal and can be reused to create different Direct Query Models. It is best suitable in scenarios where you want to use an existing data source that takes advantage of the data-pulling capabilities provided by a data model.
On the Resource Portal, navigate to the Create tab and then select Prepare Data for the dashboard.

Click the Create button to create a Direct Query Model for the dashboard.
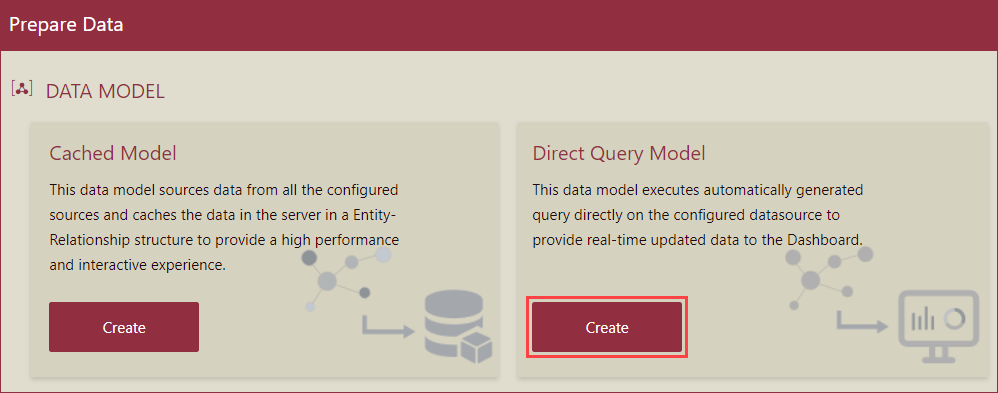
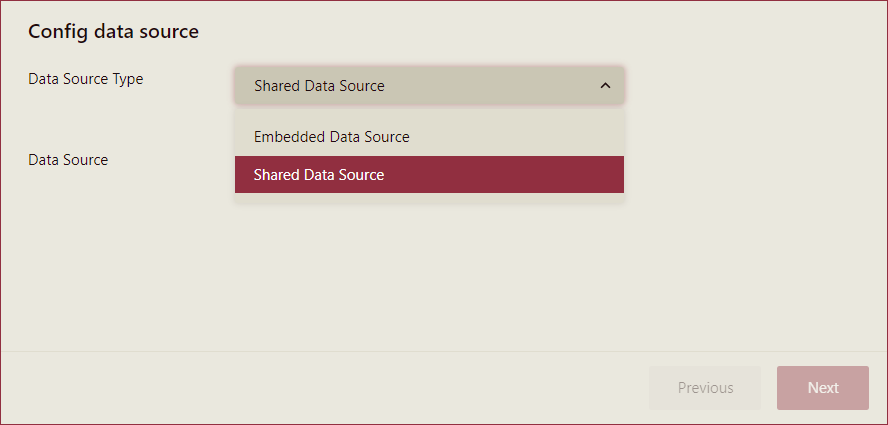
In the Create Data Model window that appears, set the Data Source Type to Shared Data Source.
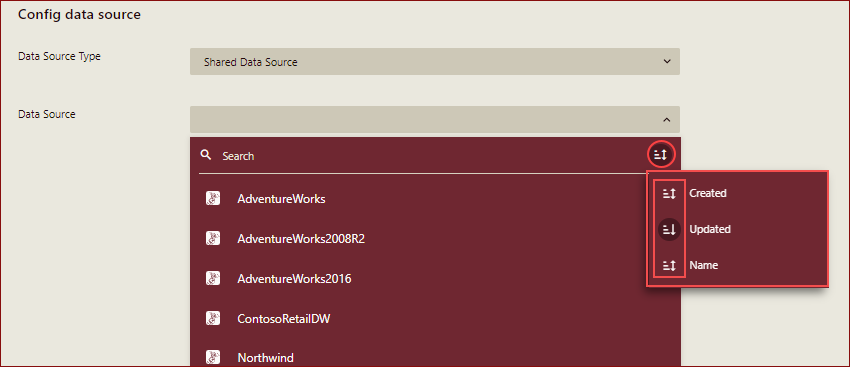
Select a data source from the Data Source dropdown for the Direct Query Model. The Data Source dropdown lists the data sources that are available on the server and supports Direct Query Models, including the following:
RDBMS Datasource - SQL Server, MySQL (version 8.0 or above), Oracle, Postgres, MariaDB, IBM DB2, Google BigQuery, JSON, Snowflake, and ClickHouse.
File Type Datasource - CSV, Excel, and XML.
Note: To access the File Type data sources in the Data Source dropdown list, add the File Extraction Setting in the wyn.conf file of the Wyn application.
You can click the sort icon
 to sort the data sources by Created Date, Updated Date, or Name. You can sort them in ascending or descending order.
Note: The data source list displays the data sources with sufficient permissions only, i.e., Execute/Create, Read/Write, and Full Control.
Click the Next button to proceed further.
Select tables, views, and materialized views to include in the Direct Query Model. You can filter the tables or views (including materialized views) in the list using the Tables or Views button, respectively. Use the Alias column to label names for the selected tables, views, or materialized views. Uncheck the Include current relations option to exclude the existing relations in the selected tables and views. You can uncheck the Include related tables option to exclude the related tables in the selected tables and views. Click Next to proceed.
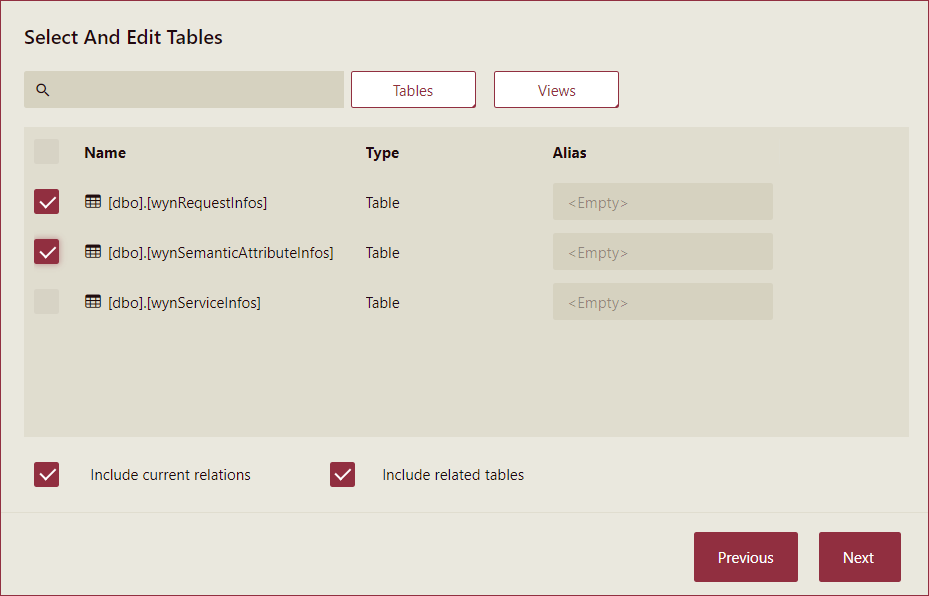
Note: You can view and select materialized views from the Select Tables and Views section while using the PostgreSQL data source.
Select or unselect the columns for tables/views selected in the previous step using the checkboxes. You can also add aliases for the columns. You can generate the Alias based on data source mapping or database description by clicking this button
 . It is supported for SQL Server, Oracle, MySQL, TiDB, and Doris databases.
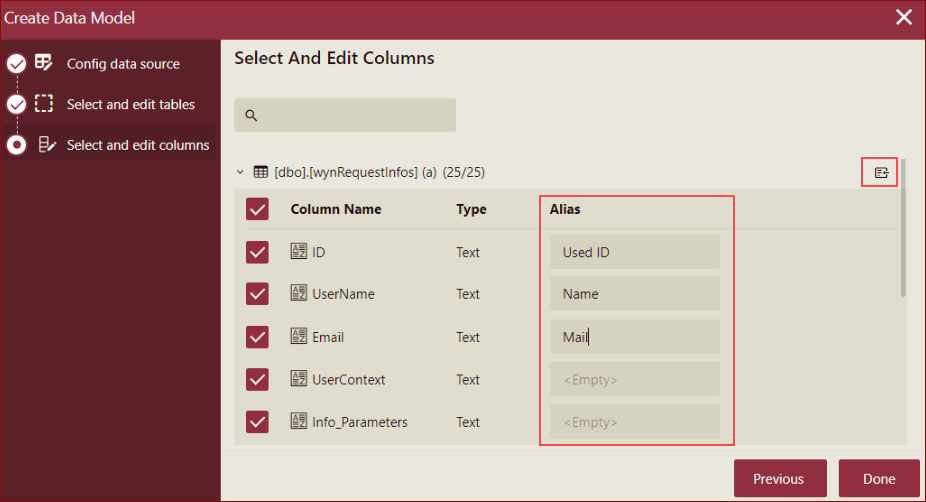
Click the Done button.
Based on the defined settings, a Direct Query Model is created as shown below.
The Data Model Designer displays the mapped names of entities and attributes if the chosen data source uses table/column mapping.

Add Data Security Filters for Entities
You can configure security filters for entities with multiple conditions in the direct query model designer. To add the data security filters, follow the steps given below.
In the model designer, select the entity for which you need to add the data security filters and click the Data Security tab.
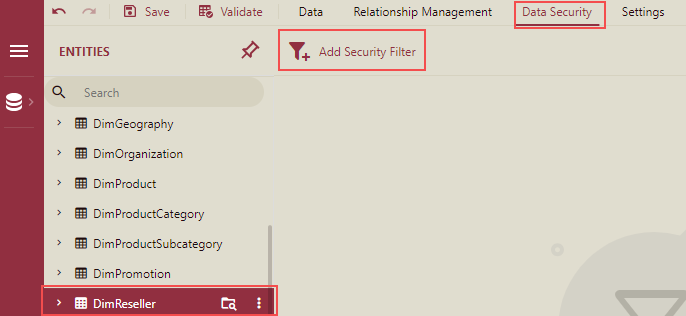
Add Security Filter option is displayed.
Click the Add Security Filter option. The configuration of Groups and Rules is displayed. These configurations have conditions like AND or OR.
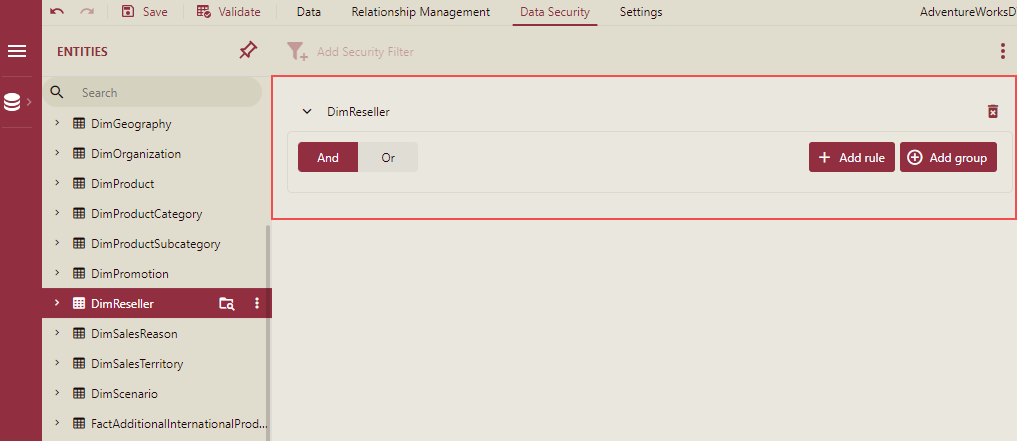
Add the security filters. In this example, we will add 2 Rules in a Group.
Click the Add Group button.
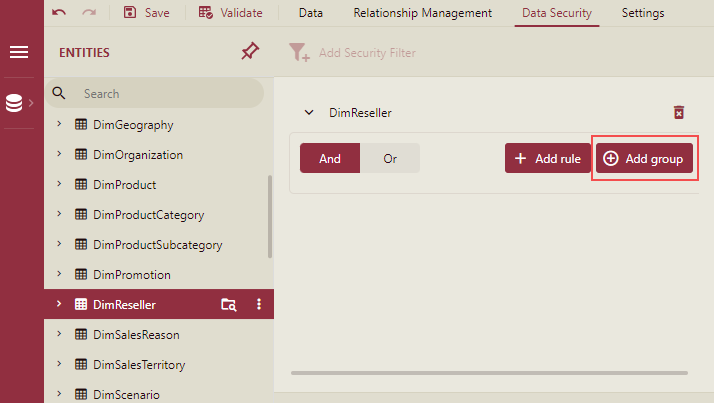
A group will be added with the option to add more groups or rules, as shown below.

By default, a rule with an And condition is added. You can modify the rule. In this example, we have added two rules with And conditions in this group, as shown below.

Once the data model is saved, you can use this model to create a dashboard, and the dashboard will display the filtered data based on the data security filters applied in this model.

Group and Rules Conditions
You can configure Groups and Rules, using 'AND' or 'OR' conditions.
Each Rule contains the following: Left Type, Left Value, Data Type, Operator, Right Type, and Right Value.
Left Type value options: Attribute, User Context, Organization Context, Constant.
When the Left Type option selected is Context, the Left Value is a single-valued Context Value.
Data Type value options: Text, Number, Boolean, Date, DateTime, Guid.
When the Left Type option selected is Attribute, then Data Type is not allowed to be modified, and the value of Data Type will be the Data Type of the selected Field.
The optional Operator values corresponding to the Data Type are listed in the following table.
Data Type
Optional Operator
Text
=, !=, Is, NotIs, In, NotIn, Contains, NotContains, StartsWith, NotStartsWith, EndsWith, NotEndsWith.
Number
=, !=, <, <=, >, >=, Is, NotIs, In, NotIn.
Boolean
=, !=, Is, NotIs.
Date
=, !=, <, <=, >, >=, Is, NotIs.
DateTime
=, !=,
Guid
=, !=, Is, NotIs, In, NotIn.
Right Type value options: User Context, Organization Context, Constant.
A few important points to be considered while adding data security
When an Attribute is deleted, the security filter that uses the attribute is automatically deleted.
When the Add group button is clicked, an And group is added, and a default Rule is added.
When all Rules and Groups in a Group are deleted, the Group is deleted, and the root Group is not deleted.
The depth of the Group is capped at 20.
Synchronize Data Source Changes with Data Model
If the data source is changed, then the data model designer will notify you and reload/refresh changes, and you can continue to edit the changed tables instead of deleting them from the data model. So, you can synchronize the data source changes with the data model using the Compare Datasources and Sync Schema options under the Settings tab.

Scenarios that can change the data source are listed below.
Column Changed: Delete a column, add a new column, rename a column, and change the column type.
Table Changed: Delete a table, Rename a table, and Add a new table.
Customized Table (SQL Query): Edit the SQL directly.
Steps for Synchronizing the Data Source
Change the data source, for example, if columns are added to the data source, then:
Click the Settings tab and click the Compare Datasources button.

An error message is displayed.

Click the Show Details button. The error details will be displayed as shown below.
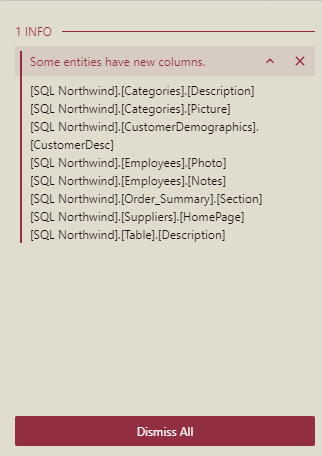
Click Dismiss All on the error message to close the dialog box.
Click the Sync Schema button to synchronize the data source changes.
If all entities are loaded successfully, the data changes are synchronized with the data model, and the Sync Schema button is disabled.
There is a Sync table data and structure option on the Entity tree node as well.
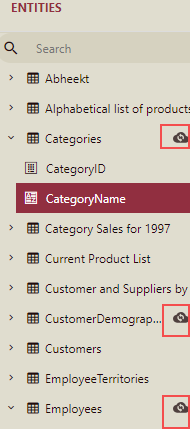
Click this button to sync the current entity. If the data is loaded successfully, the sync button of the current entity will be removed. If the current successfully reconfigured entity is the last in the model that can be synchronized, then the batch synchronization button will be disabled.
Save Direct Query Model
Click the Save button to use the Direct Query Model for binding data in dashboards.
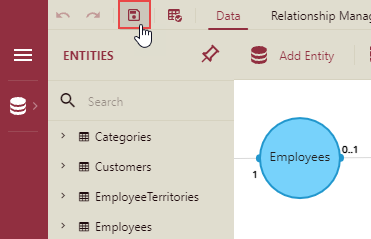
In the Save As dialog box, enter the Direct Query Model name and comment (if any) as shown.
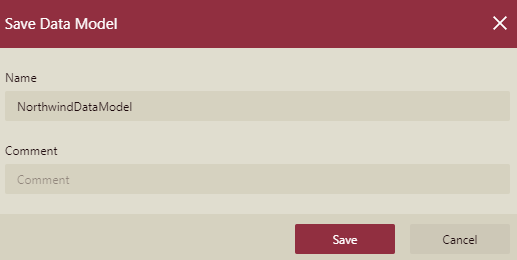
Then, click the Save button.
The saved direct query model will appear in the Data Model tab of Document Types.
