Platform
-
Interactive DashboardsCreate interactive BI dashboards with dynamic visuals.
-
End-User BI ReportsCreate and deploy enterprise BI reports for use in any vertical.
-
Wyn AlertsSet up always-on threshold notifications and alerts.
-
Localization SupportChange titles, labels, text explanations, and more.
-
Wyn ArchitectureA lightweight server offers flexible deployment.
Featured from Blog
-
 Wyn Enterprise 7.1 is ReleasedThis release emphasizes Wyn document embedding and enhanced analytical express...
 -
 Choosing an Embedded BI Solution for SaaS ProvidersAdding BI features to your applications will improve your products, better serve your customers, and more. But where to start? In this guide, we discuss the many options.
Resource Library
-
Visual GalleryInteractive sample dashboards and reports.
-
BlogExplore Wyn, BI trends, and more.
-
WebinarsDiscover live and on-demand webinars.
-
Customer SuccessVisualize operational efficiency and streamline manufacturing processes.
-
Knowledge BaseGet quick answers with articles and guides.
-
VideosVideo tutorials, trends and best practices.
-
WhitepapersDetailed reports on the latest trends in BI.
New Guide
-
 Choosing an Embedded BI Solution for SaaS ProvidersAdding BI features to your applications will impr...
 -

- Getting Started
- Administration Guide
-
User Guide
- An Introduction to Wyn Enterprise
- Document Portal for End Users
-
Data Governance and Modeling
- Data Binding Concepts
-
Introduction to Data Sources
- Connect to Oracle
- Connect to SQL Server
- Connect to MySQL
- Connect to Postgres
- Connect to Snowflake
- Connect to SQLite
- Connect to DM
- Connect to TiDB
- Connect to AnalyticDB(MySQL)
- Connect to GreenPlum
- Connect to TimeScale
- Connect to Amazon Redshift
- Connect to MariaDB
- Connect to ClickHouseV2
- Connect to MonetDB
- Connect to Kingbase
- Connect to GBase8a
- Connect to GBase8s
- Connect to ClickHouse
- Connect to IBM DB2
- Connect to IBM DB2 iSeries/AS400
- Connect to Doris
- Connect to OceanBase(MySQL)
- Connect to Kylin
- Connect to StarRocks
- Connect to Google BigQuery
- Connect to Hive (beta)
- Connect to ElasticSearch (beta)
- Connect to Hana
- Connect to Excel
- Connect to JSON
- Connect to CSV
- Connect to XML
- Connect to MongoDB
- Connect to ElasticSearchDSL
- Connect to InfluxDB
- Connect to SSAS
- Connect to ODBC
- Connect to OData
- Connect to TDengine
- Connect to Teradata
- Connect to Custom Provider
- Introduction to Data Model
- Introduction to Direct Query Model
- Introduction to Cached Model
- Introduction to Datasets
- Data Flow Designer
- Secure Data Management
- How To
- WynSQL
- View and Manage Documents
- Working with Resources
- Working with Reports
- Working with Dashboards
- Working with Notebooks
- Wyn Analytical Expressions
- Section 508 Compliance
- Subscribe to RSS Feed for Wyn Builds Site
- Developer Guide
Connect to Excel
To create an Excel data source in Wyn Enterprise, follow these steps.
On the Resource Portal, navigate to Create (+) > Create Data Source.
Select Excel in the data source list on the left or in the icon view on the right.
Fill in the database configuration information for the selected data source.
| Field | Description |
|---|---|
| Name* | The name for the data source that you want to specify. |
| SourceType | Select from the list that displays two types - Local or Web. |
| Data Source* | If the source type is Local, click Select File to select the local source file. If the source type is Web, enter the source address. |
| Request Method | Select a request method - GET or POST. |
| Authentication Method | If the source type is Web, you need to set the authentication mode. You can choose from None, Basic and OAuth2.If the AuthMode is Basic, you need to set the user name and password.If the AuthMode is OAuth2, you need to set TokenEndpoint, ClientID, ClientSecret, UserName, Password, and Scope. |
| File Password | If the Excel file is encrypted, enter the Excel password. |
| Use First Row as Header | If this option is checked, the content of the first row in the file will be used as the column header; if this option is not checked, the default column name is Excel default column name: A, B, C... |
| Load Hidden Sheets | If this option is enabled, a hidden table will be loaded. |
| Convert empty cell to DBNull | If this option is enabled, empty cells are converted to Null. If this option is disabled, empty cells are handled as follows:- The column type is String, the default value is: "";- The column type is DateTime, and the default value is: 0001-01-01T00:00:00 ;- The column type is Number, and the default value is 0. |
* Required fields
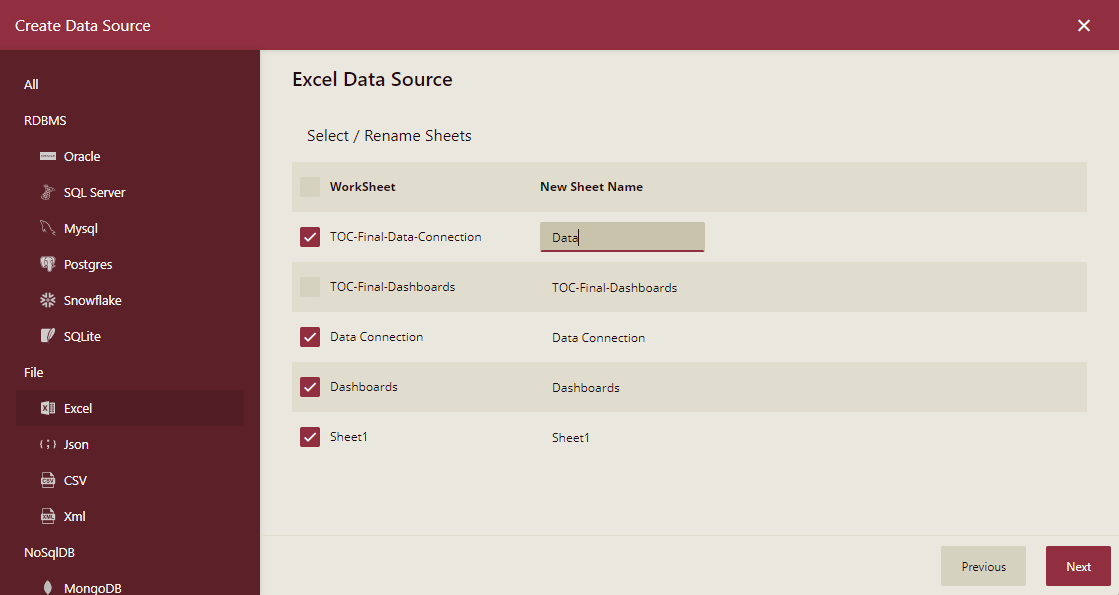
Click Next. You will be asked to select or rename sheets of the excel file.
Select and rename sheets as necessary and click Next.
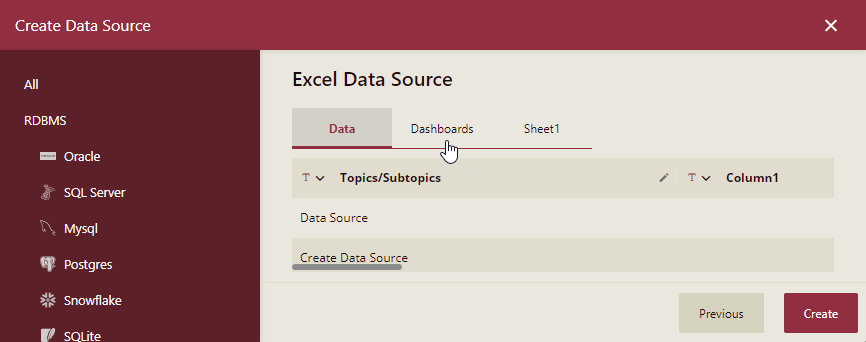
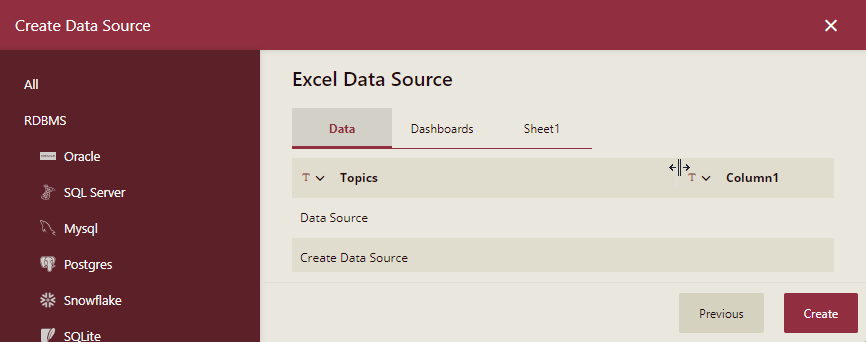
At this step, you can switch tables to view data, modify column names, and adjust column data format. The following operations are available:
- Click the table name at the top to switch data tables, similar to switching between different sheets in an Excel file.
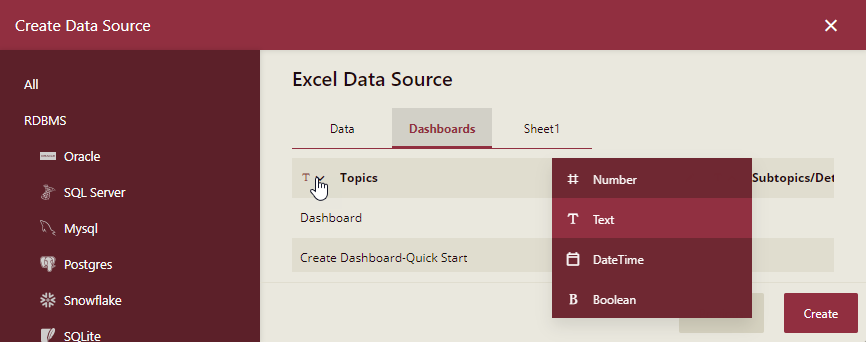
- Click the down arrow to modify the data format of the current column.
- Hover the mouse to the right of the column name to display the edit icon that you can click to edit the column name.
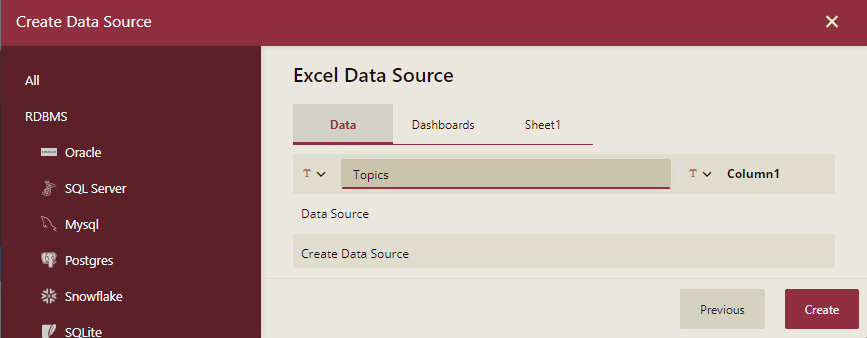
- Hover the mouse to the middle of the column name to display the column width adjustment symbol, and you can adjust the preview column width by dragging.
- Click the table name at the top to switch data tables, similar to switching between different sheets in an Excel file.
Click Create after the connection is successful.
You can view the added data source in the Categories tab of the Resource Portal.