-
Interactive DashboardsCreate interactive BI dashboards with dynamic visuals.
-
End-User BI ReportsCreate and deploy enterprise BI reports for use in any vertical.
-
Wyn AlertsSet up always-on threshold notifications and alerts.
-
Localization SupportChange titles, labels, text explanations, and more.
-
Wyn ArchitectureA lightweight server offers flexible deployment.
-
 Wyn Enterprise 7.1 is ReleasedThis release emphasizes Wyn document embedding and enhanced analytical express...
 -
 Choosing an Embedded BI Solution for SaaS ProvidersAdding BI features to your applications will improve your products, better serve your customers, and more. But where to start? In this guide, we discuss the many options.
-
Visual GalleryInteractive sample dashboards and reports.
-
BlogExplore Wyn, BI trends, and more.
-
WebinarsDiscover live and on-demand webinars.
-
Customer SuccessVisualize operational efficiency and streamline manufacturing processes.
-
Knowledge BaseGet quick answers with articles and guides.
-
VideosVideo tutorials, trends and best practices.
-
WhitepapersDetailed reports on the latest trends in BI.
-
 Choosing an Embedded BI Solution for SaaS ProvidersAdding BI features to your applications will impr...
 -

- Getting Started
- Administration Guide
-
User Guide
- An Introduction to Wyn Enterprise
- Document Portal for End Users
- Data Governance and Modeling
-
View and Manage Documents
- View Documents
- Duplicate a Document
- Delete a Document
- Rename a Document
- Copy URL
- Hide a Document
- Share a Document
- Document Binder
-
Schedule a Task
- Report Bursting
- Task Delegation
- Document Binding
- Create a Scheduled Task to Run a Report
- Create a Scheduled Task to Run a Dashboard
- Create a Scheduled Task to Run a Datasource
- Create a Scheduled Task to Run a Dataset
- Create a Scheduled Task to Run a Data Model
- Create a Scheduled Task to Print a Report
- Create a Scheduled Task to Cache a Report
- Create a Scheduled Task on a SharePoint Site
- Enable Report Caching
- Restore Deleted Documents
- Monitor Data with Alerts
- Advanced Filter Settings
- Working with Resources
- Working with Reports
- Working with Dashboards
- Working with Notebooks
- Wyn Analytical Expressions
- Section 508 Compliance
- Subscribe to RSS Feed for Wyn Builds Site
- Developer Guide
Create a Scheduled Task to Print a Report
On the Document Portal, select the report you want to schedule.
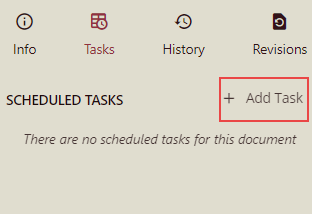
With the report selected, click the Info button in the top-right corner of the portal.
In the Info panel that appears, navigate to the Tasks tab and click the + Add Task button to create a new scheduled task.
Enter the task description in the Details field.
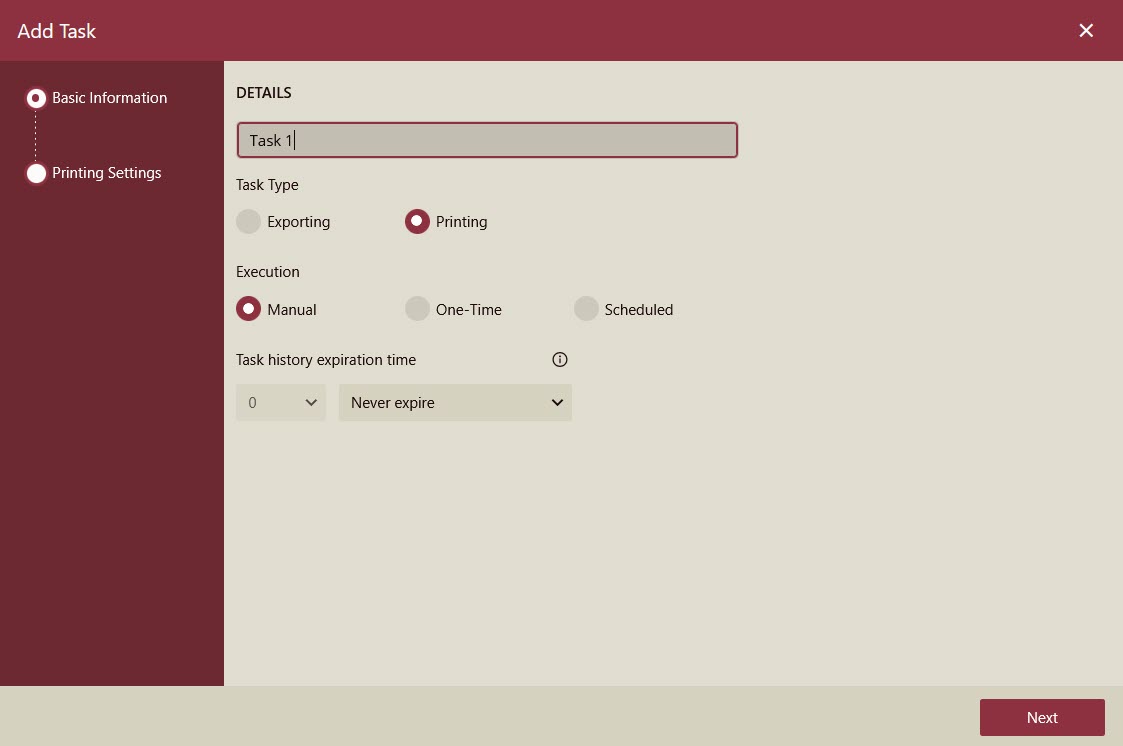
By default, tasks are manually scheduled in Wyn Enterprise. Choose Printing from the Task Type. If the Execution field is set to One-Time, then you can specify the Start date-time and Executing Timezone as per your requirement.
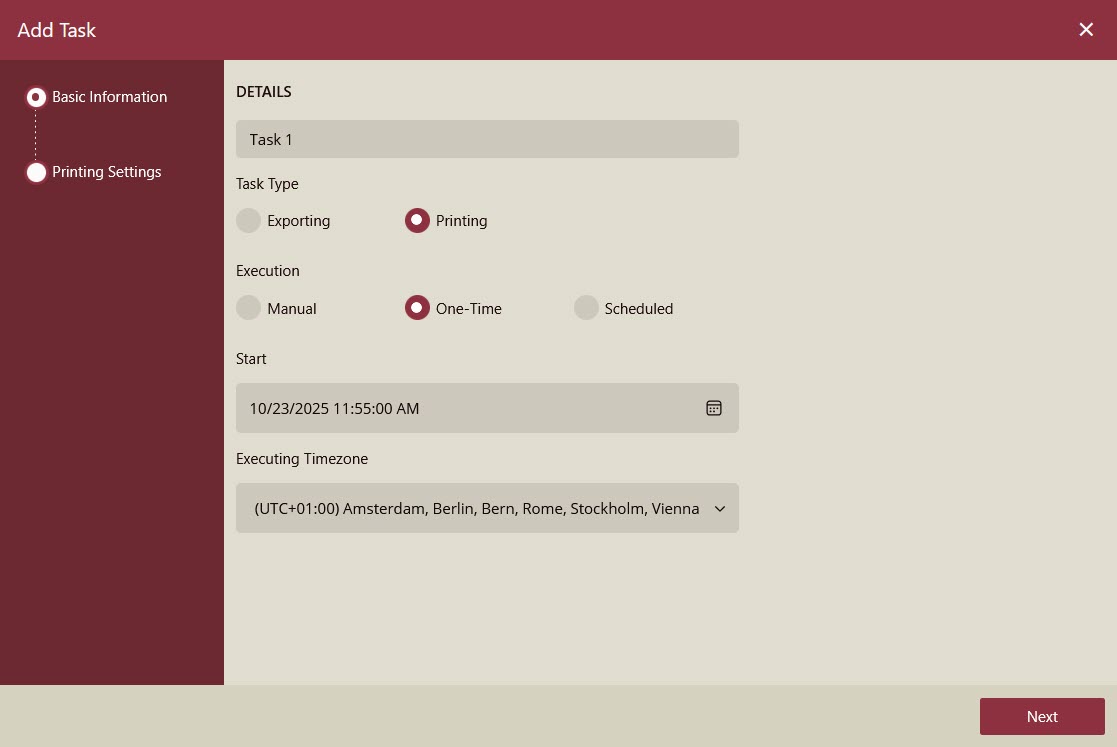
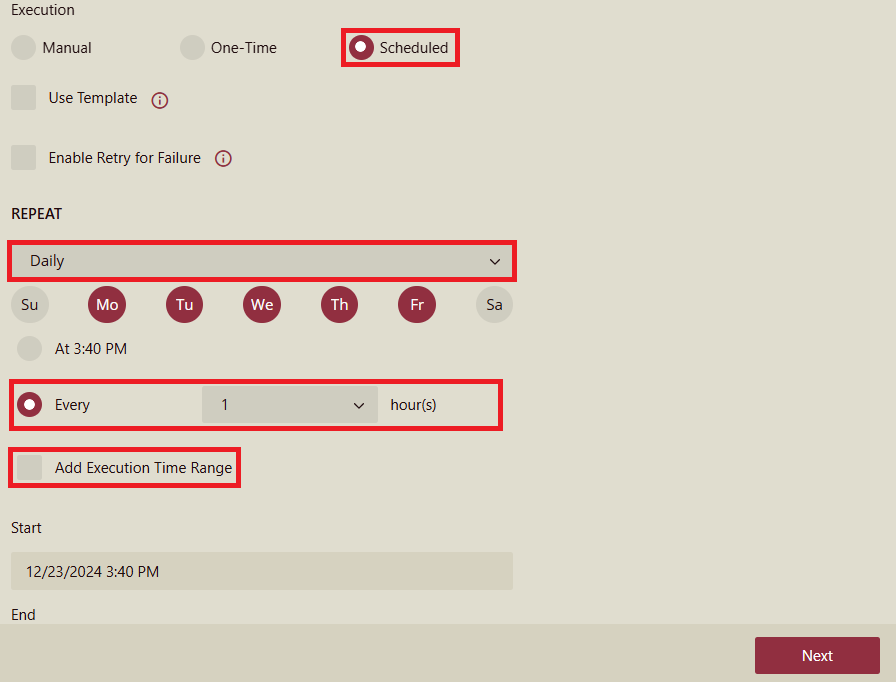
To create a task that runs at fixed intervals of time, set the Execution field to Scheduled.
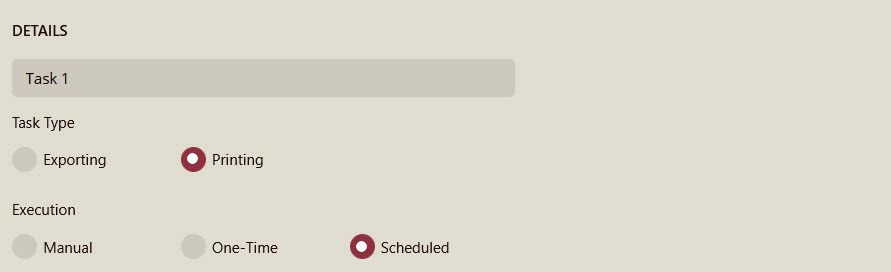
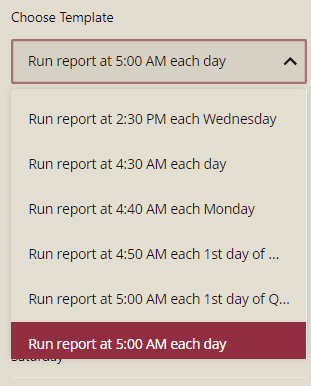
From the Choose Template dropdown, select a suitable schedule template that matches your requirements. The list shows both the built-in and custom templates on the server. For more information on how to create a custom schedule template, visit this article.
The Start and the End fields pick the default values specified in the chosen schedule template. These default values are unchangeable.

Add Execution Time Range option allows specifying a time range for daily recurring tasks within which the task should only execute. To select the time range:
Select Daily for REPEAT and select Every hour(s) for the execution time.
The Add Execution Time Range check box will appear.
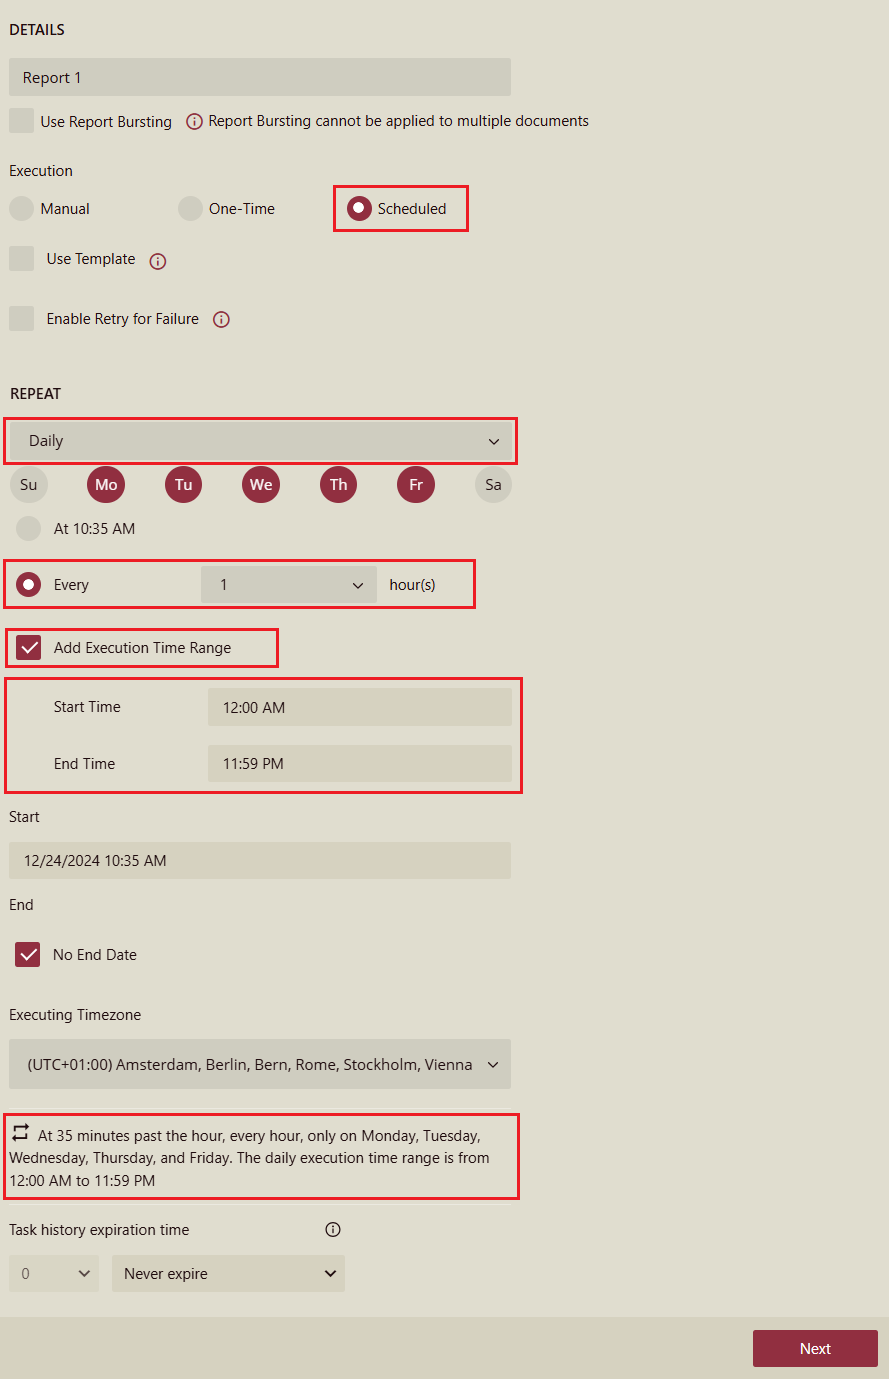
Select Add Execution Time Range, and the Start Time and End Time selectors will appear to select the time range during which the task is executed in a day.
The default value of Start Time is "12:00 AM".
The default value of End Time is "11:59 PM."
After adding the execution time range, the description of the execution time range will be displayed in the task description.
There are two ways to modify the Start Time and End Time:
Selection box
Input text
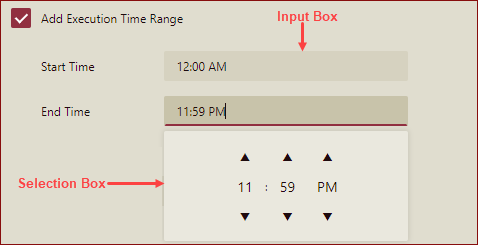
The Start Time and End Time must have a value.
Please note the following for Add Execution Time Range:
When the start time and end time are set incorrectly, the Create Task button cannot be clicked. Requirements for correct execution time range setting:
The start time and end time cannot be empty.
The time should be correct, and the format is "hh: mm AM”.
The start time must be earlier than the end time.
If there is an Execution Time Range in the task template, when creating the task using this template, the Execution Time Range information of the template will be displayed in the description of the task. The description is the same as the description of the Execution Time Range on the daily schedule task.
When creating tasks for reports and creating schedule templates, if the user selects REPEAT as Daily, the user is allowed to add the Execution Time Range on the day.
Server Printing
After finishing adding the Execution specifications, click Next to proceed to Server Printing.
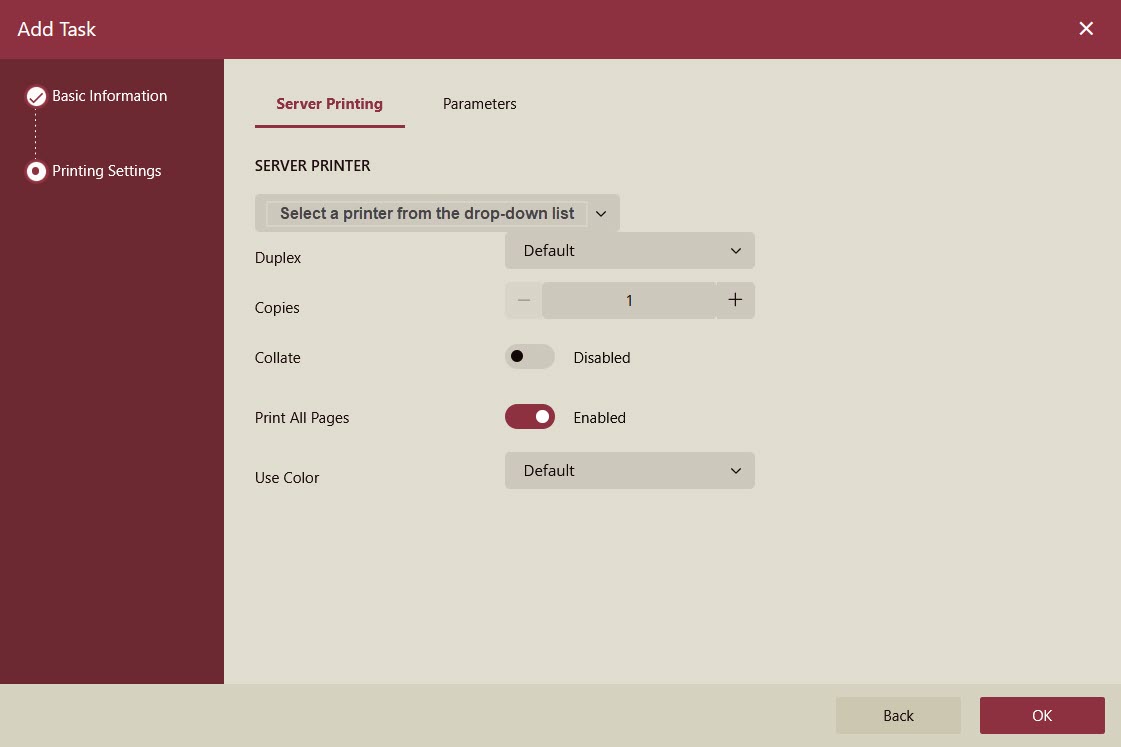
This section allows users to configure key settings for server-side printing tasks.
SERVER PRINTER
Description: Select the printer model to be used for the server-side print job.
Field Type: Drop-down.
Duplex
Description: Choose whether to print on one or both sides of the paper.
Field Type: Drop-down.
Values:
Default.
Copies
Description: Set the number of copies to print.
Field Type: Counter with "+" and "-" buttons.
Default Value:
1.
Collate
Description: Enable printing multi-page documents in sequence (e.g., 1-2-3, 1-2-3).
Field Type: Toggle Switch.
Current Value:
Disabled.
Print All Pages
Description: Enable printing all pages of the document. Disable to specify a page range.
Field Type: Toggle Switch.
Current Value:
EnabledandDisabled.Behavior When Disabled: Displays "From - Page To Page'' input.
Use Color
Description: Choose whether to print in color, grayscale, or use the printer's default setting.
Field Type: Drop-down.
Current Values:
Enabled,Disabled,Default.
After finishing configuring key settings for server-side printing tasks, click OK.
To Manage a Scheduled Task
To manage a scheduled task, click the Actions button  in the Tasks tab. You can use this button to disable, edit, duplicate, or delete a scheduled task.
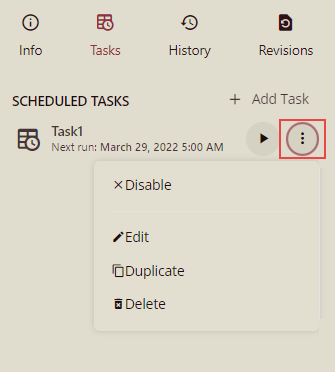
Disable - Deactivates all the future scheduled executions for that task. You can resume the task execution once you enable the scheduled task by clicking the Actions button.
Edit - Enables you to modify the existing information for that task.
Duplicate - Creates a new task with all the settings defined the same as in the originally scheduled task. This way, you can reuse the settings and save time and effort by not recreating a scheduled task from scratch.
Delete - Discards the scheduled task. Please note that once you delete a scheduled task, it is permanently deleted.