- Getting Started
- Administration Guide
-
User Guide
- An Introduction to Wyn Enterprise
- Document Portal for End Users
- Data Governance and Modeling
- View and Manage Documents
- Working with Resources
- Working with Reports
- Working with Dashboards
- Working with Notebooks
- Wyn Analytical Expressions
- Section 508 Compliance
- Subscribe to RSS Feed for Wyn Builds Site
- Developer Guide
Export Report
In Wyn Enterprise, you can export a report to different file formats. Depending on your needs, you can choose between format-preserving export formats such as PDF, Excel, Word, and Images, which are suitable as a backup or digital archive of report runs or for display or analysis in other applications. Alternatively, you can choose data-only export types such as CSV (compressed), CSV Raw (uncompressed), Excel Data (report data in an Excel workbook), JSON, Text, and XML, which export the report data without the formatting for further analysis or to be imported into other systems.
Wyn Reports can be exported either from the report viewer, from the document portal, or from the resource portal. When exporting a report, you choose the export format, and optionally, you can customize the export properties, which differ depending on the export file type.
Exporting Reports from the Report Viewer
Follow the steps below to export a report while previewing.
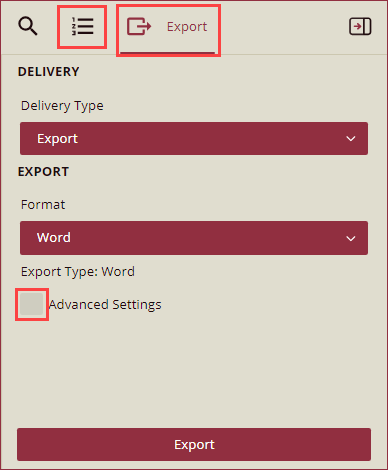
In the Report Viewer, click the Export button in the top-right corner of the viewer to expand the Export panel on the right side of your screen. By default, the Delivery Type in the Export settings is set as Export.

Choose the export file format from the list. If you want to customize the exported file, make sure you check the Advanced Export Settings checkbox to customize the exported file. Check the details about the properties of the export type you have chosen in the Advanced Export Settings section below.
After you set the advanced properties of the selected export format, click the Export button to export the report. You may need to provide values if the report is a parameterized report. The report will be exported and saved to the Downloads folder of your system.
Exporting Reports from the Documents List
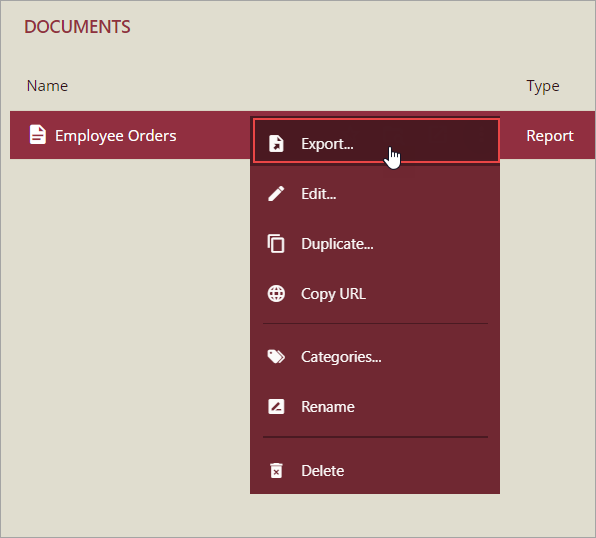
To export from the document list in the Document Portal:
Select the report you want to export.
Click the Ellipses context menu next to the selected report and click Export... or click the export button from the toolbar at the top right of the page.

In the Export dialog box, make sure you check the Advanced Export Properties checkbox if you want to customize the export and set the properties in the Advanced Properties dialog box. Check the details about the properties of each export type in the Advanced Export Settings section below.
Specify the parameter(s) for the report, if any. In case the report has no parameter(s), this screen will not appear, and the report will be exported to the chosen file type.
Click the Export button. The exported file will be saved to the Downloads folder.
Dynamic Export File Name
All export types support dynamically generating the file name of the export. The file name of the exported report can be a static string or could be dynamically generated based on a template string that can include Rendered Report Values. Rendered Report Values can be defined in the report Info Panel in the Report Designer, which can then be used in the export file name template string. You can choose one of the Rendered Report Values from the pull-down or type its name enclosed in braces, for example, {Title}. The template will be used to generate the export file name.

You can also enable timestamps to add the timestamp at the time of export to the file name.
Advanced Export Settings
Each export file type has different properties that can be customized. Refer to the following pages for a list of the properties that can be customized for each export type:


