-
Interactive DashboardsCreate interactive BI dashboards with dynamic visuals.
-
End-User BI ReportsCreate and deploy enterprise BI reports for use in any vertical.
-
Wyn AlertsSet up always-on threshold notifications and alerts.
-
Localization SupportChange titles, labels, text explanations, and more.
-
Wyn ArchitectureA lightweight server offers flexible deployment.
-
 Wyn Enterprise 7.1 is ReleasedThis release emphasizes Wyn document embedding and enhanced analytical express...
 -
 Choosing an Embedded BI Solution for SaaS ProvidersAdding BI features to your applications will improve your products, better serve your customers, and more. But where to start? In this guide, we discuss the many options.
-
Visual GalleryInteractive sample dashboards and reports.
-
BlogExplore Wyn, BI trends, and more.
-
WebinarsDiscover live and on-demand webinars.
-
Customer SuccessVisualize operational efficiency and streamline manufacturing processes.
-
Knowledge BaseGet quick answers with articles and guides.
-
VideosVideo tutorials, trends and best practices.
-
WhitepapersDetailed reports on the latest trends in BI.
-
 Choosing an Embedded BI Solution for SaaS ProvidersAdding BI features to your applications will impr...
 -

- Getting Started
- Administration Guide
-
User Guide
- An Introduction to Wyn Enterprise
- Document Portal for End Users
- Data Governance and Modeling
- View and Manage Documents
- Working with Resources
- Working with Reports
- Working with Dashboards
- Working with Notebooks
- Wyn Analytical Expressions
- Section 508 Compliance
- Subscribe to RSS Feed for Wyn Builds Site
- Developer Guide
Info panel
The Info panel in the report designer enables you to configure report-level settings, including default preview modes, localization references, permissions, and toolbar options.
To set the report information properties, follow the steps given below:
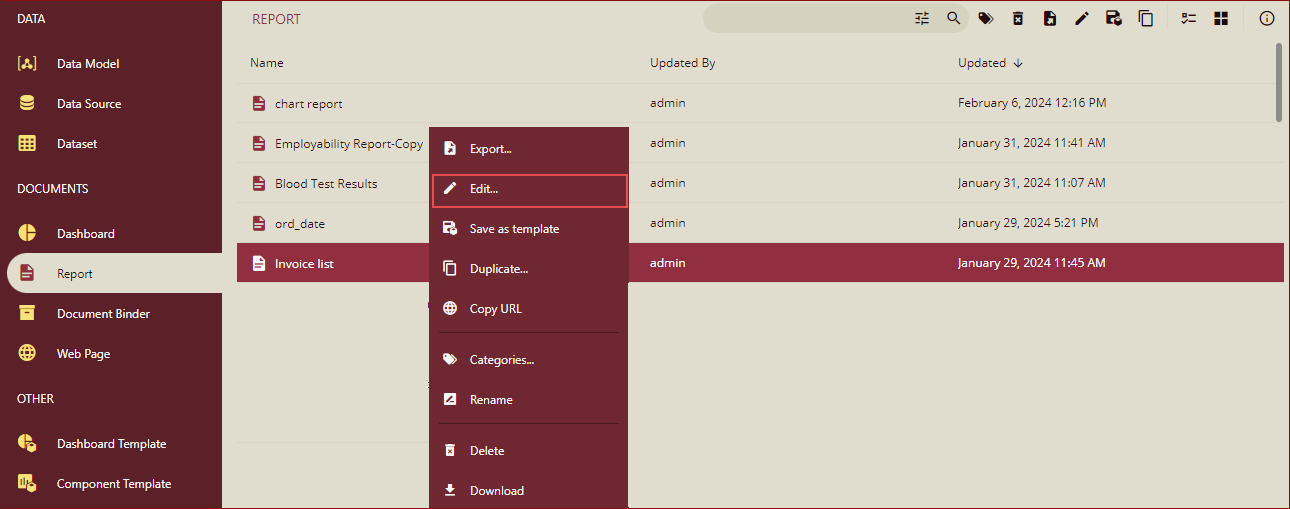
On the Document/Resource Portal, select the report for which you want to set the information properties, click the Ellipses button next to the selected report, and select the Edit option from the list.
The report designer is displayed. Click the Info button in the top-right corner of the designer.
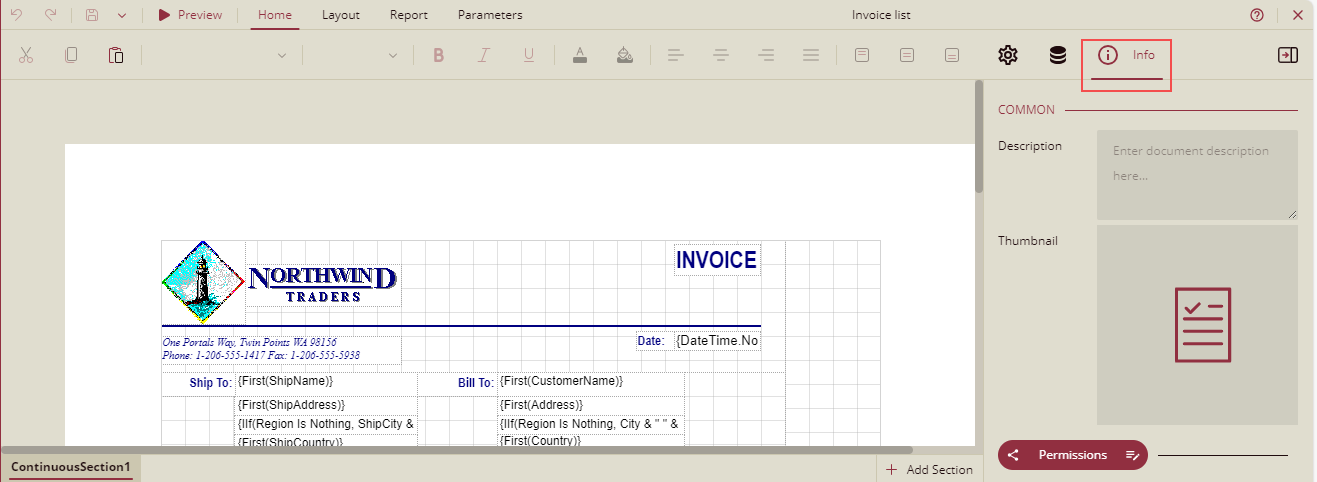
The following properties are displayed.

Property Description
Common
Description: Add the report description here.
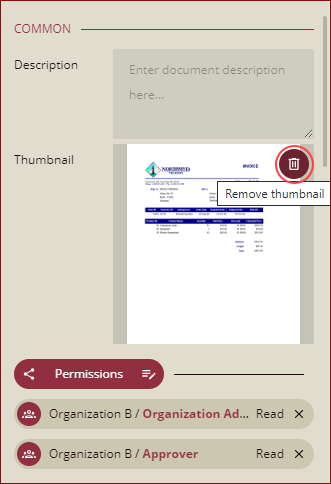
Thumbnail: You can add a thumbnail from here by clicking and selecting the thumbnail image. You can delete the thumbnail by clicking the Remove thumbnail option. For details, refer to Generate Thumbnail.
Permissions: By clicking the Permissions button, you can select the roles and their permissions. For details, refer to Assign Permissions.
Preview
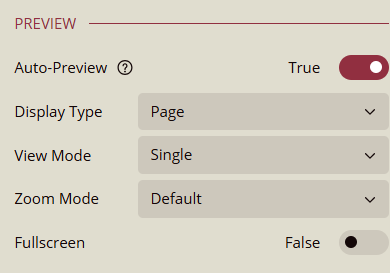
Auto-Preview
Default:
TrueWhen
Trueis enabled, the report preview starts automatically if all parameter values are defined and valid.When
Falseis disabled, the report does not run automatically. The Parameters Panel is displayed, and the user must click the Preview button to initiate the process.Scope: Auto-Preview is a per-report setting and does not apply to child reports. Child reports always auto-preview in "Jump To Report" scenarios.
Fast Mode Dependency: Fast Mode is disabled when Auto-Preview is False, as Fast Mode requires auto-preview behavior.
Hidden Parameters: If all report parameters are hidden, Auto-Preview has no effect (Parameter Panel is not shown anyway).
Show Parameter Panel by Default:
If True and Auto-Preview = False → Panel is shown on open and hidden after Preview is clicked.
If False → Panel is always visible, regardless of Auto-Preview value.
Display Type
You can set the display type for the report from here. It has two options: Page and Galley. By default, the value is set to Page. If you select the option Page, the report is displayed by page, and the View Mode option is displayed.
If you select the option Galley, then there will be no pagination, and all content is displayed together in a row without the form of a page.
View Mode
You can set the default page view mode for the report from here. It has two options: Single and Continuous. By default, the value is set to Single. You can select the Continuous option to set the default view of reports to the continuous mode, which allows scrolling through the pages of reports that have more than one page.
Zoom Mode
You can set the zoom mode of the report from here. It has three options: Default, Fit To Page, and Fit To Width. By default, the option Default is selected.
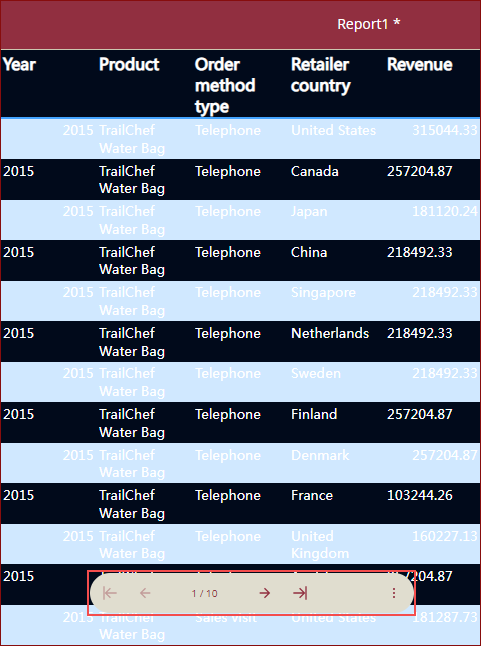
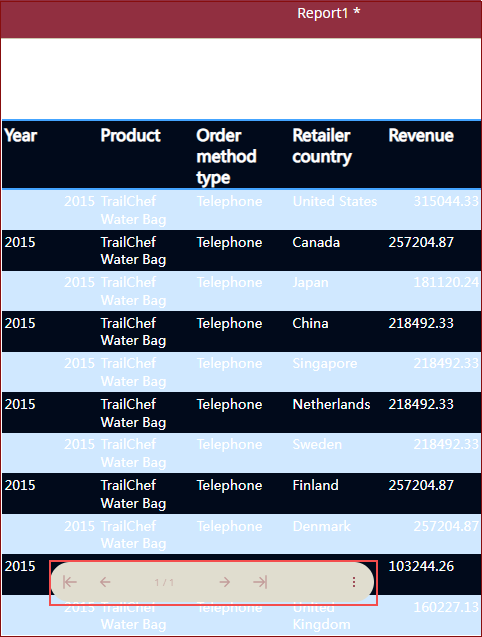
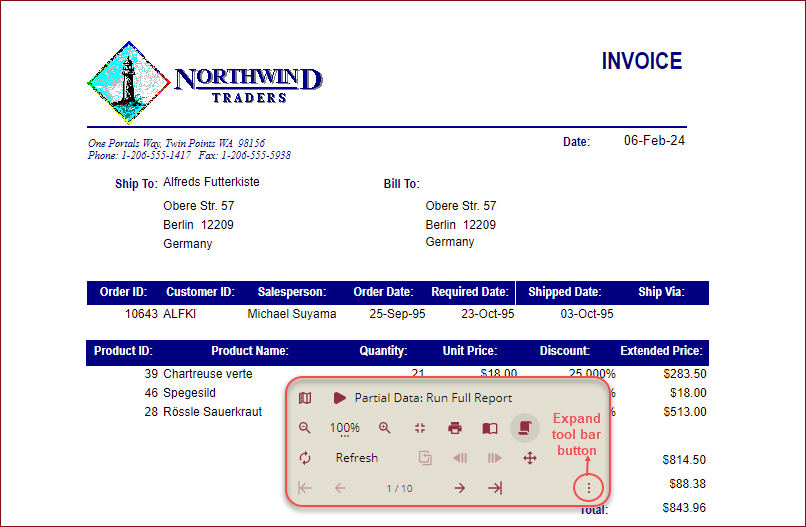
Fullscreen
On previewing the report, by default, the action bar is at the top. If you set the Fullscreen mode to True, the action bar comes at the bottom. You can click the Expand Toolbar button to display all the settings as shown below.
Parameter Panel
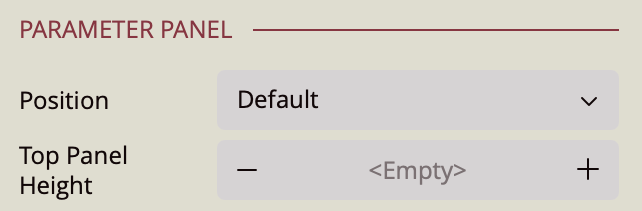
Position
Controls where the Parameter Panel appears in the viewer. Available options:
Default: Follows the global from the Admin Portal, Viewer API, or URL parameter.
Right or Top: Overrides settings for this specific report.
Parameter Panel Position Priority
Wyn applies the panel position based on the following priority (from lowest to highest):
Priority | Source | Description |
|---|---|---|
1 | Admin Portal | Default setting for all reports. |
2 | Info Panel | Overrides the Admin setting for that specific report. |
3 | Viewer API | Overrides Admin and Info Settings when embedding the viewer. |
4 | URL Parameters | Highest priority. Example: |
Note: When navigating between reports (e.g., via Jump To Report), the panel updates based on the target report's setting, unless overridden by API or URL.
Top Parameter Panel Height
You can set the default height of the report parameter panel when displayed above, with a minimum value of 70 for the height of one control. You can also adjust this height by dragging the mouse during the actual preview.
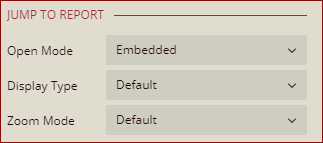
Jump To Report
Open Mode: Sets the style when opening a new document while jumping to another report. It has three forms: Embedded, Dialog, and New Window.
Embedded: It refers to opening a new report document in the current report.
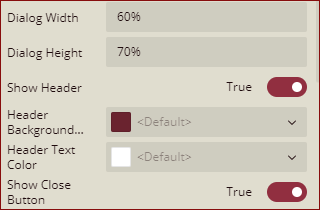
Dialog: When you jump to display the target document, a dialog box will open. When the Dialog option is selected, you will get the following items to set the dialog box properties:
Dialog Width/Height: Sets the width/height of the dialog box as a percentage of the original document. 100% represents the same size as the original report.
Show Header: You can set it to True or False. If this property is set to True, you can display the title of the new document.
Header Text Color/Header Background Color: You can set the background color and foreground color (text color) of the title.
Show Close Button: You can set it to True or False. If this property is set to True, then it will display the close button in the upper-right corner of the new dialog box.
Show Toolbar: You can set it to True or False. If this property is set to True, then it will display the toolbar for the new dialog box.
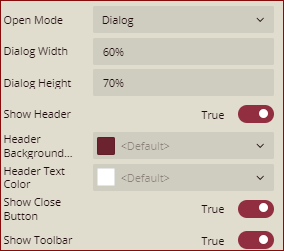
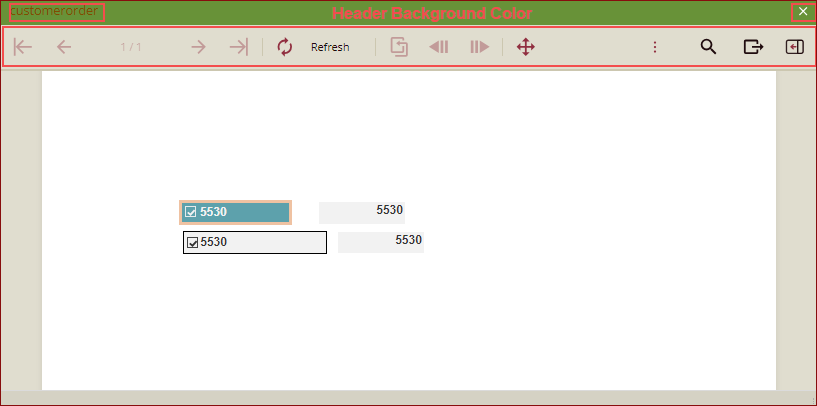
Example
If we set the following properties for the Dialog
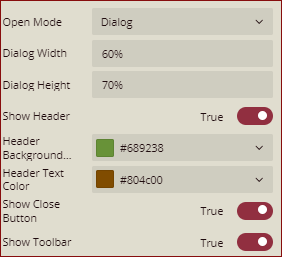
Then, on Jump To, the new dialog box will be shown as below:
New Window: When you jump to display the target document, a new window will open. When the New Window option is selected, you will get the Show Toolbar option. When you set the Show Toolbar option to True, the new window will have the toolbar. If it is set to False, then there will be no toolbar in the new window.
Display Mode: Sets the display type of the new dialog box. It has three options: Default, Page, and Galley.
Zoom Mode: Sets the zoom mode of the new dialog box. It has three options: Default, Fit to Width, and Fit to Page.
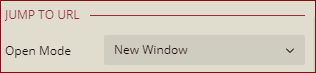
Jump To URL
Open Mode: Sets the style when opening a new document while redirecting to a URL. It has two options: Dialog and New Window. By default, it is set to Window. Select the option Dialog to open a dialog box to display the target URL page. In this case, you can set the size of the dialog box and other details, as shown below:
Select the option New Window to reopen a window to display the URL page, and there is no need to set the opening style.
Internationalization
Language Resource File: You can load the language resources for a report. Refer to the section Internationalize Labels of Custom Parameter Controls for more details.
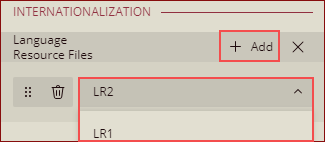
After adding the language resources, the Language Resource Files field will be displayed as shown below.

Export
Export: When you export a report, you can choose to set the name of the exported file depending on the added Key/Value pair(s) in the Rendered Report Values property of the report.
Set Rendered Report Values in a Report
On the Document/Resource portal, edit the report.
Go to the Info Panel > Rendered Report Values property.
Click Add to add one or more Key/Value pairs. The expression in the Value field can be an expression, a data field, or a parameter.
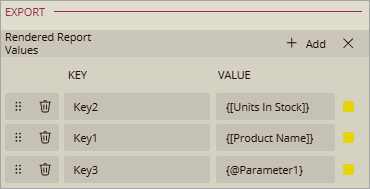
While exporting the report, the added keys can be used to modify the report's name as explained in the Export Report topic.
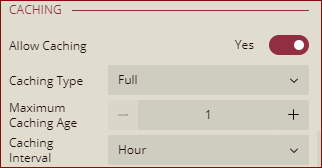
Caching
Allow Caching: By default, it is set to No. If you set this property to Yes, then you need to set up report caching. For details about Report caching, refer to the section Report caching.
Commands
Commands: You can customize different toolbars for the currently saved report using the commands. You can select/deselect all the available commands for the report here by clicking the checkbox.
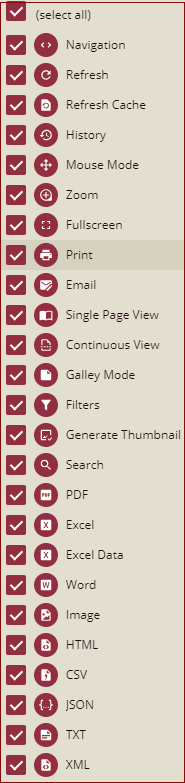
Once you select the checkboxes, the selected commands will be displayed as shown below.
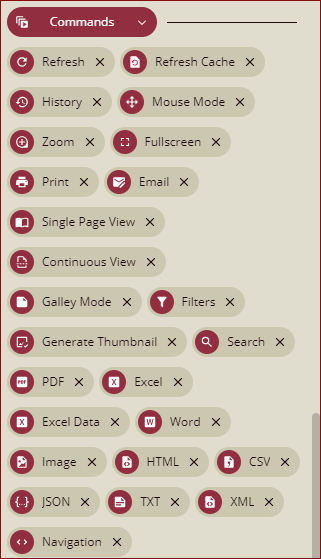
For example, if we add the following commands:
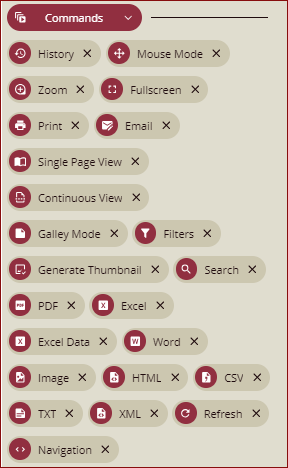
Then we will see all the selected command options in the preview toolbar as shown below.

Note: The options available in the Info panel are controlled by the Designer Settings in the Admin portal for the reports