- Getting Started
- Administration Guide
-
User Guide
- An Introduction to Wyn Enterprise
- Document Portal for End Users
- Data Governance and Modeling
- Working with Resources
- Working with Reports
- Working with Dashboards
- View and Manage Documents
- Understanding Wyn Analytical Expressions
- Section 508 Compliance
- Subscribe to RSS Feed for Wyn Builds Site
- Developer Guide
Map Table and Column Names in Data Source
You often require control over the names of tables and columns in a data source. When the table or column names in the data source are less descriptive or less meaningful, it is difficult for the dataset authors to determine the meaning from the original names. Mapping the table and column names between the data source and the dataset is extremely useful in such scenarios.
When connecting to a data provider on the Resource Portal, a dataset author should use the Table/Field Name Mapping option to configure custom schema for table/view, display name of table/view, and display name of table/view columns.
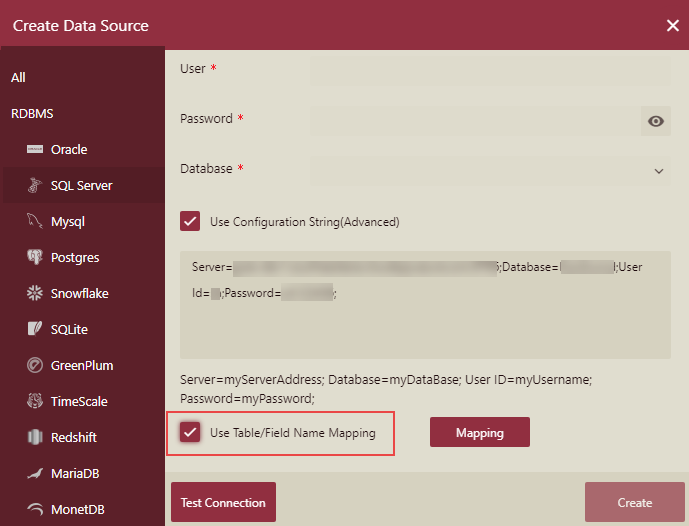
Mapping Table and Column Names
There are three ways in which you can modify the original names of the tables and columns and customize the table schema.
Method 1: Enter the Display Names Manually
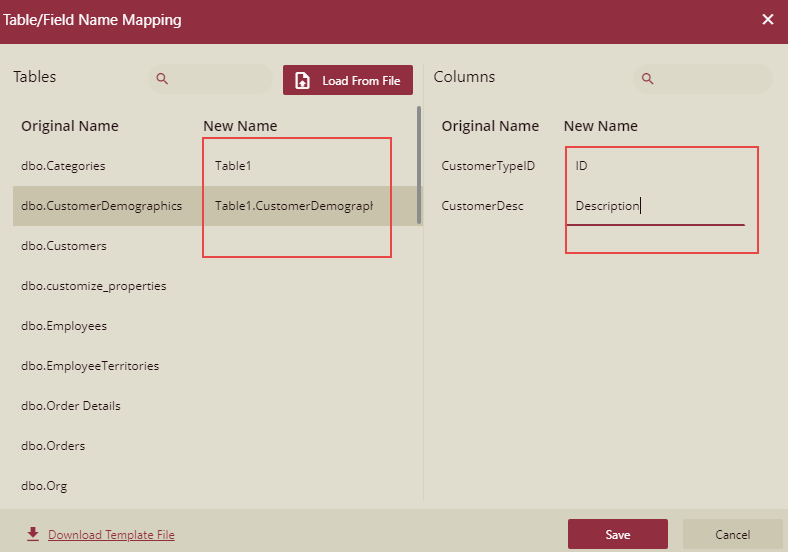
In this method, you can manually enter the display names for each table or column in the Table/Field Name Mapping dialog. This is the simplest method out of all the three.
The following example shows the column display names for the CustomerDemographic table and its customized table schema.
Method 2: Import Data Source Mapping File
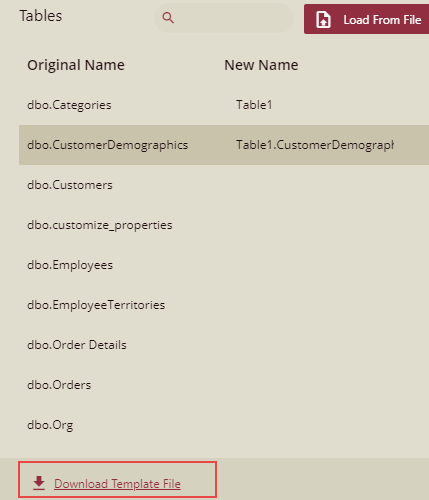
In this method, you can import a data source mapping file (CSV) containing the mapping details for the table and column names. To import a mapping file, click the Load from File button adjacent to the search bar and then browse for the file that you want to import.
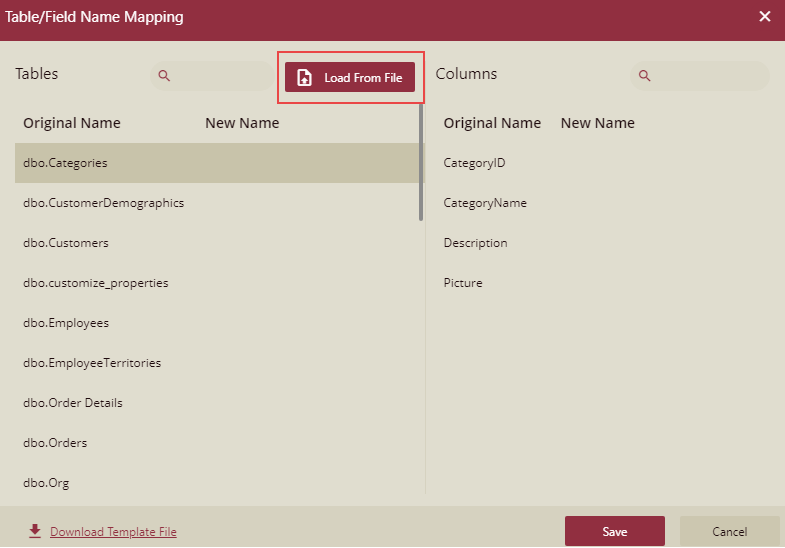
Once you click the Open button, the display names for the tables and columns are mapped against their corresponding original names in the dialog as shown.
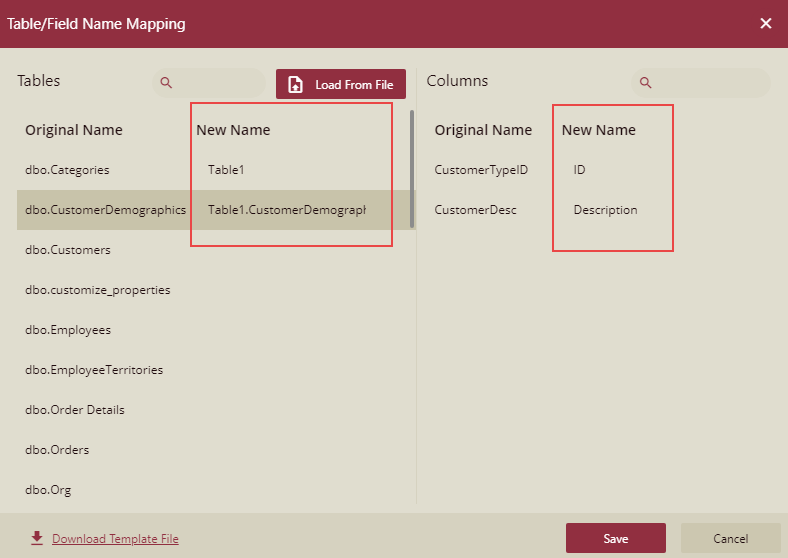
An error message is displayed when you import an invalid data source mapping file.

Use the Download Template File link to save a sample data source mapping file on your system.
Method 3: Import Display Names from Another Database (or Table)
This method is only applicable to the RDBMS databases that allow users to export its mapping details into a separate CSV file. This CSV file is later uploaded as the data source mapping file using the Load from File button in the Table/Field Name Mapping dialog, in a similar way as described in the above method.
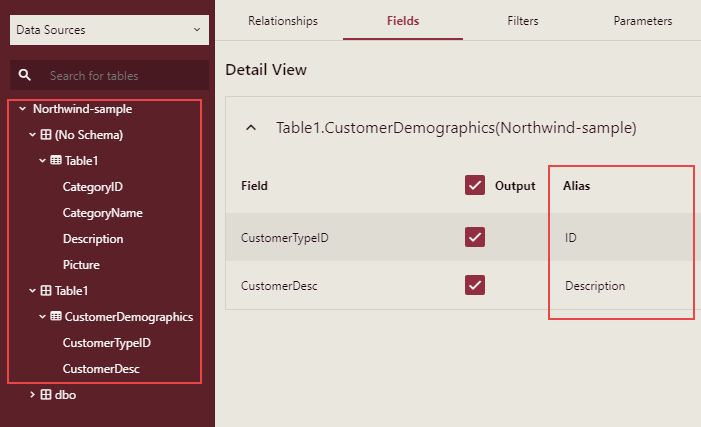
When you use this data source in the dataset designer, this is how your table schema and display names will look like. All the mapped display names from the data source are shown under the 'Alias' field.
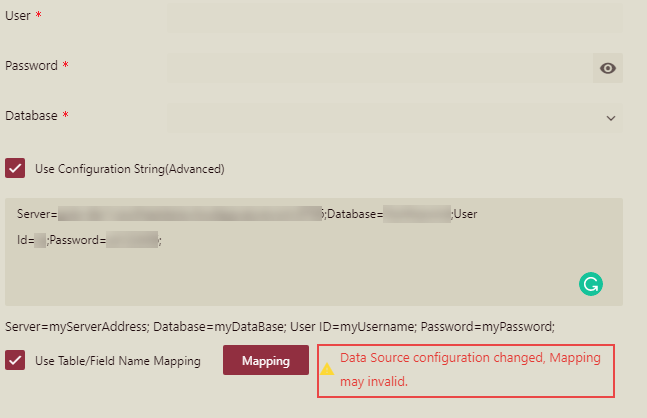
If you modify the data source configuration information, a warning message will be displayed as shown in the following example.
Limitations
JSON, Excel, and ODBC data providers do NOT support the table/field name mapping.
Users should use the original table name and column names when writing custom SQL queries instead of the display names.
Only one layer of schema can be generated while customizing the table schema.
Display names for the tables should not contain any special characters or symbols except for a dot (can be used only once).


