Email Settings
As an admin at Wyn Enterprise portal, you can change the Email Settings for the server mailing service. The server sends automatic emails in response to requests users make to reset their passwords on Wyn Enterprise portal. These are needed to ensure that the website error report is working properly. The server also uses these settings to connect with the e-mail server to deliver scheduled reports. There are two options for the server mailing services - SMTP and Google API. Let's see how to configure these settings.
Note : You need to allow the third party websites and apps to access your email account to execute a scheduled task without any issues.
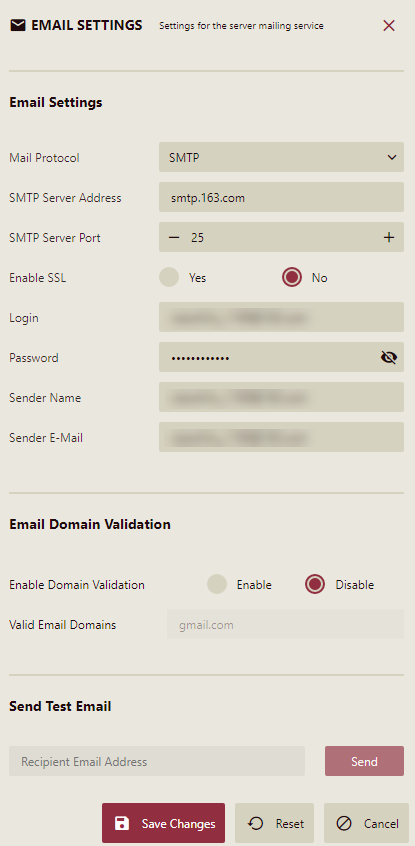
Settings for SMTP Server

Complete the SMTP form as described in the table below.
SMTP Settings | Description |
|---|---|
SMTP Server Address | Server host address in the format smtp.yourdomainname.com. |
SMTP Server Port | Port number of the server. |
Enable SSL | Set True or False to enable or disable the SSL (Security Socket Layer) connection. Note that you may need to update the previous SMTP port. |
Login | SMTP username. |
Password | Password of the SMTP user. |
Sender Name | Username of the sender. |
Sender E-mail | Email address of the sender. |
Enable Domain Validation | Set Enable or Disable to enable or disable validation of the email domain. |
Valid Email Domains | Domain name of the email address. |
Send Test Email | Enter recipient's email address and click the Send button to test if the email settings are correct. |
For organizational administrator, there is an additional option to use the parent organization email settings. By default, this option is checked. You can uncheck if you do not want to use the parent organization settings. For more information about an organization administrator, see Organizations.
Once you have configured all the settings, click the Save Changes button to save all the settings.
Settings for Google API

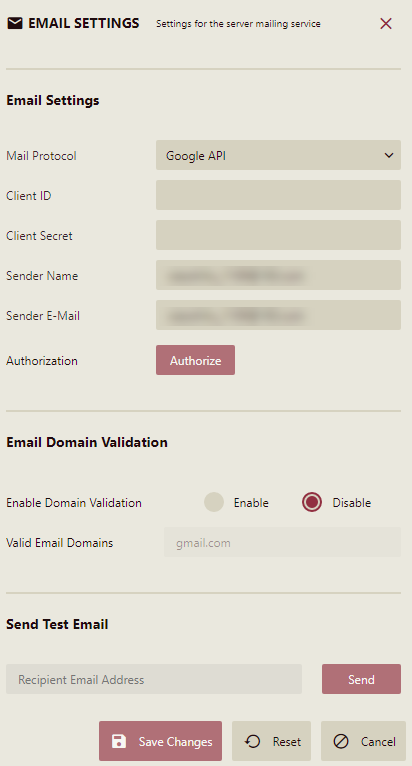
For sending emails using Google API, you need to first create a web application at Google API and obtain client id and client secret fields. See Google Help on more details. Now complete the Google API form as described in the table below.
Google API Settings | Description |
|---|---|
Client ID | OAuth Client ID of the web application. |
Client Secret | Client Secret of the web application |
Sender Name | Username of the sender. |
Sender E-mail | Email address of the sender. |
Authorization | Click Authorize to authorize the google website depending on the settings provided. |
Enable Domain Validation | Set Enable or Disable to enable or disable validation of the email domain. |
Valid Email Domains | Domain name of the email address. |
Send Test Email | Enter recipient's email address and click the Send button to test if the email settings are correct. |
Note: If on clicking 'Authorize', you see a message 'This app is not verified', you can ignore it and click 'Advanced' and then select 'Go to xxx (unsafe)'. After successful authorization, you can use google apis to send emails.


