- Getting Started
- Administration Guide
-
User Guide
- An Introduction to Wyn Enterprise
- Document Portal for End Users
- Data Governance and Modeling
- Working with Resources
- Working with Reports
- Working with Dashboards
- View and Manage Documents
- Understanding Wyn Analytical Expressions
- Section 508 Compliance
- Subscribe to RSS Feed for Wyn Builds Site
- Developer Guide
Format Date/DateTime Parameters
Wyn Enterprise allows you to use parameters to filter or add the data to display in the reports at run time. You can either prompt the users for parameters so that they control the output or supply the parameters behind the scenes.
What You Will Learn
This topic guides you through the steps to apply the display format to the Date/DateTime parameters in the Wyn Enterprise Report Designer.
Note: This tutorial uses a sample CustomerOrders data set.
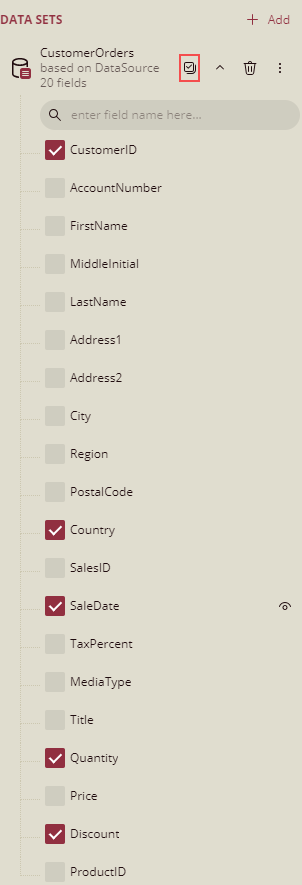
Go to the Data tab and click the drop-down next to the CustomerOrders data set. You can now see all the available fields in the data set.
Enable Select Fields... and then choose the required fields in the table.
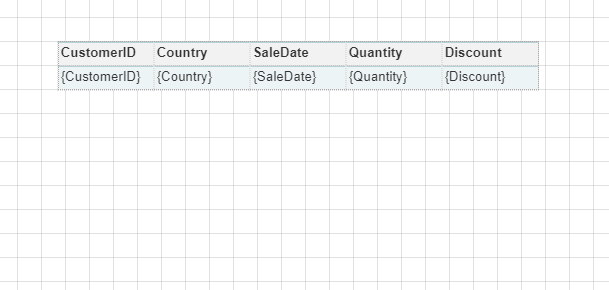
Drag-drop the selected fields onto the design area. A table with its column bound to the fields is created. You can see the table's Header and Details row are automatically filled with the data.
From the top right corner of the Report Designer, click the Data icon.
Click Add next to Parameters. A parameter named Parameter1 is added.
Click Parameter1 to edit parameter properties.
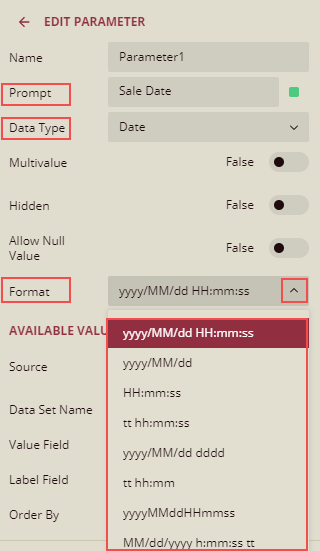
Set the Prompt property to Sale Date and Data Type property to Date and click the Format dropdown list to select the format of the Sale Date parameter. In this example, we have selected yyyy/MM/dd HH:mm:ss format. Apart from the formats provided in the dropdown list, you can also enter the custom formats by typing in the formats.
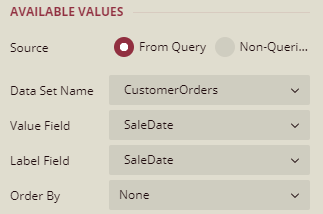
Under the Available Values section, select the Source as From Query and set the following properties as shown below.
You can sort the parameter values using the Order By property. The Order By dropdown list has the following options.
Order By
Note: The values in the Parameter list on the preview page, will be sorted based on the value selected from the Order By property and the Sort Direction.
Now add a parameter that filters the data according to the Country.
From the top right corner of Report Designer, click the Data icon.
Click Add next to Parameters. A parameter named Parameter2 is added.
Click Parameter2 to edit parameter properties.
Set the Prompt property to Country and the Data Type property to String.
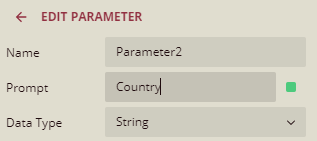
Under the Available Values section, select the Source as From Query and set the following properties as shown below.
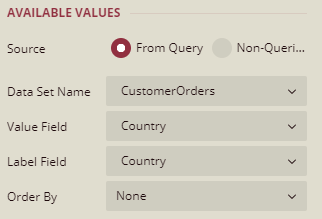
You can sort the parameter values using the Order By property.
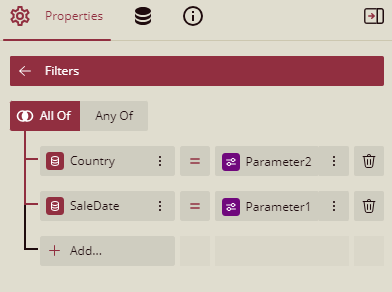
Now we will add filters to the Table data region. In our report, we will be adding two filters such that the report renders data according to the user input in Parameter1, and Parameter2.
Click the Parameters tab and click the Auto-Generate button, to auto generate the editors for the parameters. So, the format will be applied to the custom parameter items, which are created in the custom parameter panel of the web designer.
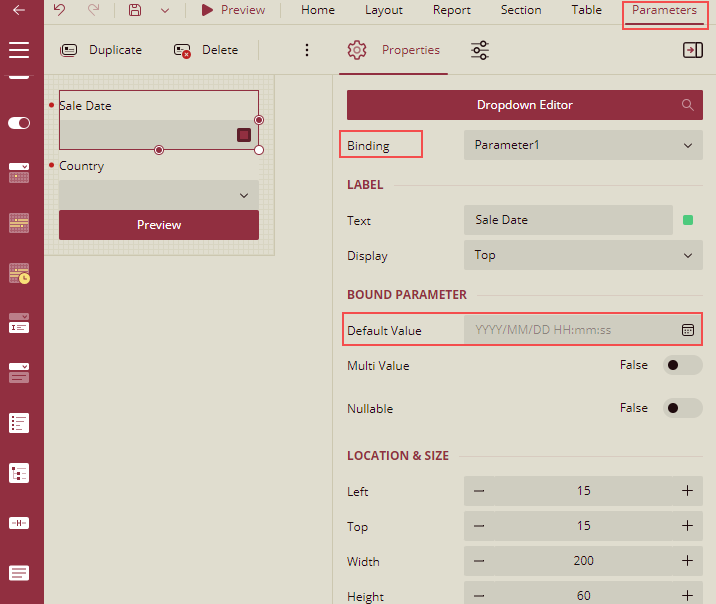
Add the header to the Report tab on top of the designer and select the Add Header option. You can customize the appearance of the Parameterized Report.
Customize Appearance of Parameterized Report Example
Click Preview to view your report in the final output. You will be prompted to enter two parameters - Sale Date and Country for which you want to view the report.
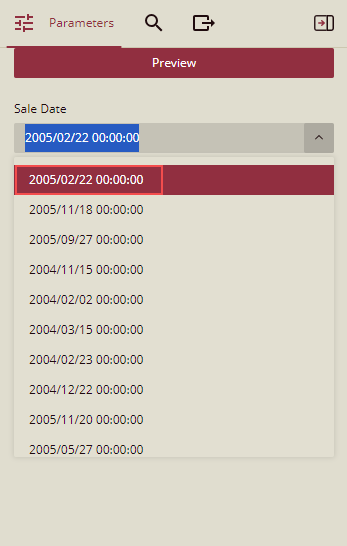
So, the Sale Date format shown in the preview is displayed based on the Format selected for Parameter1 while designing the report in the designer.
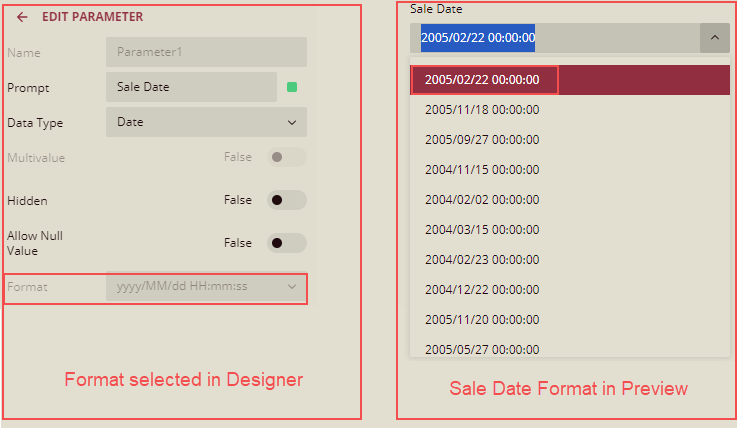
Note: You can select the Format for the Date and DateTime Data Type in the designer.


