- Getting Started
- Administration Guide
- User Guide
- Developer Guide
Restore Deleted Documents
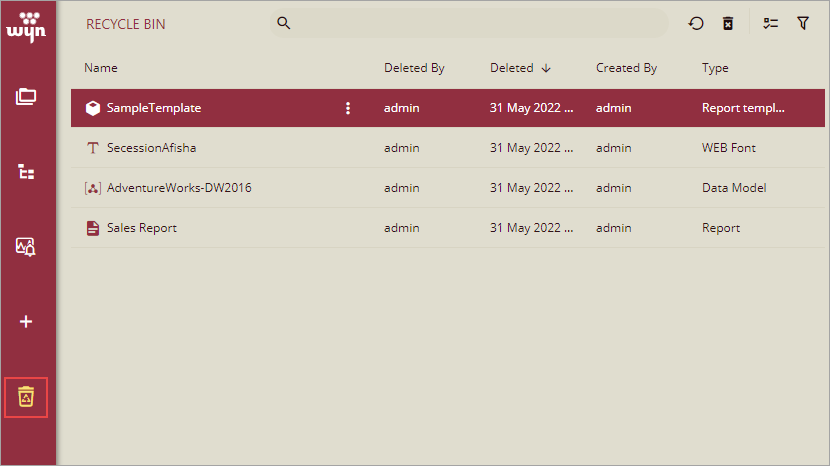
In Wyn Enterprise, you can delete the unnecessary documents from the Resource Portal you no longer require. When you delete these documents, they are not permanently removed from the Wyn Enterprise Server, instead, they are moved to the Recycle Bin tab. This tab temporarily stores the deleted documents, unless they exceed the Keep Recycle Bin Time Period. The main usage of Recycle Bin tab is to restore the documents which were accidentally deleted. Furthermore, the documents in the Recycle Bin tab can be restored to their original storage location on the portal.
Note:
1. The Recycle Bin tab is only visible on the Resource Portal if the admin user has set the Enable Recycle Bin property on the System Configurations page to True. By default, this property is set to False.
2. The restored document loses its revision details, associated scheduled tasks, and other additional details.
The Recycle Bin tab organizes the documents as shown in the following image.
To Restore a Document
Follow the below steps to restore a document from the Recycle Bin tab. Note that only admin user roles, organization admin user roles, and document owners can perform this operation.
On the Resource Portal, navigate to the Recycle Bin tab.
Select a document you want to restore.
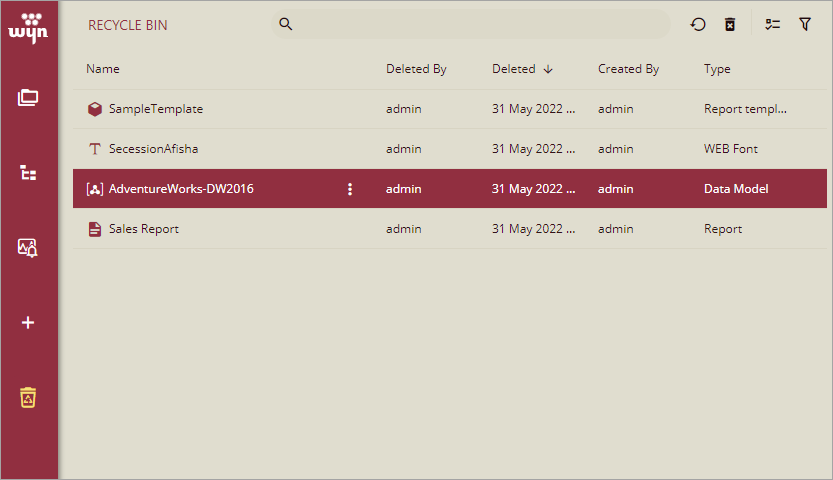
Then, select More > Restore or click Restore on the top-right corner of the window.
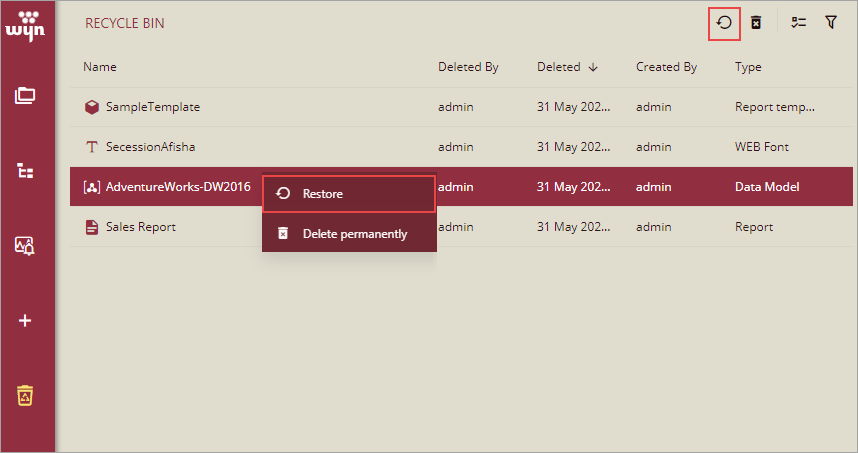
In the Restore Document dialog, click OK to confirm.

To Restore Multiple Documents
Follow the below steps to restore a document from the Recycle Bin tab. Note that only admin user roles, organization admin user roles, and document owners can perform this operation.
On the Resource Portal, navigate to the Recycle Bin tab.
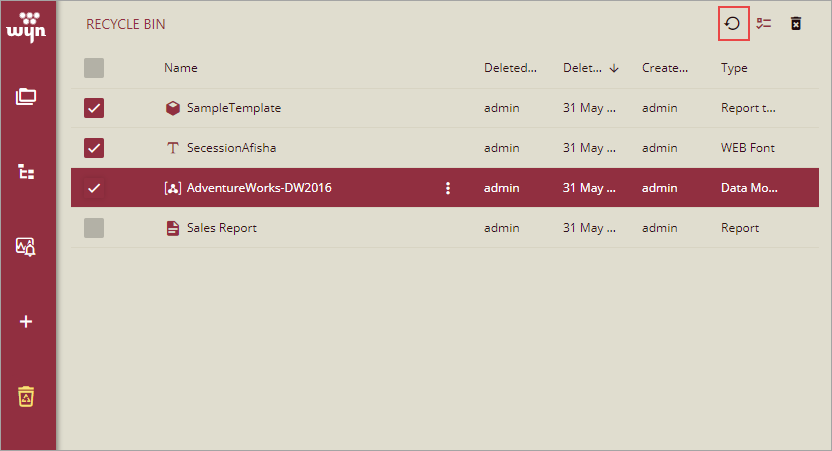
Click Show Checkbox, and then select the documents you want to restore. To select all the documents in the tab, click the first check box at the top, adjacent to the Name header.
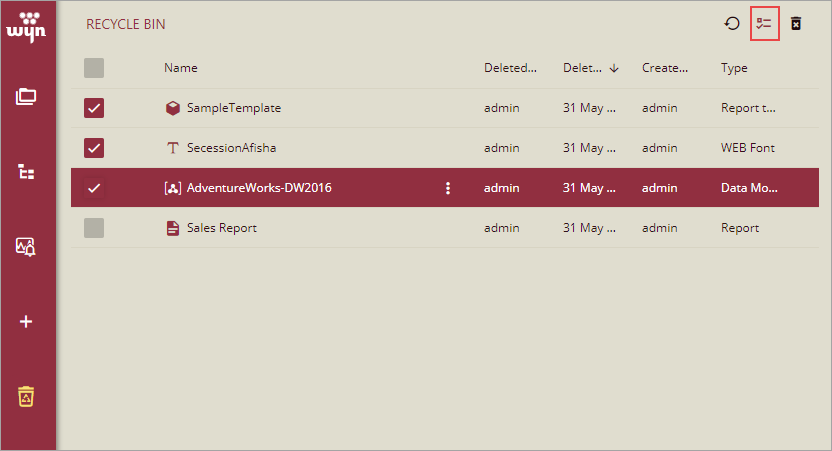
Click Restore on the top-right corner of the window.
In the Restore Document dialog, click OK to confirm.

To Delete a Document Permanently
Follow the below steps to delete a document permanently from the Recycle Bin tab.
On the Resource Portal, navigate to the Recycle Bin tab.
Select a document you want to delete.

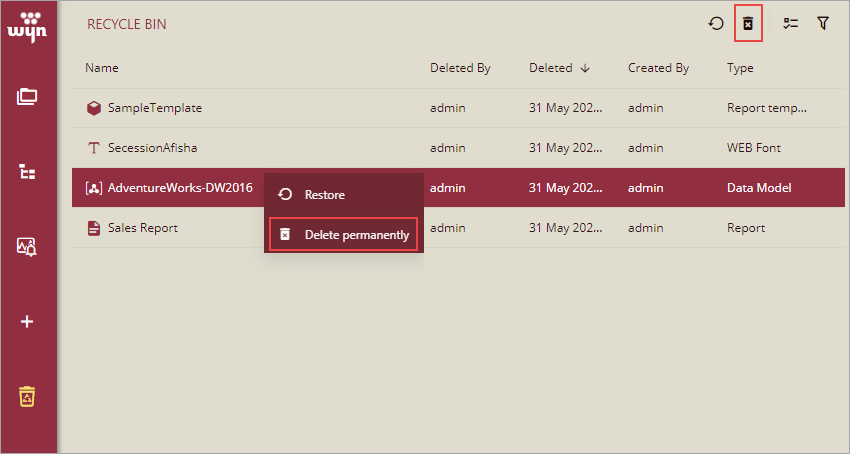
Then, select More > Delete permanently or click Delete this document on the top-right corner of the window.
In the Delete Document dialog, click OK to confirm. Once deleted, the document is lost forever.

To Delete Multiple Documents Permanently
Follow the below steps to delete multiple documents permanently from the Recycle Bin tab.
On the Resource Portal, navigate to the Recycle Bin tab.
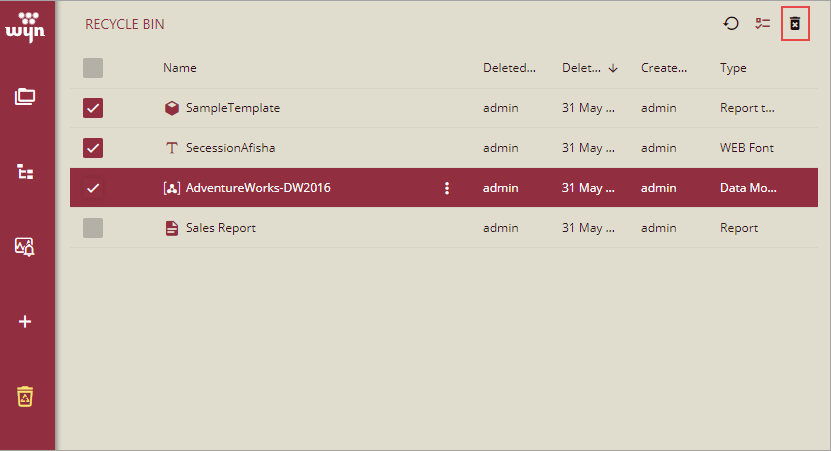
Click Show Checkbox, and then select the documents you want to delete. To select all the documents in the tab, click the first check box at the top, adjacent to the Name header.

Click Delete selected documents on the top-right corner of the window.
In the Delete Document dialog, click OK to confirm. Once deleted, the documents are lost forever.


