- Getting Started
- Administration Guide
-
User Guide
- An Introduction to Wyn Enterprise
- Document Portal for End Users
- Data Governance and Modeling
- Working-with-Resources
- Working with Reports
- Working with Dashboards
- View and Manage Documents
- Understanding Wyn Analytical Expressions
- Section 508 Compliance
- Developer Guide
Wyn Enterprise: Table
The Table is the most commonly used data region in designing reports. It organizes the data in a tabular format, that is, in rows and columns which makes the data easier to understand.
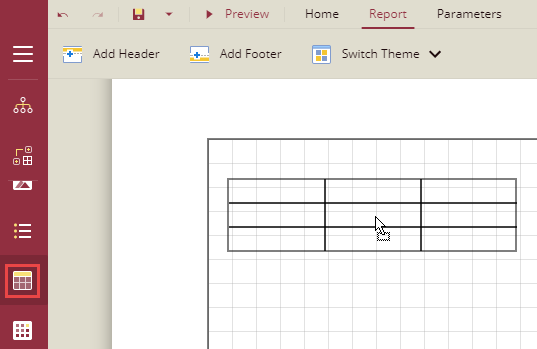
By default, a table has three columns and three rows, a total of nine cells, where each cell is filled with a text box. In a table, you can sort and filter the bound data, display a total row at the end of a table, merge rows and columns, freeze to keep certain rows and columns visible when scrolling the table, and more.
The following example displays a table listing the 20 highest claim payouts.

Table Components
A table is composed of the following components -
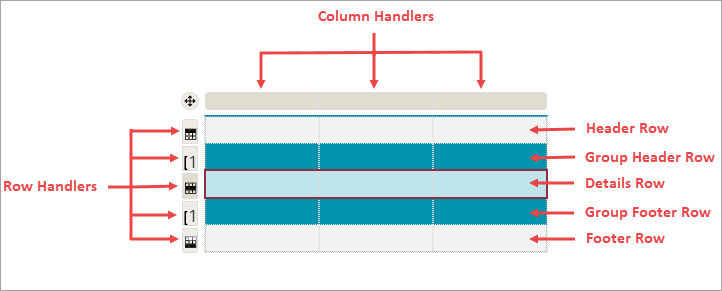
Header Row - By default, a table has a header row that appears at the top of the table. It is typically used to label each column or add a header to the table. A table can have several header rows.
Group Header Row - Appears at the beginning of each group in the table. You can use a group header row to display the group's field value or summary value. A group can have several header rows.
Details Row - Repeats for each record in the bound dataset. If the details row is inside the row group, it will repeat once for each unique value of the group. A table can have more than one details row. Note that the details group is the innermost child group.
Group Footer Row - Appears at the end of each group in a table. You could use the group footer row to display the summary values. A group can have several footer rows.
Footer Row - By default, a table has a footer row that appears at the end of the table. You could use the footer rows to display grand totals or notes. A table can have several footer rows.
Row and Column Handlers - Use to add rows and columns to the table. Note that the added row can be a header row, details row, or footer row.
Bind Data to a Table Data Region
Follow the below steps to bind data to a Table data region.
Method 1 -
From the Report Toolbox on the left, drag and drop the Table data region onto the design area.
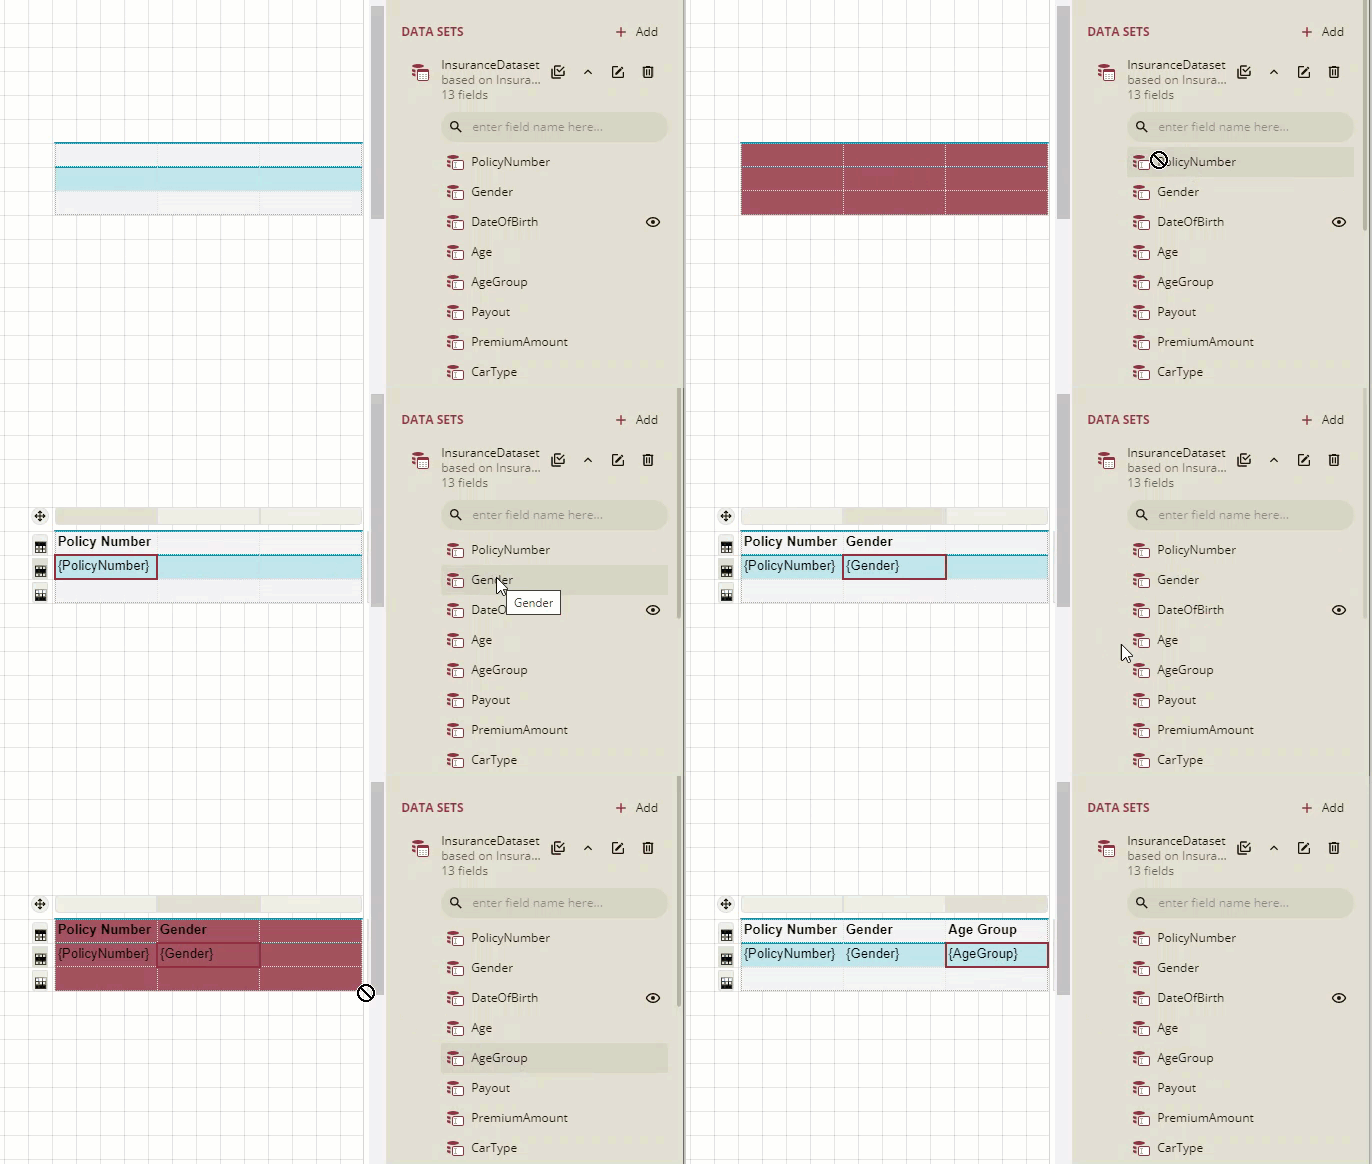
From the Data Binding tab on the right, expand the dataset and drag-drop the desired fields onto the cells in the details row. The header row in the table is automatically filled with the corresponding labels. In this example, the report uses the InsuranceDataSource.
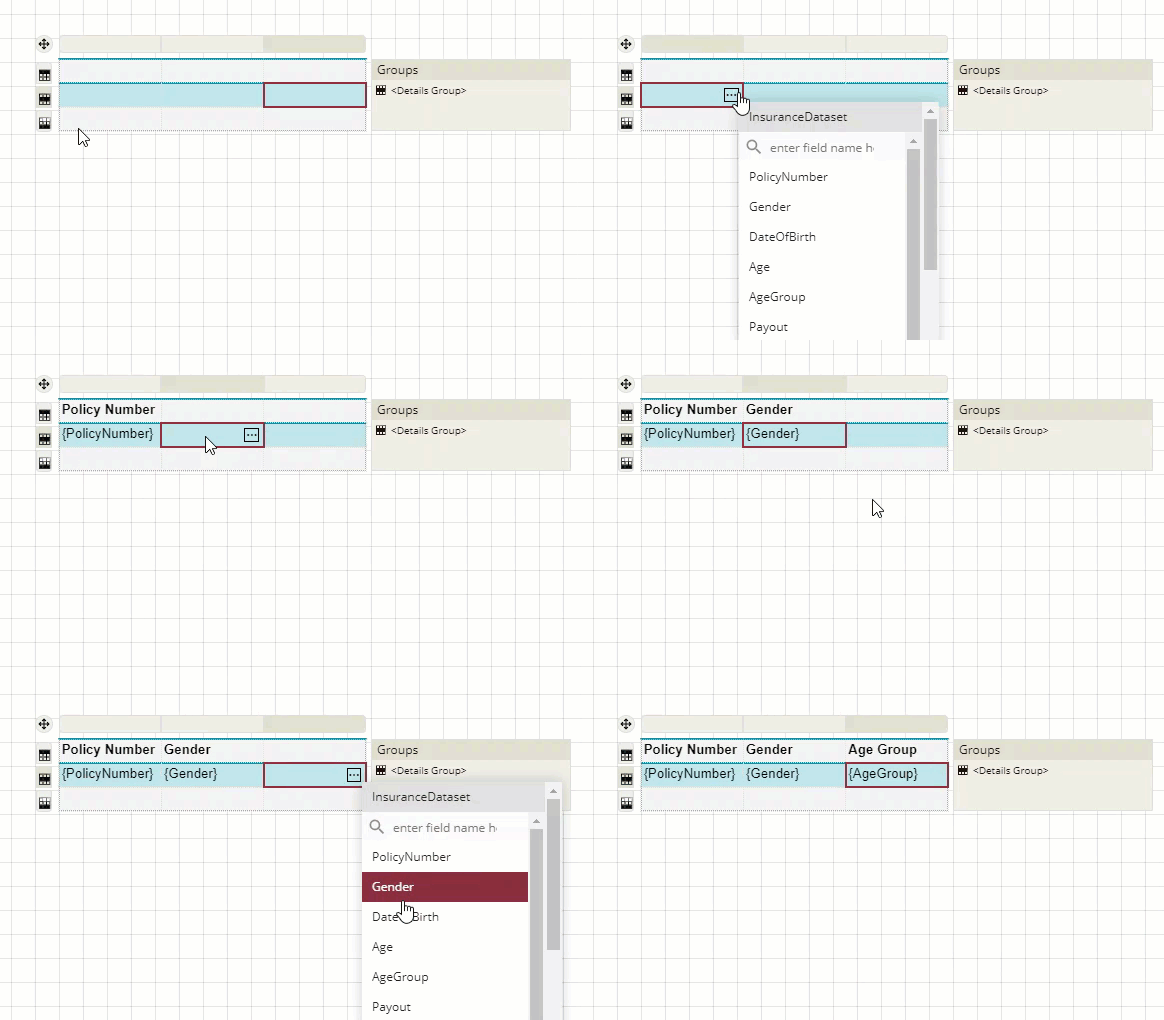
Method 2 -
From the Report Toolbox on the left, drag and drop the Table data region onto the design area.

Select a TextBox in the details row and, from the fields selection adorner, select a field from the list.
Method 3 -
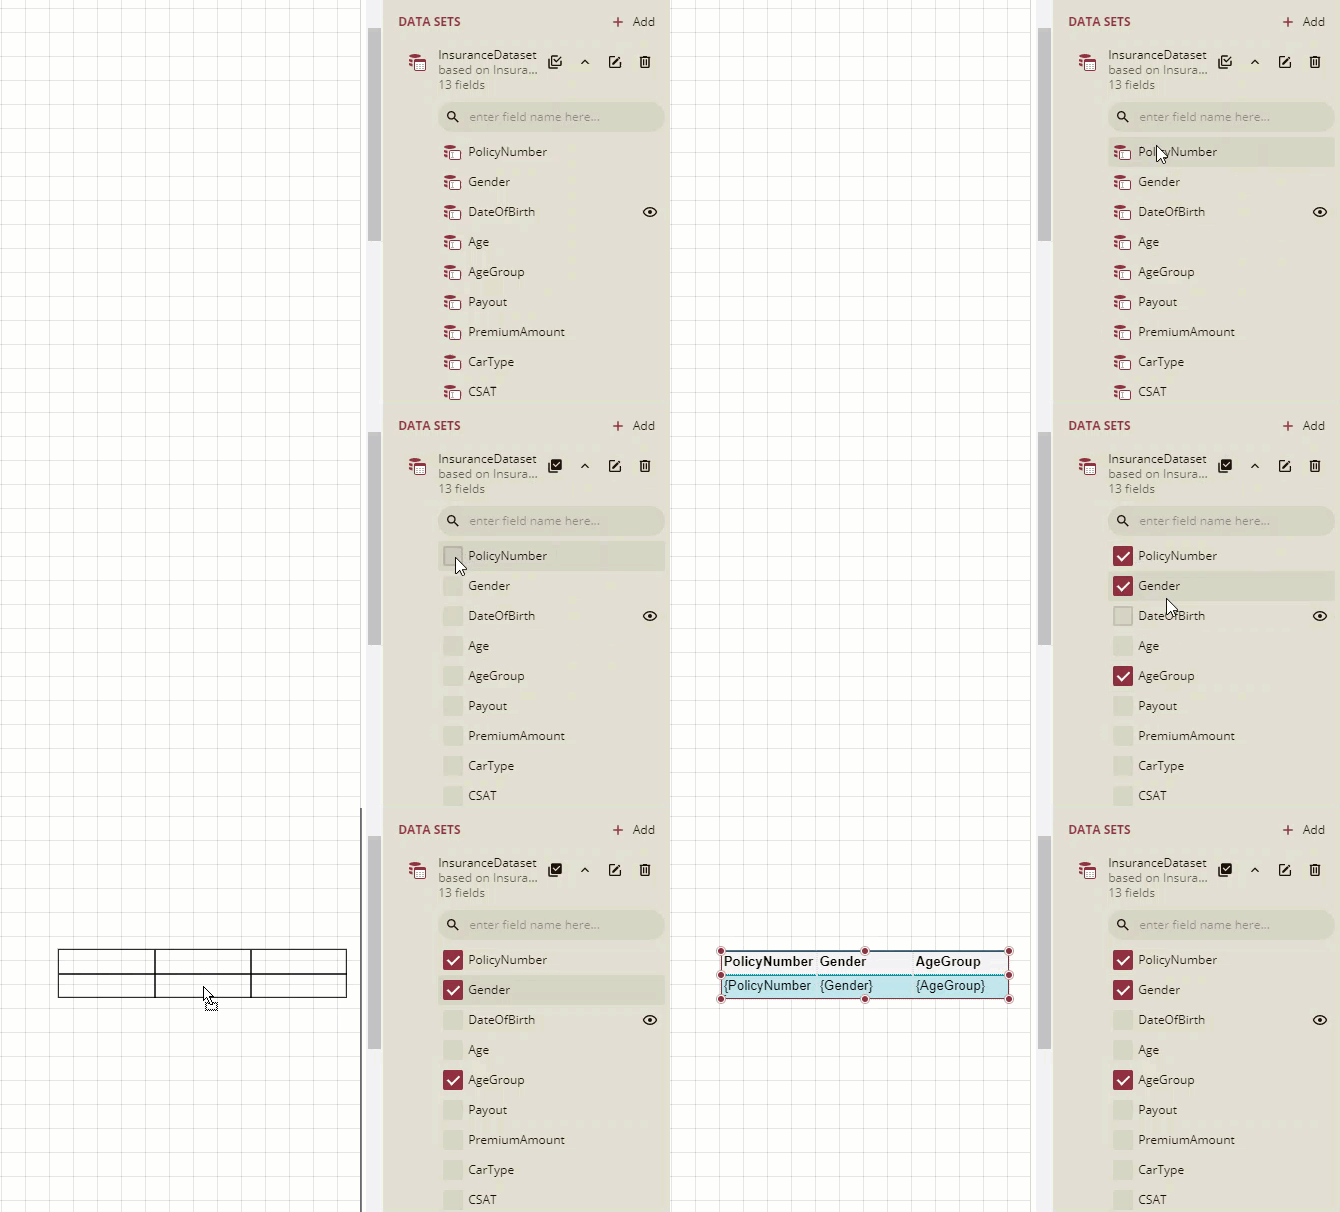
From the Data tab on the right, click the Select Fields button next to the bound dataset and choose the desired fields.
Drag-drop the selected fields onto the design area. A table with its column bound to the fields is created.
