- Getting Started
-
Administration Guide
-
Get Started with Administering Wyn Enterprise
- System Requirements
- Installing on Windows
- Installing on Linux
- Installing using Docker
- License Wyn Enterprise
- Deploying with HTTPS
- Deploying with Reverse Proxy
- Deploying to Azure App Service (AAS)
- Deploying to Azure Kubernetes Service (AKS)
- Deploying to AKS using Helm Chart
- Deploying to Local Kubernetes
- Deploying to Kubernetes Cluster using Helm Chart
- Deploying as a Virtual Directory or Sub-Application
- Deploying to Amazon ECS
- Deploying to Amazon EKS using Helm Charts
- Deploying in a Distributed Environment
- Migration from ActiveReports Server 12
- Upgrade Wyn Enterprise to Latest Version
- Logging on to the Administrator Portal
- Ports in Firewall
- Configuration Settings
- Account Management
- Security Management
- System Management
- Document Management
- How To and Troubleshooting
-
Get Started with Administering Wyn Enterprise
- User Guide
- Developer Guide
Deploying to AAS using Docker Image
This article describes how to configure a docker container of Wyn Enterprise to run on Azure App Service.
Log in to Microsoft Azure.
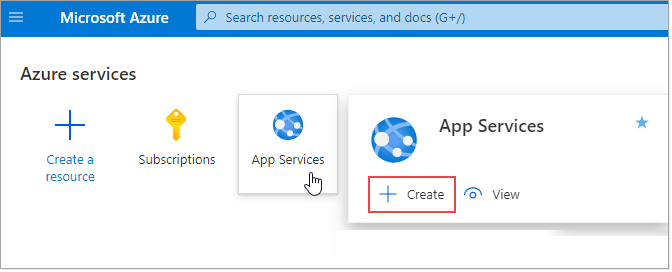
In the Azure portal, choose App Services and then click Create.
Enter the name for your new web app, and then choose Docker Container as the publish target. Select Linux for the operating system. Depending on your requirements, you can choose the required operating system.
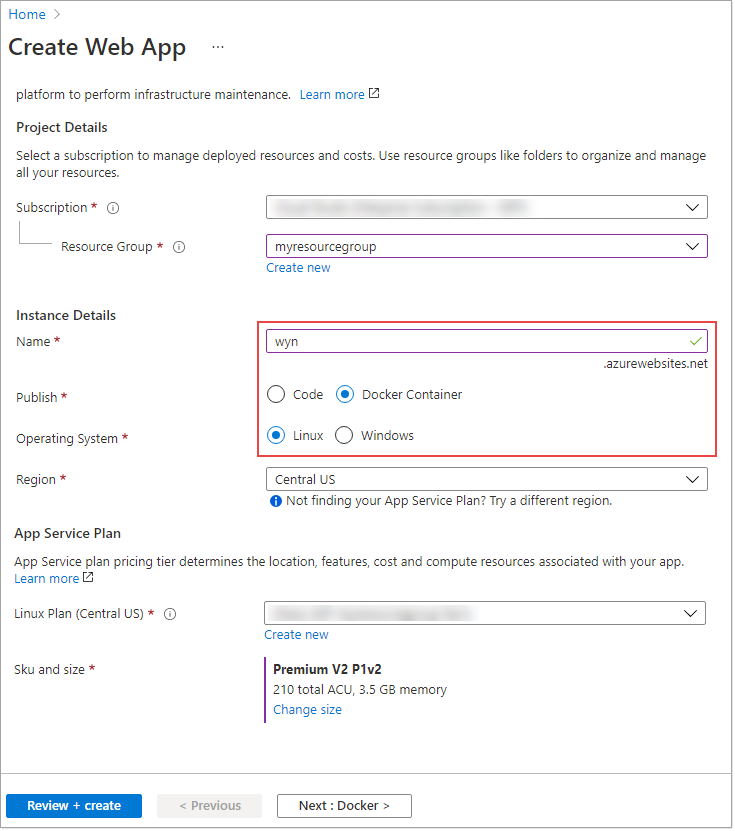
Now, click Next: Docker > to proceed further.
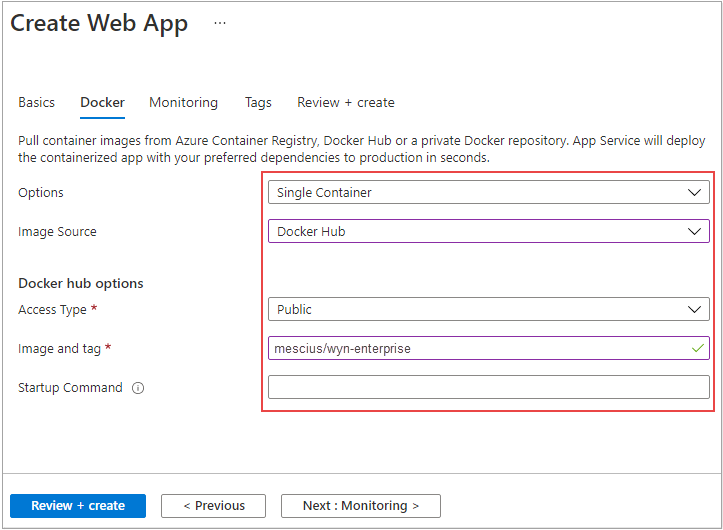
Fill in the details for the docker image as shown. Set Options to 'Single Container', Image Source to 'Docker Hub', Access Type to 'Public', and Image and Tag to 'mescius/wyn-enterprise'.
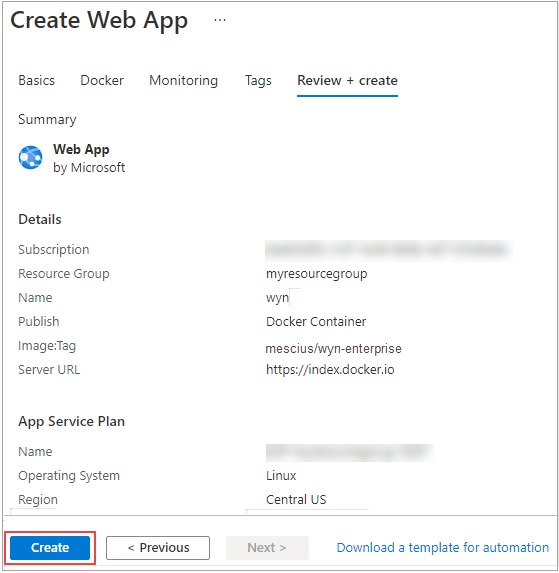
Click Review and Create to view the configuration details for the newly created web app. After validating the configuration details, click Create.
Note: For versions older than 7.0, the Image and tag will be grapecityus/wyn-enterprise instead of mescius/wyn-enterprise.
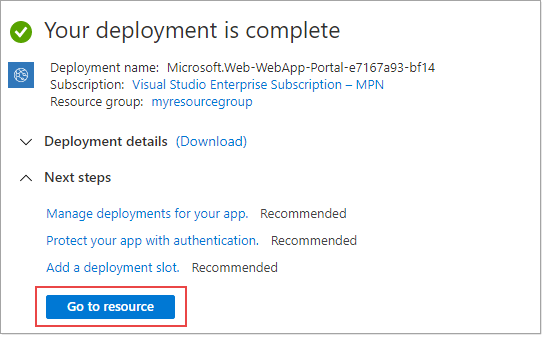
Once your deployment is complete, click Go to resource to configure the website port.
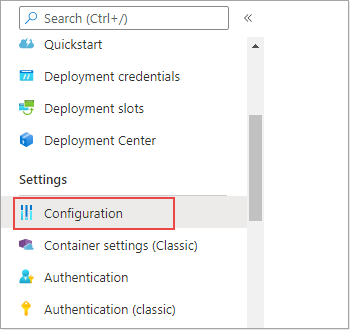
On the left pane, navigate to the Settings section and then select Configuration.
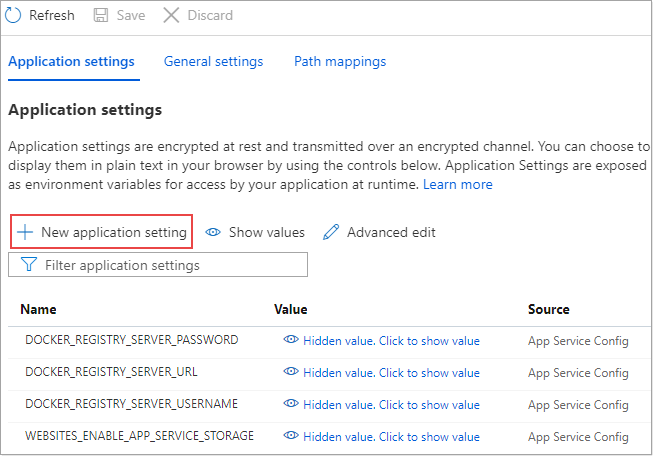
In the Application settings tab of Configuration, click New application setting to create a new setting for your web app service.
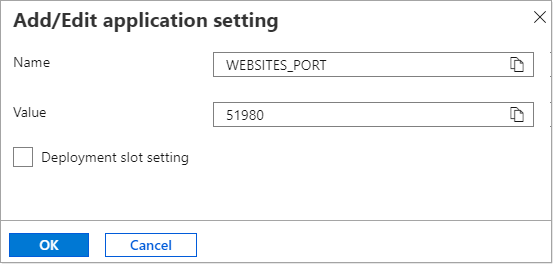
In the Add/Edit application setting dialog box, enter the name and port for the website. Click OK to save the setting.
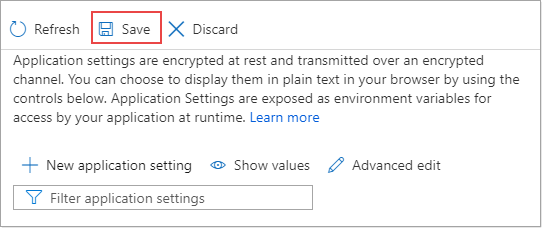
Select Save to confirm the changes.
Click Restart to start your web app service with the new configuration settings.
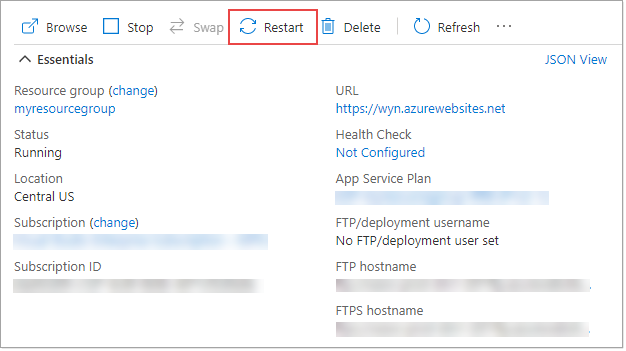
It will take 3 to 5 minutes to restart the web app service and extract the docker image.
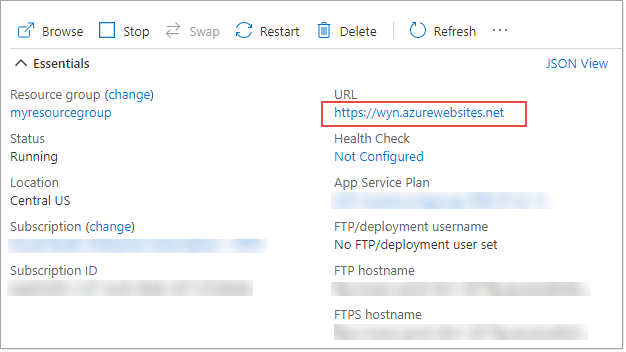
Finally, click the given URL to visit the website.
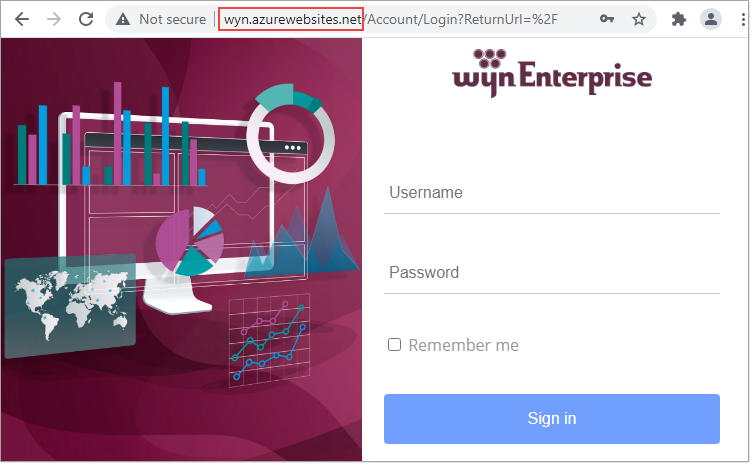
Your website is now running.
Key Points
This section discusses a few key points that are useful while deploying Wyn Enterprise to an Azure App Service.
Case 1: Using an External Datastore
By default, Wyn Enterprise uses the built-in PostgreSQL database to store the data. If you want to use an external database, such as the Azure SQL database, then pass the database information to the docker container using environment variables or use the single database mode to create all the data tables in one database. Following is the list of all the supported variables:
DB_PROVIDER - The database provider. The supported providers are Postgres, SqlServer, MySql, and Oracle.
DB_HOST - The hostname of the database server.
DB_PORT - The listening port of the database server.
DB_USER - The username of the database server.
DB_PASSWORD - The password of the given database user.
SINGLE_DATABASE_MODE - Store all the data in one single database (set to 'true' to use a single database, set to 'false' to use multiple databases in the datastore).
This is mandatory for the proper deployment of Wyn Enterprise, else, any restart can reset the whole datastore, license, etc.
Note: The database needs to be created before specifying the settings. When setting the Single_Database_Mode to 'true', create one database named 'wyn'. In case, you want to use multiple databases, create the databases with the names 'wynis', 'wyndatacache', and 'wynserverdata'.
Case 2: Persisting Cached Datasets on the Server (including Streaming and Push Datasets)
If you want to persist the data stored in the built-in MonetDB database using path mapping, then follow the below steps.
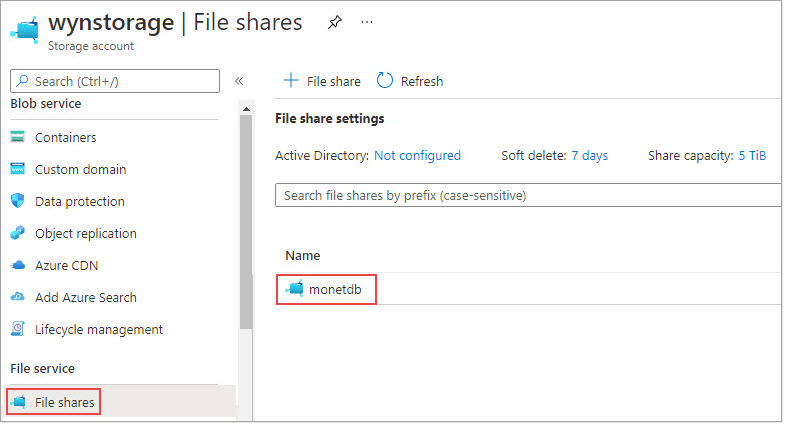
For this, create an Azure storage resource and then a file share with the name 'monetdb'.
Configure path mapping for your web app service in the Path mappings tab of Configuration. Set the Mount path to '/var/monetdb5/dbfarm' location.
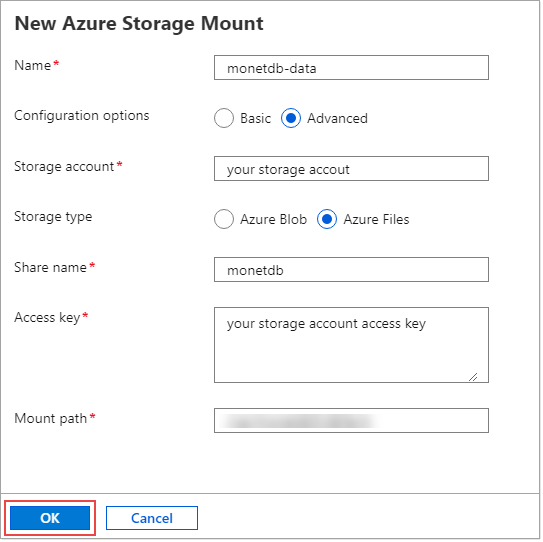
Click Save to confirm the new settings.
Click Restart. You will now see the data generated by the MonetDB database is stored in the file share.

Case 3: Persisting and Deploying Custom Security Providers
If you want to set a custom security provider as a mapped path for the web app service, you need to first have a custom security provider DLL, and then follow the below steps. For more information on how to create a custom security provider, see this article.
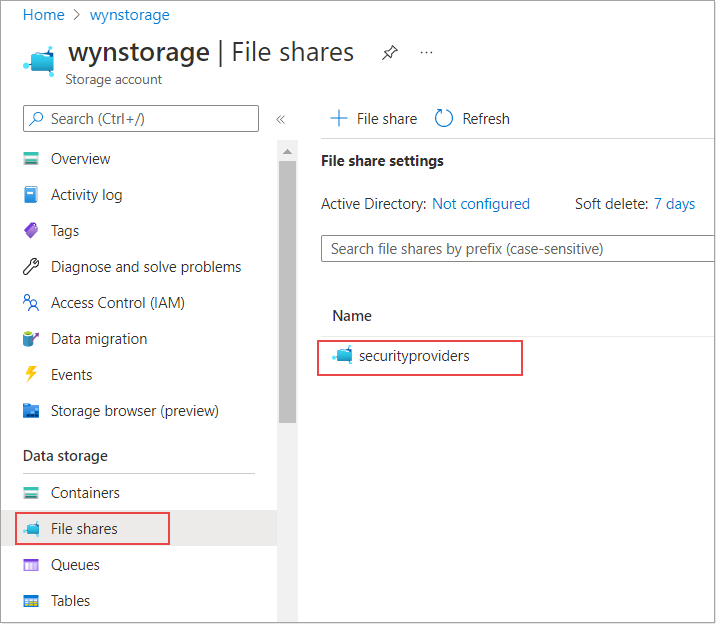
Create an Azure storage resource and then create a file share with the name 'securityproviders'.
Upload the security provider DLL(s) to the 'securityproviders' file share. In the below example, we upload three DLLs - ActiveDirectorySecurityProvider and Novell.Directory.Ldap.NETStandard (you can copy these DLLs from here: C:\Program Files\Wyn Enterprise\Server\SecurityProviders) and MySecurityProvider (the compiled custom security provider DLL) to the file share.
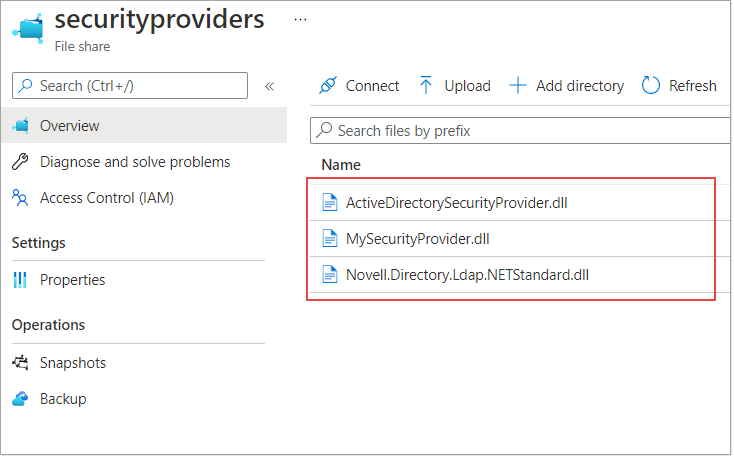
Note: The ActiveDirectorySecurityProvider.dll and Novel.Directory.LDAP.NETStandard.dll (default location is C:\Program Files\Wyn Enterprise\Server\SecurityProviders) should be uploaded before completing the file share. Else, you might face an issue while restarting the web app service.
To map your file share here: /wyn/Server/SecurityProviders, you need to define a new path mapping in the Settings > Configuration page of your web app service.
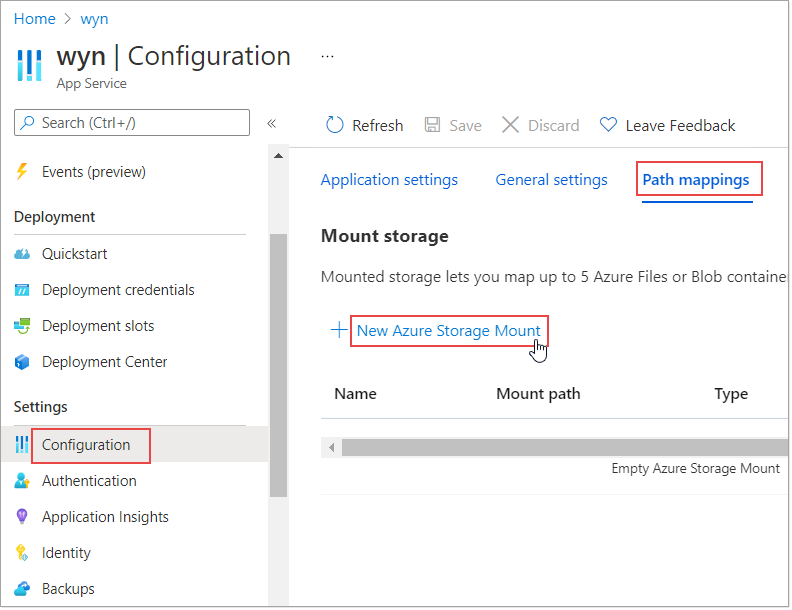
Fill in the following details and set the Mount path to '/wyn/Server/SecurityProviders' location.
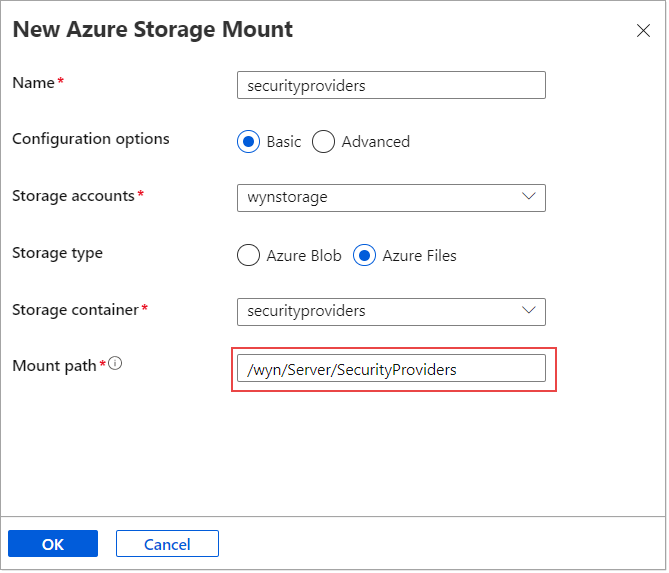
Click OK and then Save to confirm the changes.
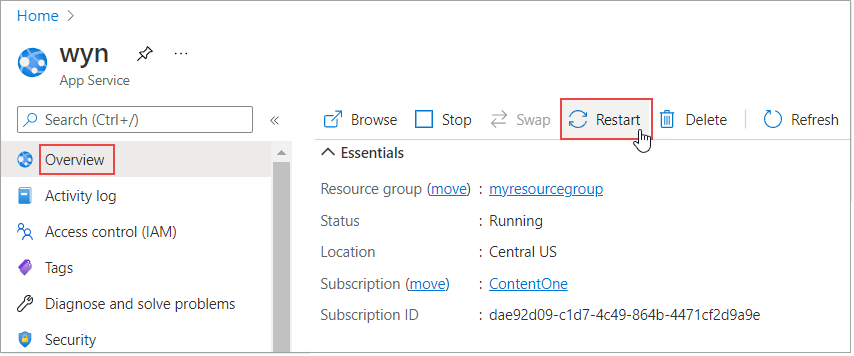
Restart the web app service to load with the new configuration settings.
You can now visit the website.
When you add a provider on the Security Providers page of the Admin portal, you will see a custom security provider corresponding to each uploaded DLL.
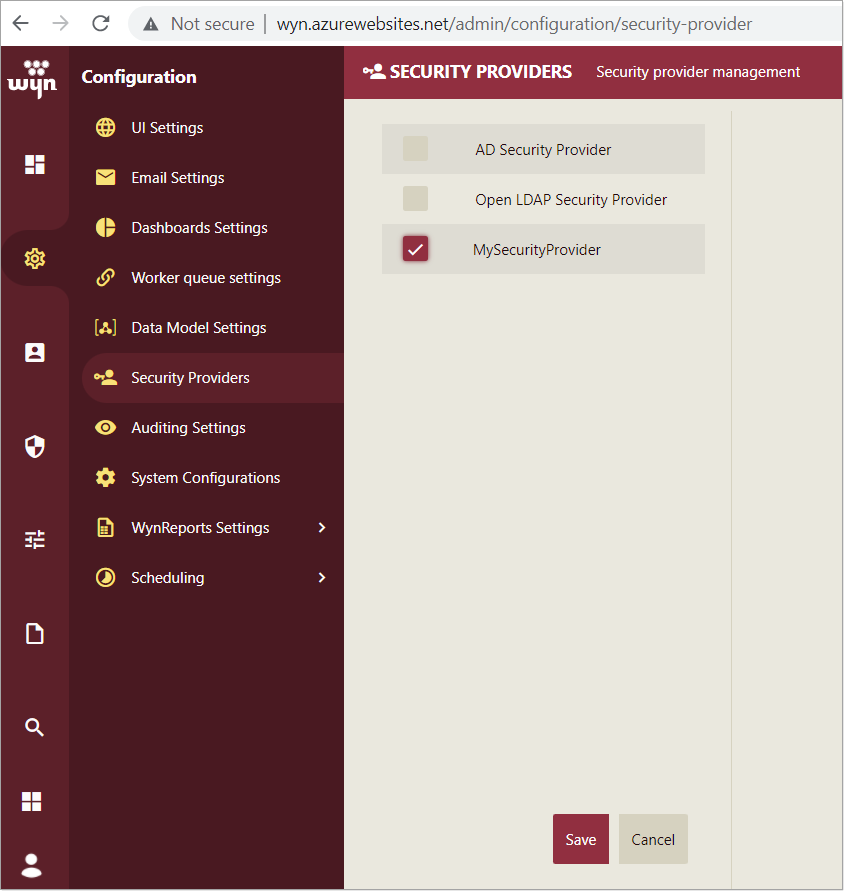
Case 4: Using Third-Party Data Provider Drivers
If you want to use a beta data provider like ElasticSearch, Hive, or Google BigQuery for creating a data source, then follow the below steps.
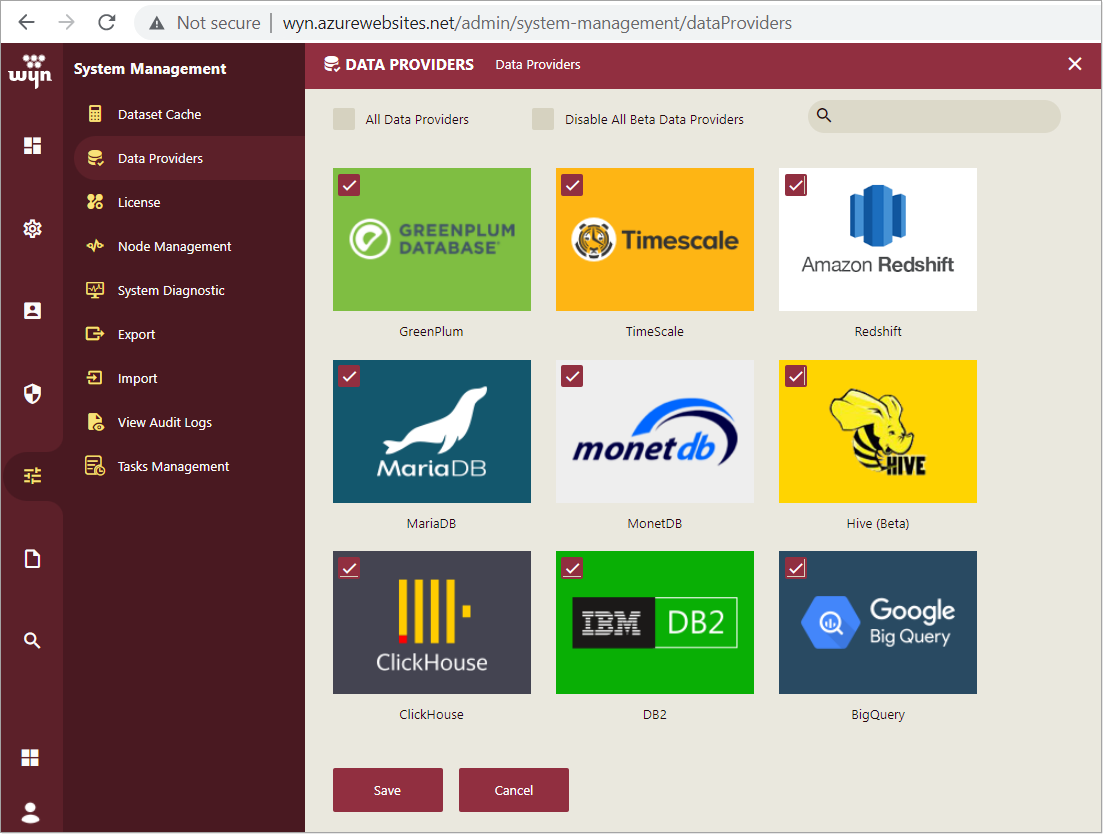
Note: By default, the beta data providers are disabled. You can enable them by manually installing their respective drivers on your local system and then updating the settings defined in the Data Providers page of the Admin Portal.
See the Install Drivers Manually article for information on driver installation steps for beta data providers.
Create an Azure storage resource and then a file share with the name 'third-party-drivers'.
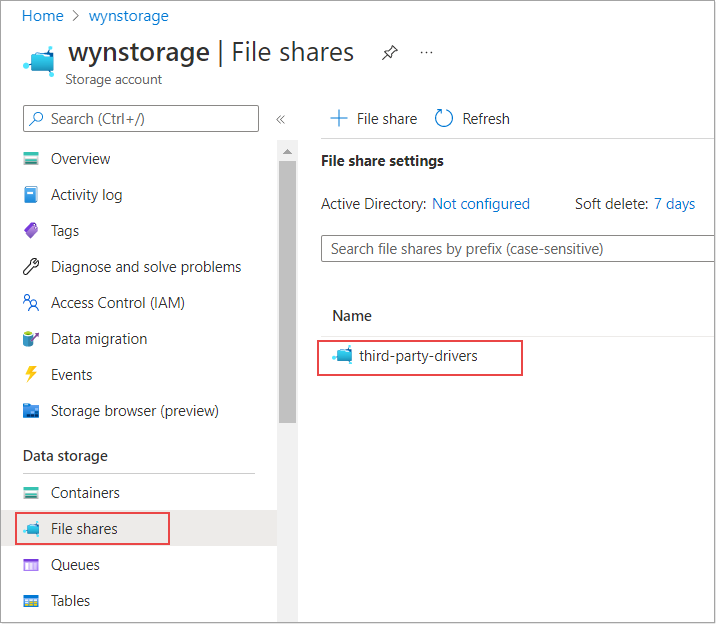
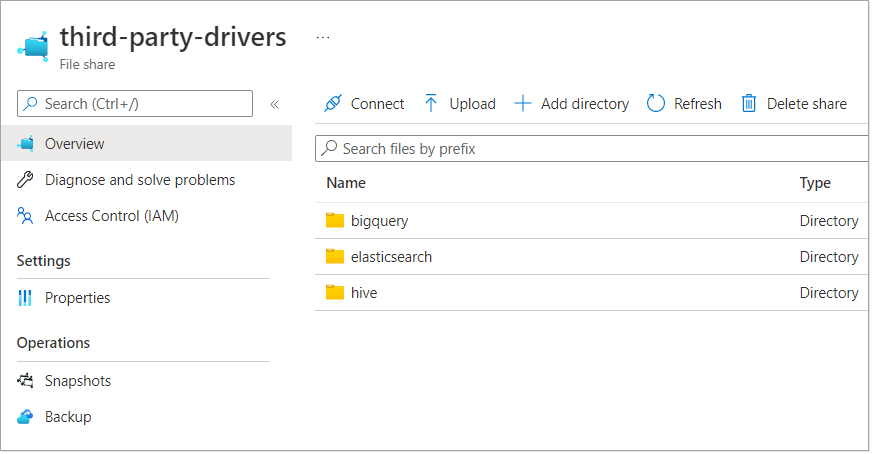
Upload the folders containing the required drivers to the 'third-party-drivers' file share. In the below example, we upload drivers for ElasticSearch, Hive, and Google BigQuery data providers.
To map your file share here: /wyn/DataSourceService/third-party-drivers, you need to define a new path mapping in the Settings > Configuration page of your web app service.

Fill in the following details and set the Mount path to '/wyn/DataSourceService/third-party-drivers' location.
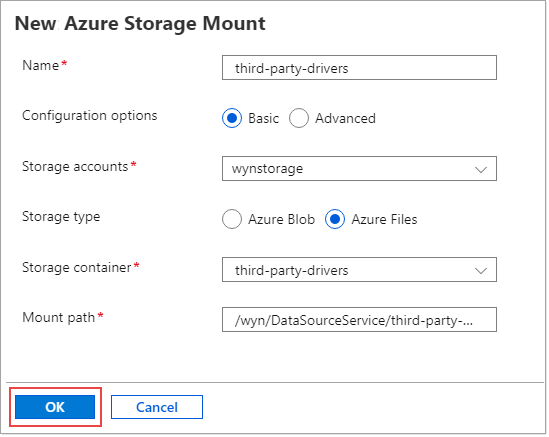
Click OK and then Save to confirm the changes.
Then, restart the web app service to load with the new configuration settings.

You can now visit the website, and use the beta data providers for creating data sources.
See this page on steps that are needed on upgrading Wyn to the latest version if the customer deploys Wyn on Azure App Service with Wyn docker image, having MonetDB data mapped to Azure file share.


