-
Interactive DashboardsCreate interactive BI dashboards with dynamic visuals.
-
End-User BI ReportsCreate and deploy enterprise BI reports for use in any vertical.
-
Wyn AlertsSet up always-on threshold notifications and alerts.
-
Localization SupportChange titles, labels, text explanations, and more.
-
Wyn ArchitectureA lightweight server offers flexible deployment.
-
 Wyn Enterprise 7.1 is ReleasedThis release emphasizes Wyn document embedding and enhanced analytical express...
 -
 Choosing an Embedded BI Solution for SaaS ProvidersAdding BI features to your applications will improve your products, better serve your customers, and more. But where to start? In this guide, we discuss the many options.
-
Visual GalleryInteractive sample dashboards and reports.
-
BlogExplore Wyn, BI trends, and more.
-
WebinarsDiscover live and on-demand webinars.
-
Customer SuccessVisualize operational efficiency and streamline manufacturing processes.
-
Knowledge BaseGet quick answers with articles and guides.
-
VideosVideo tutorials, trends and best practices.
-
WhitepapersDetailed reports on the latest trends in BI.
-
 Choosing an Embedded BI Solution for SaaS ProvidersAdding BI features to your applications will impr...
 -

- Getting Started
- Administration Guide
-
User Guide
- An Introduction to Wyn Enterprise
- Document Portal for End Users
- Data Governance and Modeling
- View and Manage Documents
- Working with Resources
- Working with Reports
- Working with Dashboards
- Working with Notebooks
- Wyn Analytical Expressions
- Section 508 Compliance
- Subscribe to RSS Feed for Wyn Builds Site
- Developer Guide
Custom Visualization
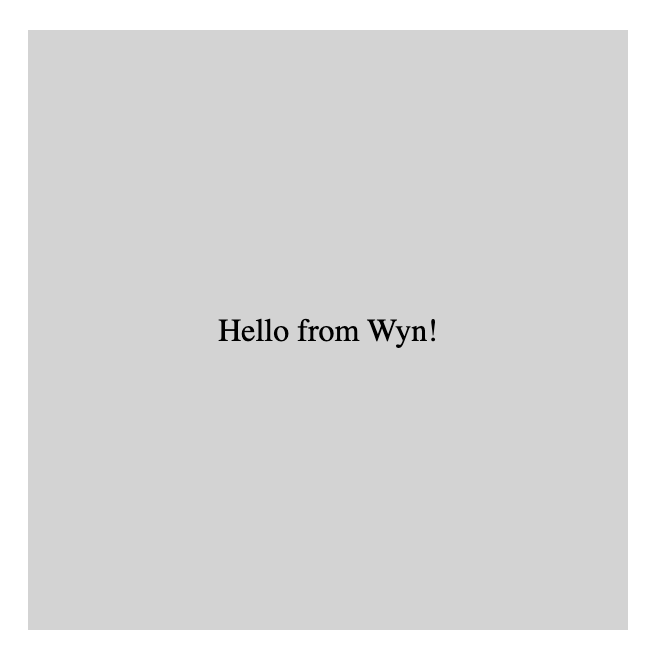
Creating a Minimal "Hello from Wyn!" Custom Visualization
This quick-start guide helps you build and preview a super-simple custom visualization in Wyn Enterprise using the Dev Tools scenario. No complex charts, SVGs, or data bindings are needed — the goal is to confirm your local development setup works and see something appear in Wyn.
What You'll Achieve
A gray box that fills the Dev Tools placeholder
Centered white text: Hello from Wyn!
Confirmation that Wyn is successfully loading and running your local code (via browser console logs)
Prerequisites
Node.js and npm installed (download from https://nodejs.org if needed)
Wyn Enterprise with Developer Mode enabled:
Go to Admin Portal → Dashboards Settings → Enable Developer Mode
Access to the Wyn dashboard designer
Step 1: Install the Wyn Visual Tools CLI
Open a terminal (Command Prompt, PowerShell, Terminal, etc.) and run:
Bash
npm install @wynenterprise/wyn-visual-tools -gThis installs the official command-line tool globally.
Note: If you see permission errors on macOS/Linux, prefix with sudo or use nvm.
Step 2: Create a New Project
In your terminal, run:
Bash
wyn-visual-tools initWhen prompted, enter a project name (e.g., hello-wyn-viz)
This generates a folder with starter files.
Navigate into the project:
Bash
cd hello-wyn-viz(Replace hello-wyn-viz with whatever name you chose.)
Step 3: Update visual.json
Open visual.json in your code editor (VS Code recommended) and replace everything with this clean version:
JSON
{
  "id": "helloWynViz",
  "name": "helloWynViz",
  "displayName": "Hello from Wyn Viz",
  "displayNameKey": "",
  "description": "Minimal test visualization",
  "icon": "icon.png",
  "externalJs": [],
  "externalCss": [],
  "dependencies": [],
  "assets": {
    "images": {}
  },
  "configuration": {},
  "cliVersion": "6.1.8"
}
This avoids common JSON syntax issues.
Optional: Drop a small icon.png into the assets/ folder for a nicer icon later.
Step 4: Simplify capabilities.json
Replace the contents of capabilities.json with:
JSON
{
  "dataBinding": {
    "aggregate": false
  },
  "options": {},
  "actions": {},
  "analysis": {}
}
This disables data binding (not needed for basic testing).
Step 5: Write the Minimal Visual Code
Open src/visual.ts and replace everything with this:
TypeScript
import "../style/visual.less";

export default class Visual extends WynVisual {
  private container: HTMLDivElement;

  constructor(
    dom: HTMLDivElement,
    host: VisualNS.VisualHost,
    options: VisualNS.IVisualUpdateOptions
  ) {
    super(dom, host, options);

    // Create a full-size container
    this.container = document.createElement("div");
    this.container.style.width = "100%";
    this.container.style.height = "100%";
    this.container.style.display = "flex";
    this.container.style.alignItems = "center";
    this.container.style.justifyContent = "center";
    this.container.style.fontSize = "24px";
    this.container.style.fontWeight = "bold";
    this.container.style.color = "white";

    dom.appendChild(this.container);
  }

  public update(options: VisualNS.IVisualUpdateOptions): void {
    console.log("Update called!", options); // Helps confirm it's running

    // Simple rendering: gray background + text
    this.container.style.backgroundColor = "gray";
    this.container.innerHTML = "Hello from Wyn!";
  }

  public onDestroy(): void {}
  public getInspectorHiddenState(): string[] | null { return null; }
  public getActionBarHiddenState(): string[] | null { return null; }
  public getColorAssignmentConfigMapping(): VisualNS.IColorAssignmentConfigMapping | null { return null; }
}
This uses plain HTML/CSS — no extra libraries required.
Step 6: Start the Local Development Server
In the project folder, run:
Bash
wyn-visual-tools developYou should see: Dev server listening on port 3000!
The server auto-rebuilds when you save files.
Keep this terminal window open.
(If port 3000 is in use, add -p 3001 and remember to update Wyn later.)
Step 7: Preview in Wyn Enterprise
Open your Wyn dashboard designer and create/open a dashboard.
From the visualization node (Custom Visualizations section), drag the Dev Tools scenario onto the canvas.
Click the Refresh button (reload icon) next to the Dev Tool scenario when selected.
Packaging and Uploading a Custom Visualization to Wyn
Once you’ve developed your custom visual (e.g., hello-world-viz) using wyn-visual-tools, follow these steps to package it and make it available in Wyn dashboards.
Step 1: Package the Visual
Open a terminal and navigate to your project folder:
cd ~/hello-world-vizRun the Wyn packaging command:
wyn-visual-tools packageThis compiles your project and creates a
.vizfile (e.g.,hello-world-viz.viz) in the same folder.This
.vizfile contains all your compiled code, assets, and metadata.
Step 2: Upload the .viz file to Wyn
Log in to the Wyn Admin Portal.
Go to Resource Portal.
Click Create (+).
Scroll down to Upload.
Drag and drop your packaged
.vizfile.Confirm the upload — the visual is now stored in Wyn.
Step 3: Use the Custom Visual in Dashboards
Open the Dashboard Designer in Wyn.
In the visualization node, open Custom Visualizations.
Locate your uploaded visual (e.g.,
Hello World Viz).Drag and drop it onto the dashboard canvas.
Configure layout, appearance, and settings as needed.